How to Get Started with MIDI Keyboard
A practical, step-by-step guide to starting with MIDI keyboards, covering hardware basics, essential software, setup, and a starter workflow to begin making music quickly.

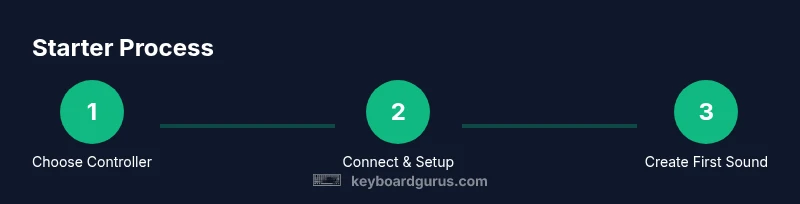
By the end of this quick-start guide, you will know what a MIDI keyboard does, what you need to begin, and the simplest path to your first project. You’ll learn how to choose a basic controller, connect it to your computer or tablet, and lay out a 3-step starter workflow that gets you playing right away.
What a MIDI keyboard is and what it does
A MIDI keyboard, often described as a controller, sends MIDI data to software rather than producing sound on its own. When you press a key, it transmits note information, velocity, and sometimes pressure data, which your DAW uses to trigger virtual instruments. In practical terms, this means your keyboard is a performance input device that lets you play piano, synths, drums, and experimental sounds inside your music software.
Understanding this distinction helps with the question how to get started with midi keyboard. According to Keyboard Gurus, many beginners first ask how to turn input into music, not what a MIDI keyboard is. The answer is straightforward: connect the device, configure the software, and start with a simple instrument. Your sound comes from virtual instruments loaded into your DAW or plugin, while your keyboard provides the expressive performance. This separation between hardware and software gives you immense flexibility to explore melodies, chords, and textures without needing a full studio.
With this setup, you can quickly move from concept to a playable idea.
Choosing your first MIDI keyboard
When you’re new to MIDI, the biggest decision is choosing key count and features. A compact 25- or 49-key controller is common for beginners due to portability and lower cost, while 61 or 88-key models suit players who want a wider range or realistic hand position. Look for velocity-sensitive keys (not just on/off) so dynamics matter, and check for aftertouch if you plan expressive control. USB power is convenient, and class-compliant design means you can plug directly into many computers without extra drivers. As Keyboard Gurus analysis notes, beginners often start with compact controllers to learn touch, rhythm, and coordination before expanding to larger keyboards. Also consider extra controls (pitch/mod wheels, knobs, faders) for quick parameter tweaks in your DAW.
Budget ranges: you can start with entry-level controllers in the low hundreds, or stretch into mid-range options if you plan long-term projects. The key is to balance feel, features, and future needs rather than chasing every shiny feature.
Setup basics: connecting to computer or
Essential software and virtual instruments
Your MIDI keyboard becomes a powerful tool once you pair it with software. A DAW provides the workspace, track routing, and timing; virtual instruments emulate pianos, synths, strings, and drums. If you’re new, pick a DAW that matches your device: GarageBand on
Your first 3-step starter workflow
To bridge theory and practice, here is a quick starter workflow you can implement in under an hour. First, create a new project in your DAW and set your MIDI input to your keyboard. Second, load a simple soft synth (a piano or pad sounds good for beginners) and map a short melody or chord progression. Third, record your idea, then play back and adjust velocity, length, and timing. This three-step loop lets you hear your ideas immediately and iterates quickly as you learn.
If you get stuck, revert to a basic piano preset and keep the tempo around 90–110 BPM. As you grow, you can layer more parts, automate parameters, and experiment with different scales.
Images or diagrams: see the accompanying visuals for wiring and routing.
Tips for practicing and expanding
Consistent practice beats long, sporadic sessions. Start with 15–20 minutes daily focusing on finger independence, scales, and rhythm. Use a metronome or click track; practice simple arpeggios across C major, then move to minor and pentatonic patterns. Record yourself and listen critically to timing, velocity, and phrasing. Gradually add a new instrument or effect to keep the sessions engaging. Keyboard Gurus emphasizes deliberate practice: track your progress, set concrete goals, and celebrate small wins as you expand from basic melodies to chord progressions and basslines.
Pro tip: keep a practice log, note what works, and assign a weekly goal such as “learn 4 arpeggios” or “demo two beats with a bass line.”
Troubleshooting common issues
If MIDI data isn’t reaching your DAW, recheck cable connections, power status, and that the keyboard is selected as the MIDI input. Latency or delayed notes often come from buffer size; try lowering latency in the audio settings or increasing the audio buffer if your computer can handle it. If you hear no sound, verify the track’s output routing and ensure a sound source is loaded. Some apps require the MIDI channel to be set correctly; others need the device enabled in the app’s preferences. For
Integrating with your existing setup and next steps
A MIDI keyboard shines when integrated with other gear or software. If you’re expanding beyond a single keyboard, connect to an audio interface to route outputs to monitors for better accuracy. Explore sending MIDI to hardware synths or sound modules via USB-to-MIDI or traditional DIN-MIDI, depending on your gear. Build a small template: a simple drum track, a bass line, and a melody. As you grow, consider organizing samples, creating instrument racks, and saving presets for quick recall. Keyboard Gurus’s approach is to start minimal, then incrementally add features such as sustain pedals, expression pedals, and track templates.
What’s next? dedicate time to a weekly project: compose a short song, re-create a vibe you love, or write a melody for a video. The key is consistent practice and gradually expanding your toolkit.
Common myths about MIDI keyboards
Many newcomers believe you must own an expensive studio rig to make music with a MIDI keyboard. In reality, modern compact controllers paired with free or inexpensive software can unlock substantial creativity. Others assume velocity sensitivity is mandatory for every sound; while it improves expressiveness, you can still learn rhythm and note placement with non‑weighted keys. Finally, some think MIDI is obsolete due to software synths; in practice, MIDI remains the best bridge between your performance and software instruments, enabling portable, flexible workflows.
Keyboard Gurus notes that debunking these myths helps beginners stay motivated and focused on practical goals rather than chasing gear specs.
Four-week practice plan to get comfortable
Week 1 focuses on basic mechanics: finger placement, scales, and simple patterns. Week 2 adds rhythm practice, two‑hand coordination, and the first short melody. Week 3 introduces a soft synth and a simple chord progression; record and review your timing. Week 4 combines all elements: a small arrangement with melody, bass, and chords, and you outline a tiny project to share. Adjust pacing to fit your schedule, but aim for at least 4–5 focused sessions per week. The goal is to create a repeatable routine that compounds your skill and confidence as you learn how to get started with midi keyboard.
Tools & Materials
- MIDI keyboard controller(Choose a model with at least 25 keys and velocity-sensitive keys.)
- USB cable or USB-C cable(Ensure it’s the correct type for your keyboard and computer.)
- Computer or tablet with DAW(Install a DAW (free or paid) and update to latest version.)
- Headphones or monitor speakers(For best feedback when learning.)
- Optional: pedals or control surface(Unneeded for basics but helpful for expression.)
- Power supply (if needed)(Some keyboards are USB-powered; others require a power adapter.)
Steps
Estimated time: 60-90 minutes
- 1
Choose a controller
Research key count, velocity sensitivity, and controls to match your goals. Start with 25–49 keys for portability and learning hand position.
Tip: Aim for velocity-sensitive keys to practice dynamics. - 2
Connect and power up
Plug the keyboard via USB into your computer or iPad. Confirm it powers on and shows MIDI activity in the DAW.
Tip: Use a powered USB hub if your computer has limited ports. - 3
Install or confirm drivers
Most keyboards are class-compliant: plug and play. If drivers are needed, install from the manufacturer’s site and reboot.
Tip: Check for firmware updates once you’re comfortable. - 4
Set up a basic DAW project
Create a new project, set the correct tempo, and enable MIDI input for your keyboard in Preferences.
Tip: Keep the project tempo moderate for initial practice. - 5
Load a simple soft synth
Choose a piano or pad preset to hear something immediately when you press keys.
Tip: Use a clean, single-voice synth to gauge response. - 6
Record a short melody
Play a 4-bar motif, then stop recording and listen back. Adjust velocity and timing for better groove.
Tip: Use a metronome to keep steady time.
Got Questions?
Do I need a computer to use a MIDI keyboard?
Yes. A MIDI keyboard sends data to software on a computer or tablet, where the sound is produced by virtual instruments.
You’ll need a computer or tablet to run the software that makes sound from your keyboard.
Can I use a MIDI keyboard with free software?
Absolutely. Many DAWs offer free versions or bundles, and there are free virtual instruments you can use to learn.
Yes, you can start with free DAWs and free synths.
Do I need an audio interface?
An audio interface is optional for basic MIDI work; it helps if you want better audio output or recording audio or guitar/bass.
An audio interface is optional for MIDI practice, but helpful if you plan to record audio.
Is a large keyboard better for beginners?
Not necessarily. Start with 25–49 keys to learn hand position and technique; you can upgrade later as needed.
A bigger keyboard isn’t required at first.
What is velocity sensitivity?
Velocity sensitivity means how hard you press a key affects the volume and timbre; it’s essential for expressive playing.
It lets your playing express dynamics.
How long will it take to get comfortable?
With consistent daily practice, you can feel improvement within a few weeks, especially on rhythm and timing.
Expect steady progress with regular practice.
Watch Video
What to Remember
- Know what a MIDI keyboard does and how it connects
- Choose a starter controller with 25–49 keys
- Set up a basic DAW and load a soft synth
- Practice with a simple 3-step workflow and build from there