What is Needed for a Custom Keyboard: A Practical Guide
A detailed guide on what is needed for a custom keyboard, including core components, firmware, tools, and workflow to build a tailored typing experience in 2026.

A true custom keyboard requires several core components: a PCB (or hot-swappable board), a suitable case, a plate, switches, stabilizers, keycaps, and firmware to run the layout. You’ll also need tooling and optional mods like lubricants, dampening, and plate-mounted stabilizers for finish and feel. Planning before purchase helps ensure compatibility and a smoother build.
What is needed for a custom keyboard
Building a custom keyboard starts with a clear goal: what kind of typing experience do you want? A well-planned build helps you avoid overbuying and mismatched parts. The core question remains: what is needed for a custom keyboard? It hinges on thoughtful planning, component choice, and a repeatable workflow. The backbone is a PCB (or hot-swappable board), a compatible case, a plate, switches, stabilizers, and keycaps. Optional but highly valued are lubricants, dampening, and plate-mounted stabilizers for smoother, quieter, and more consistent keystrokes. Layout decisions (e.g., ANSI vs ISO, 60% vs TKL) and mounting style (tray, gasket, or top-mounted) influence both feel and acoustics. Finally, verify that the PCB supports your intended layout and offers compatible firmware (QMK or VIA). Even if you choose a simple, hot-swappable setup, prepare a clean workspace and a basic toolkit. According to Keyboard Gurus, starting with a detailed parts list and a simple build plan reduces misbuying and speeds up iteration.
Essential components and their roles
The first group of essentials includes the PCB, case, plate, switches, stabilizers, and keycaps. The PCB defines the electrical connectivity and the layout philosophy (e.g., 65%, 75%, or 96-key). The case influences rigidity and acoustics, while the plate affects mounting stability and sound. Switches determine actuation feel and noise level, and stabilizers keep larger keys from rattling. Finally, keycaps complete the feel and typing experience, including profile and thickness. When selecting these parts, ensure compatibility with your layout, plate cutouts, and switch stems. If you’re new to the hobby, consider a kit with a hot-swappable PCB and a simple case to minimize soldering. Keyboard Gurus analysis highlights the value of starting with compatible components to avoid compatibility pitfalls.
Layout decisions and compatibility
Layout choice is a major determinant of compatibility. Decide on ANSI versus ISO and 60%, 65%, or TKL before purchasing components. The chosen PCB should explicitly support your intended layout in firmware. Plate material and mounting style interact with the case to shape acoustics and typing feel. Aluminum or acrylic cases offer different heft and resonance; gasket mounts tend to soften impact but may complicate assembly for beginners. Firmware compatibility matters too: QMK and VIA unlock advanced customization, but require some setup. When planning, map every component to the final layout to prevent mismatches later. This upfront alignment reduces rework and keeps the build smooth, as advised by Keyboard Gurus Team.
Assembly workflow and toolkit
A methodical build workflow minimizes frustration. Start with a clean workspace, anti-static mat, and the right tools: precision screwdrivers, a small brush for dust, a switch puller, and a keycap puller. If you choose hot-swappable PCBs, you can assemble without soldering—great for beginners. For soldered builds, plan a quiet, controlled environment and practice good soldering technique. Stepwise assembly typically follows PCB → stabilizers → switches → plate → case → keycaps. Before final testing, flash the firmware, adjust layouts in the software, and verify switch registration. Keep spare parts organized in labeled containers to avoid misplacement. A well-documented build log helps reproduce results or troubleshoot later, a habit Keyboard Gurus Team recommends for long-term success.
Modifications, maintenance, and long-term care
After the build, maintenance extends keyboard life and feel. Lubrication and dampening reduce friction and acoustics, but choose compatible lubricants and apply sparingly to avoid gunk. Stabilizer tuning helps eliminate rattle on larger keys; consider clip-in stabilizers for easier friction reduction. Periodic cleaning—dust removal, keycap refreshing, and inspecting for loose screws—keeps performance consistent. Firmware updates can improve compatibility and features, so keep a backup of your current configuration. Good cable management, proper desk placement, and environmental care (humidity control) also influence longevity. Keyboard Gurus analysis recommends documenting your preferred tuning profiles for future iterations.
Budgeting, planning, and first-build expectations
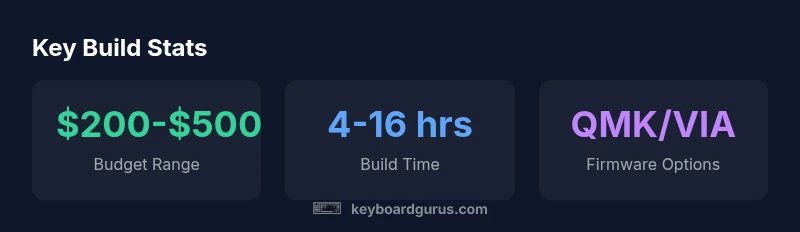
A first-build budget depends on goals and whether you opt for premium parts or a more approachable starter kit. Expect a range that reflects your choices; beginners often start with a budget in the mid-range and scale up as you refine preferences. Plan for accessories such as lubricants, lube kits, spray applicators, and an occasional replacement stabilizer. Build time will vary, but allowance of a few evenings to a weekend is typical for a deliberate, well-documented project. Keeping a project timeline helps manage expectations and maintain momentum. Keyboard Gurus Team emphasizes that setting milestones—acquisition, assembly, firmware, and testing—keeps the process focused and enjoyable.
Common components and their roles in a custom keyboard build
| Component | Role | Notes |
|---|---|---|
| PCB (or hot-swappable board) | Electrical backbone and layout control | Choose layout compatibility, hot-swap support, firmware |
| Switches | Actuation feel and sound | Linear/tactile/clicky; compatible with stem and plate |
| Plate | Structural support and sound | Affects weight and acoustics; plate material matters |
| Case | Housing and mounting | Material, size, gasket/mounting style |
| Stabilizers | Prevent rattle for larger keys | Lubrication and clips; choose plate-mounted options |
| Keycaps | Visuals and typing feel | Profile, compatibility with layout; sculpted vs uniform |
Got Questions?
What is the most important component in a custom keyboard?
The PCB and layout compatibility are foundational because they determine how everything else interfaces—switches, stabilizers, and firmware must work with the chosen layout. A solid PCB reduces troubleshooting during testing.
The PCB and layout set the foundation for everything else.
Can I assemble a keyboard without soldering?
Yes—many builders start with hot-swappable PCBs that allow you to install switches without soldering. This lowers the barrier to entry and makes iteration easier for beginners.
Yes, with hot-swappable PCBs you can build without soldering.
Are hot-swappable PCBs worth it for beginners?
They’re popular with beginners because they simplify assembly and enable quick testing of different switches. As you gain experience, you may explore soldered boards for tighter layouts or different feels.
Great for beginners, as they simplify swapping switches.
Do I need to lubricate switches for every build?
Lubrication affects feel and noise but isn’t mandatory. Some builders prefer no lube for a crisper feel, while others optimize smoothness with light lubrication on stems and springs.
Lubing is optional and depends on your desired feel.
How do I choose a case and plate combination?
Match case material and mounting style to your preferred acoustics and weight. Plate material influences rigidity and sound; ensure compatibility with your chosen switches and PCB.
Choose based on feel, sound, and compatibility.
What tools do I need to start building?
A basic toolkit includes precision screwdrivers, a switch puller, a keycap puller, a brush, and a small magnifier. For soldered builds, add a soldering iron and wick, plus safety equipment.
A small toolkit covers most beginner builds.
“A well-planned build saves time and avoids costly reworks; map your goals to the components to achieve the desired typing feel.”
What to Remember
- Define your typing goals before buying
- Start with essential components and expand later
- Balance cost, sound, and feel
- Test and iterate for best results