How to of keyboard light: A complete lighting guide
Learn the practical steps for lighting your keyboard, including backlighting, RGB, and ambient options. This Keyboard Gurus guide covers setup, calibration, safety, and maintenance to improve visibility and reduce eye strain in any environment.

This guide teaches you how to master the how to of keyboard light by selecting the right lighting setup for backlit, RGB, or ambient options. You’ll learn practical steps to plan, install, and calibrate lighting that improves visibility and reduces eye strain in low-light work or gaming. According to Keyboard Gurus, a well-lit keyboard helps prevent typos and fatigue.
What is the how to of keyboard light and why it matters
The phrase how to of keyboard light captures the practical, repeatable steps used to illuminate a keyboard effectively. Lighting isn't merely decorative; it enhances contrast, improves accuracy in dim rooms, and can even influence typing speed and comfort during long sessions. In this section we lay the foundation for practical decision-making: goals, keyboard type, and room conditions.
According to Keyboard Gurus, effective lighting is a balance of brightness, color temperature, and placement. Start by defining your primary goal: faster key recognition, reduced eye strain, or a particular aesthetic for streaming. Then inventory your gear: a keyboard with built-in backlighting, per-key RGB, or a passive lighting solution like desk lamps or LED strips. With goals and gear in hand, you can choose a strategy that fits your workspace and budget.
The core idea is to map an overlay of light on the keyboard without causing screen glare or monitor reflections. This means planning where light comes from, how intense it should be, and whether it should change with tasks. The following sections guide you through choices, configurations, and safe installation practices so you can achieve the desired effect without compromising keyboard performance or longevity.
Lighting options explained
There are three common routes to keyboard illumination: built-in backlighting, per-key RGB, and external ambient lighting. Built-in backlighting is standard on many mainstream keyboards and offers a straightforward brightness and sometimes color balance. Per-key RGB adds individual LED control for each key, enabling dynamic effects and color coding that can map to functions or games. External ambient lighting—such as desk lamps, LED strips around the keyboard tray, or under-key lighting—can illuminate the board and reduce harsh contrasts without illuminating the screen.
Choosing between these options depends on your goals and budget. Built-in backlighting is typically the simplest to configure and maintain. Per-key RGB delivers the widest creative control but requires compatible hardware and software. Ambient lighting provides a soft, uniformly lit workspace that reduces eye strain without altering key appearance. A blended approach often works best: subtle per-key lighting for visibility combined with a low-profile ambient glow to soften shadows on the desk.
How to plan your lighting scheme for different tasks
Your lighting plan should reflect how you use the keyboard most. For typing and writing, aim for a neutral brightness with a cool white color temperature (around 6500K) to maximize contrast between key legends and surrounding surfaces. For gaming or streaming, you might prefer color-coded keys and a slightly higher brightness that remains stable during screen glow. For late-night work, a dim, warm tone can reduce blue light exposure and eye strain.
Practical steps:
- List your primary tasks (typing, gaming, design).
- Decide if you want one lighting layer or multiple layers (built-in + ambient).
- Choose a color temperature that aligns with your monitor and room lighting.
- Establish a default brightness that stays comfortable for extended sessions.
A well-planned scheme reduces eye fatigue and helps you locate keys faster in dim environments. This is at the heart of the how to of keyboard light.
Hardware and software prerequisites
Before you install anything, verify compatibility and plan for future upgrades. If your keyboard supports built-in backlight or per-key RGB, ensure your firmware and software can access brightness and color profiles. For non-backlit keyboards, you’ll rely on external lighting solutions like LED strips or desk lamps.
Essential prerequisites include:
- A keyboard with compatible lighting control (either hardware keys or software support).
- A power source that can reliably drive the lighting hardware without overloading your USB port or USB hub.
- Lighting control software or supplier-provided utilities for color, brightness, and effects.
- Basic cable management supplies to keep wires tidy and prevent interference with key travel or fans.
If you’re mixing components, check for potential conflicts between software ecosystems to minimize glitches when you switch profiles.
Installation, calibration, and daily use
With the right components, installation becomes straightforward. Begin by mounting any external light sources in positions that evenly illuminate the keyboard without causing glare on the screen. Calibrate brightness and color temperature to a comfortable baseline, then save profiles for different tasks.
Daily use tips include: create at least one default profile for work, one for gaming, and another for media consumption. Keep software updated to ensure continued compatibility with your keyboard firmware and any third-party lighting apps. Periodically check connections and clean dust from LED lenses to preserve brightness and evenness.
While working on your lighting, monitor monitor reflections and ambient color balance. Subtle adjustments can significantly affect legibility and comfort across long sessions.
Maintenance, safety, and troubleshooting
Maintenance is a key part of the how to of keyboard light. Regularly inspect LED strips or per-key LEDs for signs of wear, check power adapters for heat, and ensure cables aren’t kinked or damaged. Use manufacturer-recommended power levels and avoid overloading USB ports. If you notice flickering or color shifts, reset the profile or reinstall the software.
Safety considerations include avoiding moisture near electrical components, securing all cables to prevent tripping, and preventing heat buildup by giving LED strips adequate ventilation. Troubleshooting steps: reboot the keyboard and software, test with a different USB port, and try a factory reset of lighting settings before seeking advanced assistance.
Tools & Materials
- Keyboard with built-in backlight or RGB(Ensure brightness control in hardware keys or software)
- USB power source or computer connection(Stable power for lighting hardware (avoid hubs with weak power))
- External lighting accessories (LED strips, clips, or keycap LEDs)(Optional for keyboards without internal lighting)
- Lighting control software(Vendor or community apps for color profiles and effects)
- Cable management supplies(Cable ties, adhesive clips, and routing guides)
Steps
Estimated time: 60-120 minutes
- 1
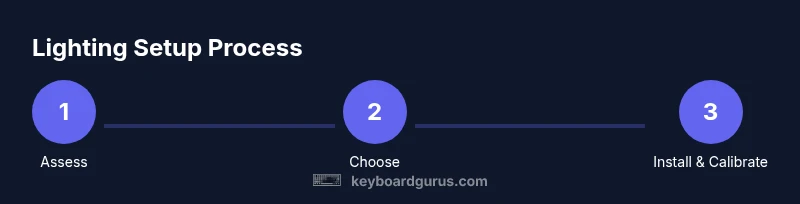
Assess needs and compatibility
Define your lighting goals (typing accuracy, aesthetics, gaming cues) and confirm your keyboard supports backlighting, RGB, or external lighting. This step ensures you pick the right hardware and software ecosystem.
Tip: Write down your top two goals to guide every later decision. - 2
Choose lighting method
Decide between built-in backlight, per-key RGB, or ambient lighting. Each method has different setup steps, software requirements, and costs. Alignment with your goals is key.
Tip: For beginners, start with built-in backlight before adding external LEDs. - 3
Check power and connections
Verify that your power source can handle the lighting load and that connections match your keyboard and any external add-ons. Avoid overloading USB ports to prevent instability.
Tip: Use a dedicated power supply if your lighting needs are high. - 4
Install lighting hardware
Attach LED strips or install LEDs beneath/on the keyboard per the chosen method. Secure cables to prevent interference with key travel and ensure a clean appearance.
Tip: Plan wire routing before attaching adhesives to avoid messy leftovers. - 5
Configure brightness and color
Open the lighting software or hardware controls and set baseline brightness and color profiles. Save distinct profiles for work, gaming, and cinema modes.
Tip: Start with a comfortable brightness and cool-white color, then adjust per task. - 6
Calibrate in different ambient conditions
Test the setup under day, evening, and dark room lighting. Adjust brightness and color temperature to maintain legibility and reduce glare.
Tip: Dim the keyboard if ambient light is strong to prevent screen reflection. - 7
Test performance and comfort
Type for 15–30 minutes to assess readability, reaction times, and eye strain. Refine profiles as needed.
Tip: If you notice eye fatigue, lower brightness or shift to warmer color. - 8
Maintain and troubleshoot
Regularly inspect LEDs, ensure firmware is up to date, and re-calibrate after software updates or desk changes.
Tip: Document your preferred profiles for quick switching next time.
Got Questions?
Do I need RGB lighting to have good keyboard visibility?
Not necessarily. Built-in backlighting or even a good ambient setup can provide ample visibility. RGB is mainly for customization and contours per key, not a requirement for readability.
RGB is nice to have, but backlighting or ambient lighting often provides all the visibility you need.
Is it safe to install LED strips on my keyboard?
Yes, if you use appropriate adhesive, avoid overheating, and ensure the power supply matches the LED strip requirements. Keep strips away from hot components and never expose them to moisture.
LED strips can be safe when installed properly and powered correctly.
What if my keyboard has no lighting options at all?
You can still improve visibility with external lighting like a desk lamp or clip-on LED lights. Position lighting to minimize screen glare and shadows on the keys.
If your keyboard isn’t lit, add ambient light from a desk lamp or clips to make typing easier.
How do I calibrate brightness for different tasks?
Start with a baseline brightness for general typing, then create task-specific profiles for gaming or coding. Adjust color temperature to reduce eye strain in your environment.
Set a base level, then tweak for each task and time of day.
Watch Video
What to Remember
- Plan before you buy to match lighting with tasks
- Use built-in lighting first, then add ambient or RGB if needed
- Calibrate across different ambient conditions for comfort
- Keep cables tidy to avoid interference and wear