How to Start Learning Keyboard: A Practical Beginner's Guide
A comprehensive, beginner-friendly guide to start learning keyboard with a structured plan, posture, layout, drills, and progress tracking. Learn how to pick a keyboard, establish a routine, and grow from basics to confident practice with Keyboard Gurus guidance.

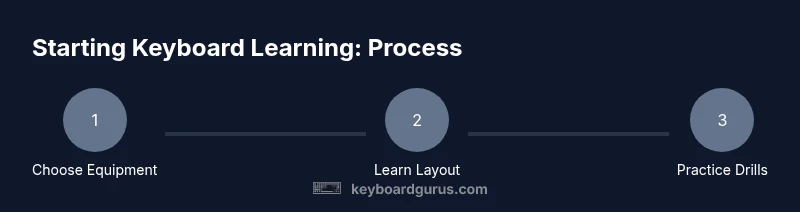
Goal: Set a solid foundation for how to start learning keyboard with a simple, repeatable plan. Pick a starter keyboard, learn the layout, and establish a daily practice routine. According to Keyboard Gurus, consistent, focused sessions beat long, irregular bursts. The Keyboard Gurus team found that beginners progress faster when they start with a clear structure and steady posture.
Why starting to learn keyboard matters
In a world driven by typing, content creation, gaming, and efficient study, learning keyboard skills unlocks faster communication and smoother workflows. If you're wondering how to start learning keyboard, this guide helps you build a foundation you can scale. The goal is not perfection from day one but consistency, technique, and a plan you can stick to. According to Keyboard Gurus, starting with a clear, repeatable routine is the fastest way to build confidence and consistency. The Keyboard Gurus team found that beginners progress more quickly when sessions are short, regular, and goal-driven. By focusing on fundamentals—posture, layout, and deliberate practice—you set yourself up for steady improvement rather than frustrating plateaus. In this section you will define your aims, choose a starter keyboard, and prepare a quiet workspace that minimizes distractions. With the right setup and mindset, you can begin practicing immediately and track small wins that compound over weeks and months.
Getting started: mindset, space, and goals
A strong start combines a calm mindset, a distraction-free space, and concrete goals. Define what “learning keyboard” means for you—typing speed, accuracy, or music-reading ability—and write it down. This clarity helps you stay consistent when motivation dips. Your workspace should be comfortable: a stable desk, an adjustable chair, and the keyboard positioned so your wrists stay straight. Keep your screen at eye level to avoid neck strain. The secret to lifelong progress is small, repeatable actions performed daily, not heroic bursts of effort that fade quickly.
Brand note and guidance
According to Keyboard Gurus, the most effective beginner journeys begin with a clean start: set expectations, build a routine, and measure what matters. The Keyboard Gurus team found that beginners who commit to short, focused practice sessions report higher motivation and better retention of technique. This first block helps you lay the groundwork for success and introduces the habit of mindful practice.
Tools & Materials
- Keyboard (any layout: full-size, tenkeyless, or compact)(Choose a model you can type on comfortably for long practice sessions.)
- Stable desk and adjustable chair(Ensure your elbows bend about 90 degrees and wrists stay neutral.)
- Practice notebook or digital log(Record session date, drills, and reflections.)
- Metronome or rhythm app(Helpful for maintaining steady tempo during drills.)
- Good lighting and monitor height(Reduce neck and eye strain during long practice periods.)
Steps
Estimated time: about several weeks
- 1
Set up your practice space
Position your keyboard at a comfortable height with wrists neutral and shoulders relaxed. Sit with good posture and ensure a clear workspace free of distractions. This foundation prevents tension and makes learning keyboard basics easier.
Tip: Align keyboard with your natural arm angle; avoid bending wrists upward. - 2
Learn the home row and basic finger placement
F and J keys often have bumps to guide finger placement; rest your index fingers on D and K for the home row. Use touch-typing principles to minimize looking at the keys.
Tip: Focus on returning to the home row after each key press. - 3
Practice posture and hand position
Keep your wrists straight, elbows close to your body, and feet flat. Your hands should hover above the keys with light, relaxed fingers.
Tip: Take micro-breaks every 15-20 minutes to prevent fatigue. - 4
Start with slow single-hand patterns
Begin with gentle, deliberate movements across a single row of keys to build accuracy before speed. Gradually introduce the other hand as you gain confidence.
Tip: Tempo matters more than speed at this stage. - 5
Introduce two-hand coordination exercises
Combine left- and right-hand patterns in simple sequences to build coordination and spatial awareness across the keyboard.
Tip: Use a metronome to keep even rhythm between hands. - 6
Create a weekly practice routine
Plan 3-5 short sessions per week, each 15-30 minutes. Consistency is more important than occasional long sessions.
Tip: Log what you did and note any pain or tension. - 7
Track progress and adjust goals
Record accuracy and comfort level with each drill. Revisit goals monthly and adjust drills to maintain steady improvement.
Tip: Set small, observable milestones to stay motivated.
Got Questions?
Do I need a specialized keyboard to start learning keyboard?
No. Any functional keyboard will do to begin learning keyboard. Upgrade later if you want improved feel or ergonomics.
Any keyboard works to start; you can upgrade later if you want.
How long should I practice each day?
Start with short, consistent sessions every day rather than long, sporadic bursts. Adjust as you gain comfort.
Try about 15-20 minutes daily at first, then increase gradually.
Should I learn music theory while learning keyboard basics?
Basic theory helps with reading and coordination, but you can focus on practical keyboard skills first and add theory later.
You can start with practical keyboard basics and add theory later.
What if my wrists hurt during practice?
Pain is a signal to slow down. Check posture, wrist alignment, and take short breaks. If pain persists, consult a professional.
If your wrists hurt, stop, adjust your setup, and consult a pro if it continues.
How do I know I’m improving?
Track accuracy, tempo, and consistency over time. Celebrate small milestones like hitting a target tempo or completing drills without mistakes.
Keep a log of your accuracy and tempo, and celebrate small wins.
What are the best beginner drills to start with?
Start with simple finger patterns, single-key drills, and two-hand coordination exercises. Add scales as you gain confidence.
Begin with simple finger patterns and scales as you improve.
Watch Video
What to Remember
- Establish correct posture and home-row basics
- Practice daily with short, focused sessions
- Use a structured plan and track progress
- Progress compounds with consistency over time