Master Android Keyboard Settings: A Practical Guide
Learn to tune Android keyboard settings for faster typing, better privacy, and enhanced accessibility. This step-by-step guide covers Gboard, Samsung Keyboard, and SwiftKey with practical tweaks, troubleshooting, and testing strategies.

You will learn how to customize Android keyboard settings to improve typing speed, accuracy, and privacy. This guide covers popular keyboards (Gboard, Samsung Keyboard, and SwiftKey), and shows how to adjust languages, auto-correct, gesture typing, hints, and accessibility options for a better typing experience. You'll find step-by-step actions, safety notes, and troubleshooting tips.
Understanding the Android keyboard ecosystem
Android devices offer a diverse landscape of keyboard options, from the preinstalled Samsung Keyboard to Google’s Gboard and a growing set of third-party apps like SwiftKey. The settings you’ll care about sit across three layers: system language and input (the core platform controls), the active keyboard app’s preferences (per-app and per-language options), and, for power users, accessibility and developer features. This structure matters because a change at one layer can impact all apps differently. According to Keyboard Gurus, starting with a clear picture of which keyboards you use most and which languages you type in daily helps you design a stable baseline. Begin by enabling the languages you’ll actually type in, then adjust auto-correct sensitivity, gesture typing, and privacy options in a single workflow. Your goal is consistency across apps and an intuitive typing experience that suits your workflow.
Choosing the right keyboard app
The market offers several strong contenders, and the best choice depends on your priority—speed, accuracy, or privacy. Gboard is feature-rich with robust glide-typing, voice dictation, and multilingual support. Samsung Keyboard integrates tightly with Samsung devices and supports one-handed layouts and hardware key mappings. SwiftKey emphasizes AI-powered predictions and robust language packs, useful for multilingual users. When choosing, consider: data privacy policies, integration with your favorite apps, and how often you switch languages. Install at least two options to compare how each handles autocorrect and gesture control. Remember to review permission requests (microphone, contacts, storage) during setup, since these affect privacy. If you switch keyboards, Windows and macOS users can mirror the same language and layout preferences for cross-platform consistency.
Core settings that affect every keyboard
No matter which app you use, there are core settings that shape all typing experiences. Language and input settings determine which languages and keyboards are available across apps. Auto-correct, text correction, and next-word prediction influence speed and accuracy, so start with a gentle level and adjust upward as you gain confidence. Gesture typing (swipe input) settings control sensitivity and error handling—try a few passes to find a sweet spot. Cursor control and key repeat options can improve navigation in long texts. Many keyboards offer a “dense” or “compact” layout vs. a “classic” layout; test both to see which minimizes finger travel. Finally, enable or adjust clipboard history, smart replies, and autocapitalization per your typical use case. A careful pass through these core toggles sets a reliable base from which refinements become meaningful.
Accessibility features that help
Accessibility options ensure typing remains comfortable and usable for everyone. Screen reader support (TalkBack or similar), high-contrast themes, and larger fonts reduce visual strain. One-handed modes reflow the keyboard for easier reach on small screens, while split layouts can dramatically improve comfort and accuracy on tall devices. Some keyboards include dedicated accessibility switches for haptic feedback, magnification, and color schemes that reduce eye fatigue. If you rely on voice input, ensure that the keyboard supports accurate voice dictation and integrates with on-device privacy settings. Starting with accessibility basics not only helps users with disabilities but also benefits all users under bright glare or while multitasking. The Keyboard Gurus team emphasizes testing accessibility features in real-world contexts—compose a message, then switch to a long email to observe how the features perform under sustained usage.
Personalization: themes, layout, and gestures
Personalization drives a lot of satisfaction with mobile typing. Themes influence contrast and glare, while layout options (QWERTY, AZERTY, or DVORAK, for example) can dramatically affect speed for seasoned typists. Gesture-based typing, one-handed modes, and keys’ size tuning help tailor the experience to your hands and your app mix (messaging vs. coding IDEs). Many keyboards let you customize swipe actions, long-press functions, and shortcut keys. If you primarily type in two languages, set up per-language layouts and switch quickly with a long-press or gesture. Be mindful of accidental changes when testing new layouts; enable a quick reset option to revert if needed. A measured approach—test one change at a time—reduces confusion and helps you identify which personalizations truly improve your workflow.
Privacy and data handling
Typing data is valuable for predictions and corrections, but it can raise concerns about privacy. Review what data is collected and whether it’s synced to cloud services. Most major keyboards offer a toggle for data syncing, and some provide per-language data controls, allowing you to keep sensitive languages local on the device. Disable cloud-based predictions if you’re worried about privacy; opt for on-device processing where possible. Regularly review permissions (microphone, storage, contacts) granted to your keyboard, and consider a keyboard with transparent data practices. Keyboard Gurus analysis shows that a thoughtful privacy setup—combining on-device processing with explicit sync controls—can significantly reduce data exposure without sacrificing typing quality.
Troubleshooting common issues
Walkthroughs for common problems help you stay productive. If the keyboard doesn’t appear when you tap a text field, check that you’ve enabled the keyboard in Settings > System > Languages & input > Virtual keyboard, and that the app is allowed to show on-screen keyboards. Lag can often be reduced by clearing cache, disabling unnecessary extensions, or turning off highly aggressive auto-correct. If predictions become persistently inaccurate, re-train the dictionary by typing a few hundred representative phrases in your typical domains. When switching keyboards, always test several apps (messaging, email, browser) to ensure consistent behavior. Finally, if accessibility features cause quirks, disable them briefly and re-enable them to trigger a clean reset of the input pipeline.
Advanced tweaks for power users
For those who want deeper control, explore per-language dictionaries, custom shortcuts, and clipboard management. Some keyboards offer developer options for tweaking key repeat rate or enabling advanced gestures. You can often import/export dictionaries to maintain consistency across devices. If you work in a software development environment, consider enabling a monospace font for the on-screen keyboard in a hidden developer mode, and mapping frequently used snippets to shortcut keys. Remember: more features aren’t always better—curate a small, reliable toolkit of settings you actually use. Regularly revisit your choices to ensure they still align with your tasks and device updates.
Cross-device and backup strategies
Synchronizing keyboard settings across devices reduces cognitive load and keeps your typing experience consistent. Use your Google account or your device’s cloud service to back up language packs, personal dictionaries, and preferences. If you frequently switch between a phone and tablet, verify that the same languages and layouts are enabled on all devices and that autosync is active. Periodically export dictionaries if your keyboard app supports it, so you can restore quickly after a wipe or device upgrade. Consider a contingency plan: if you change to a new keyboard, you can import your settings via your cloud backup. This approach minimizes the retraining cost and helps you preserve your preferred workflow.
How to test and measure improvements
After configuring your keyboard settings, measure impact with concrete tests. Track typing speed (words per minute) and accuracy across common tasks: composing messages, emails, and notes. Use a timer and a short text corpus to obtain repeatable results. Compare performance with your baseline before changes and after each tweak. Create a checklist that includes readability, cursor navigation, one-handed comfort, and the ease of switching languages. If possible, run a user-focused test with a friend to observe real-world issues like mispredicts, mis-taps, or lag. Finally, maintain a short log for future adjustments so you can revisit decisions after Android updates or keyboard app updates. The goal is measurable improvement, not feature bloat.
AUTHORITY SOURCES
- https://developer.android.com/guide/topics/ui/accessibility/overview
- https://support.google.com/android/answer/9075355?hl=en
- https://www.nist.gov/topics/accessibility
Tools & Materials
- Android device(Any model running Android 9+; test on multiple devices if possible)
- Keyboard apps(Gboard, Samsung Keyboard, and SwiftKey or another preferred option)
- Internet connection(Needed to download apps, sync settings, and consult online docs)
- Account access(Google or device account for syncing preferences)
- Backup/restore plan(Optional: export dictionaries or settings before major changes)
Steps
Estimated time: 40-60 minutes
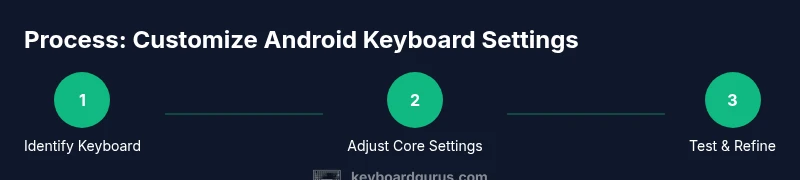
- 1
Identify primary keyboard and languages
Open Settings and review which keyboard is active. Note the primary languages you type in daily. This step establishes the baseline and ensures subsequent tweaks target the correct language packs and layouts.
Tip: If you type in multiple languages, enable per-language layouts early to avoid repeated changes later. - 2
Adjust core language and input settings
Navigate to System > Languages & input > Virtual keyboard. Select your keyboard and review language packs, auto-correct sensitivity, and next-word prediction. Set a conservative auto-correct level to prevent constant corrections.
Tip: Test auto-correct on a long paragraph to gauge balance between helpful corrections and false positives. - 3
Tune gestures and layout
In the keyboard’s settings, experiment with swipe typing sensitivity, long-press duration, and layout density. If you frequently type with one hand, enable one-handed mode or split layout.
Tip: Switch to a compact layout after typing a few paragraphs to feel the changes before finalizing. - 4
Enable accessibility features
Turn on features like high-contrast theme, larger keys, or TalkBack as needed. Verify that the changes don’t interfere with normal typing and app navigation.
Tip: Only enable accessibility options you actually use to avoid clutter and potential lag. - 5
Customize personal dictionary and shortcuts
Add frequent phrases, usernames, or technical terms to the personal dictionary. Create simple shortcuts for long phrases and common snippets to save time.
Tip: Export dictionaries after building a useful term list for quick recovery during device changes. - 6
Audit privacy and permissions
Review permissions granted to your keyboard app (microphone, storage, contacts). Disable cloud-based predictions if you’re concerned about data transfers.
Tip: Prefer on-device processing where available; ensure sync is optional and reversible. - 7
Test across apps and tasks
Open messaging, email, and browsing to test consistency. Record any mispredictions or lag, and refine settings accordingly.
Tip: Keep a short notes log detailing what you changed and the observed impact. - 8
Backup and cross-device prep
If you use multiple devices, back up dictionaries and preferences to your cloud account. Prepare a plan to sync across devices and verify on each one.
Tip: Doing a one-time cross-device check saves time during device upgrades. - 9
Set up a testing routine
Create a weekly 10-minute typing test with a consistent text. Compare results over time to quantify improvements and ensure changes stick.
Tip: Use a baseline text you know well for reliable comparisons. - 10
Document and refine
Keep a short changelog of what you modified and why. Revisit settings after Android or keyboard app updates and adjust as needed.
Tip: A simple changelog helps you avoid reverting useful tweaks during updates.
Got Questions?
Do I need to install a separate keyboard app to customize settings on Android?
Not always. Android includes system-level language and input controls, and most major keyboards offer extensive in-app settings. If you want more customization, you can install a second keyboard to compare features.
You can start with the built-in options; if you want more features, you can try a second keyboard to compare.
Where are keyboard settings located on Android?
Keyboard settings are usually under System > Languages & input > Virtual keyboard, then select your active keyboard. Some devices route it through Settings > General management or Language and input.
Go to Settings, then Languages and input, and pick your keyboard to adjust its settings.
Can I disable auto-correct completely?
Yes, you can turn off auto-correct in the keyboard’s own settings. This can reduce unwanted corrections but may increase typos in fast typing. Start with a milder setting and adjust as you gain confidence.
You can turn off auto-correct in the keyboard settings, then test whether you prefer manual corrections.
How do I enable swipe typing and adjust its sensitivity?
Open the keyboard settings and find the gesture or swipe typing option. Enable it, then adjust sensitivity so on-screen glides feel natural without causing accidental inputs.
Enable swipe typing in the keyboard settings and tweak sensitivity until it feels right.
Will changing keyboard settings affect privacy?
Some features rely on cloud predictions or data syncing. You can minimize risk by using on-device processing when possible and disabling cloud sync for predictions and dictionaries.
Yes, some features involve data sent to the cloud. Prefer on-device options when available.
What’s the best way to test typing improvements after changes?
Use a consistent text, measure speed and accuracy before and after tweaks, and keep a simple log of changes. Compare results across apps to ensure broad improvements.
Test with a fixed text, track speed and accuracy, then compare with your baseline.
Watch Video
What to Remember
- Identify your primary keyboard and languages first.
- Tune core language and input settings before deeper tweaks.
- Test accessibility and layout changes with real tasks.
- Protect privacy by balancing cloud features with on-device processing.
- Document changes and measure performance to guide decisions.