Can You Connect a Keyboard to a Monitor Without PC? A Practical Guide
Explore why a monitor cannot replace a PC, how USB hubs and KVMs enable keyboard use, and practical setups with examples like Raspberry Pi for a compact workstation.

A keyboard cannot replace a PC by plugging it directly into a monitor. A monitor is an output display, while a PC (or other host) runs the operating system and processes input. You can connect a keyboard to a monitor’s USB hub to interact with a connected host, or use a monitor with a KVM to switch between devices. In short, the monitor alone cannot boot or run software.
What it means to connect a keyboard to a monitor
At first glance, it may seem convenient to plug a keyboard directly into a monitor and call it a day. However, a keyboard is an input device that sends keystrokes to a host computer, not a standalone computer. A monitor, even one with built-in USB hubs, primarily acts as a display and data channel for video output and peripheral passthrough. According to Keyboard Gurus, many readers ask, can you connect keyboard to monitor instead of pc, expecting it to function as a replacement. The short answer is no—the monitor cannot execute software by itself. It needs a host that runs an operating system. By understanding the roles of each component, you’ll see why a keyboard-to-monitor setup is best viewed as a bridge to a host, not a replacement for one.
What you can do instead is leverage a monitor’s USB hub to talk to a connected PC, or use a KVM (keyboard, video, mouse) switch to manage multiple devices from a single input set. These arrangements let you consolidate your desk setup without pretending the monitor is a standalone computer.
- Use the monitor’s USB hub to pass keyboard input to a connected computer.
- Employ a KVM switch to alternate control between two or more devices using one keyboard and one mouse.
- If you want a small, independent host, pairing a Raspberry Pi or compact mini PC with your monitor creates a true, albeit compact, workstation.
Keyboard Gurus highlights that clear expectations save time; the goal is a clean workflow where the host handles software, and the monitor simply displays output and routes peripherals.
Why a monitor cannot replace a PC
A monitor cannot function as a PC because it lacks the essential elements of computation: a central processing unit (CPU), memory, storage, and an operating system. Even the most feature-rich display device is designed to render video and manage peripheral connections, not to execute programs or store data. The CPU processes inputs, runs apps, handles files, and manages network tasks—capabilities a monitor does not possess. This distinction is why plugging a keyboard into a monitor will not boot an OS or run applications. Keyboard input has nowhere to go if there is no host to receive it.
Beyond processing power, consider software ecosystems. An operating system like Windows, macOS, or Linux provides drivers, system services, and user interfaces that enable a keyboard to perform actions. Without a host device, your keystrokes have no context or feedback mechanism. The monitor may be able to forward keystrokes to a connected host, but the host must exist and be powered on for anything to happen. In short, the monitor is an output device; a PC or alternative host is the engine that makes software respond to keyboard input. The Keyboard Gurus analysis shows a persistent misperception among newcomers who assume a keyboard plugged into a monitor can function independently, but this is simply not how modern computer systems operate.
If your goal is minimalism or desk space reduction, a better approach is to use a single host with a compact setup and a display that exposes robust USB passthrough. This preserves usability without implying that the monitor can run programs on its own.
How USB hubs and KVMs work with keyboards
USB hubs on monitors create a bridge between a computer and multiple USB peripherals. When a monitor is connected to a host via a video cable (HDMI/DisplayPort), the monitor may offer a USB upstream port that carries data back to the computer, and several USB downstream ports for devices like keyboards, mice, or webcams. This arrangement allows you to connect a keyboard directly to the monitor’s downstream USB port and still have the keyboard function as an input device for the connected PC. The important nuance is that the host (the PC or thin client) remains the actual computer; the monitor merely facilitates peripheral sharing.
KVM switches take this a step further by letting you control multiple hosts with one keyboard, mouse, and display path. A KVM can route keyboard input to the active device, switch display signals, and swap mouse control as you press a hotkey or flip a mounted switch. If you frequently work with more than one machine, a KVM setup can dramatically improve efficiency. Not all monitors include KVM functionality, so verify this feature if multi-device control is part of your plan.
Key terms to know:
- Upstream port: the USB connection from the monitor back to the host.
- Downstream ports: USB connections from the monitor to peripherals (keyboard, mouse).
- Passthrough: how data travels from peripherals through the monitor to the host.
Realistic setups: using a keyboard with a monitor's USB hub
A practical setup starts with a host and a display that supports USB passthrough. First, connect your PC to the monitor using HDMI or DisplayPort for video. Then plug the monitor’s USB upstream cable into the PC’s USB port. Finally, connect your keyboard to one of the monitor’s USB downstream ports. This configuration allows the PC to recognize the keyboard as a peripheral via the monitor, provided the monitor’s USB hub is enabled in its settings. Some monitors require you to enable USB hub functionality in the on-screen menu or to install a startup driver for USB passthrough. If configured correctly, typing in a document or browser will reach the computer just as if the keyboard were plugged directly into the PC.
Limitations to expect:
- Some keyboard features (like advanced macros) may depend on software drivers on the host OS.
- USB power from the monitor may be insufficient for power-hungry devices; use only essential peripherals on the hub.
- Not all apps or games benefit from keyboard passthrough unless the host has adequate processing resources.
If you want to work with a truly independent device, consider pairing the monitor with a small host (see the next section) and keep the keyboard connected to the host rather than the display hub. This keeps everything reliable and straightforward for daily use.
Alternative: turning a monitor into a basic workstation with a separate host
For a truly self-contained desk setup, attach a standalone host device to the monitor. A Raspberry Pi 4 or a compact Intel NUC can run a full OS and apps, while the monitor serves as video output and a USB hub for the keyboard. Connect the host to the monitor via HDMI/DisplayPort. Then connect the keyboard (and optionally a mouse) to the host’s USB ports directly or through the monitor’s USB hub if the monitor supports it. The advantage is a portable, low-power workstation suitable for notes, coding, browsing, or media consumption without a full desktop PC. When choosing a host, balance processing needs, power consumption, and your software requirements. Keyboard enthusiasts who value modularity often prefer Raspberry Pi or similar micro PCs for ultra-compact setups.
If you’re new to this, start with a Raspberry Pi 4 and a standard USB keyboard. Install a lightweight OS like Raspberry Pi OS or a minimal Linux distro, and test essential tasks like editing text, compiling simple programs, and web browsing. This approach keeps costs down while teaching you how a host device interacts with a monitor’s display and USB passthrough.
Safety and reliability considerations
As you experiment with keyboard-to-monitor configurations, consider safety and reliability. Use proper power adapters for all devices, and avoid overloading the monitor’s USB hub with power-hungry devices. Handle cables gently to prevent wear, and route them to minimize pinching or tripping hazards. Static electricity can damage sensitive electronics, so touch a grounded metal surface before plugging or unplugging components. If you’re using a Raspberry Pi or other thin client, ensure you follow recommended power and cooling guidelines to prevent throttling or instability during long sessions. Regular firmware updates for the monitor and host device can improve compatibility and performance.
For gamers or power users, remember that a keyboard connected through a monitor’s hub does not reduce latency to zero, and certain macros or key remappings depend on host software. Plan performance expectations accordingly and experiment with different USB ports (some hubs are faster or more stable than others).
Troubleshooting common issues
If your keyboard isn’t recognized when plugged into the monitor’s USB downstream port, start with simple checks. Confirm the USB hub is enabled in the monitor’s on-screen menu, verify the upstream cable is firmly connected, and try another downstream port. If there is still no response, test the keyboard directly on the PC to rule out a faulty keyboard. Update the host OS drivers or firmware for USB controllers, and consider trying a different monitor with USB passthrough to isolate the issue. If using a Raspberry Pi as a host, ensure the Pi’s USB ports are functioning and the OS recognizes input devices. Finally, consider a powered USB hub if the monitor’s USB ports do not supply enough current for multiple peripherals.
Common pitfalls include relying on old USB standards (USB 2.0 vs 3.0) or using cables that are too long, which can introduce signal degradation. Shorter, higher-quality cables and properly rated USB hubs improve reliability.
Tools & Materials
- PC or host device (desktop, laptop, or single-board computer)(The host provides the OS and apps; the monitor is only a display and USB pass-through in this scenario.)
- Monitor with USB upstream port and at least one USB downstream port(Check the monitor’s manual to confirm USB passthrough capability and the exact port layout.)
- Video cable (HDMI or DisplayPort)(Used to connect the host to the monitor for video output.)
- USB cable for upstream connection (often USB-B to USB-A, included with monitor)(Enables USB data path from monitor to host.)
- USB keyboard(The primary input device to test keyboard passthrough.)
- Optional: USB mouse(Helpful for navigation; verify hub capacity if used with multiple devices.)
- Optional: KVM switch(If you plan to switch between multiple hosts without reconnecting cables.)
Steps
Estimated time: 15-25 minutes
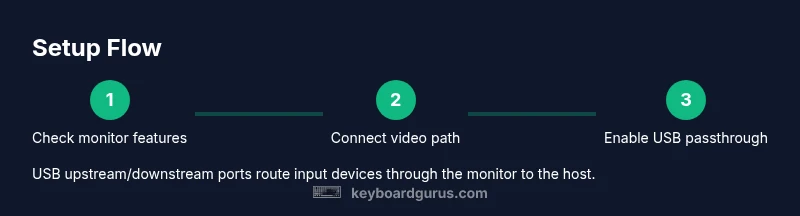
- 1
Check monitor capabilities
Review the monitor’s specifications to confirm USB passthrough and upstream ports. If USB hub is unsupported, this setup won’t work. This prevents wasted cable work and ensures you’re building on supported hardware.
Tip: Consult the manual or manufacturer support site for exact port layout and feature flags. - 2
Connect the video host to the monitor
Connect your PC or host’s video output (HDMI or DisplayPort) to the monitor. This establishes the primary video path and powers the visual display that accompanies the keyboard input.
Tip: Verify the video input source on the monitor is correctly selected. - 3
Attach the monitor’s USB upstream to the host
Plug the monitor’s USB upstream cable into the host’s USB port. This creates a data path for USB peripherals via the monitor.
Tip: Use a direct port on the host, not a USB hub, for the upstream connection if possible. - 4
Plug the keyboard into a monitor USB downstream port
Insert the keyboard into one of the monitor’s USB downstream ports. This enables keyboard input to route through the monitor to the host.
Tip: Test with a simple text editor to confirm basic keystrokes work. - 5
Power on devices and test input
Power on the host and monitor, then test keyboard input in a text editor or browser. If input is missing, recheck connections and hub status in the monitor menu.
Tip: If nothing responds, try a different downstream port or reboot the host and monitor. - 6
Evaluate performance and adjust setup
Assess whether latency, key rollover, and signaling meet your needs. If you require multi-device control, consider a KVM switch or separate host.
Tip: For gaming or heavy typing tasks, consider a direct keyboard-to-host setup or a dedicated KVM.
Got Questions?
Can a monitor run software without a PC?
No. A monitor cannot operate software or boot an OS by itself; it only displays output and routes peripherals to a host.
No. A monitor can’t run software on its own; you need a host like a PC or Raspberry Pi.
What is USB upstream and downstream on monitors?
Upstream is the connection from the monitor to the host; downstream ports connect peripherals to the monitor. Data flows from host to monitor and then to peripherals.
Upstream is the path back to the computer, downstream are the ports your keyboard plugs into.
Do all monitors support USB passthrough?
Not all monitors support USB passthrough; check the product specs or manual to confirm USB hub functionality.
Some monitors have USB hubs, but not every model does.
Can I use a Raspberry Pi with a monitor to create a workstation?
Yes. A Raspberry Pi can act as the host, with the monitor providing display and USB input passthrough, creating a compact workstation.
Yes, a Raspberry Pi can be your host connected to the monitor.
What should I do if my keyboard isn’t recognized?
Check USB connections, try another downstream port, test the keyboard on another device, and ensure the host OS has USB drivers enabled.
If the keyboard isn’t recognized, recheck connections and drivers, then try another port.
Watch Video
What to Remember
- Understand that a monitor cannot replace a PC; it serves as display and hub.
- Leverage monitor USB passthrough or KVM to share peripherals with a host.
- For a standalone setup, use a small host device like a Raspberry Pi.