Chromebook Keyboard Test: How to Check Your Keys for Accuracy and Comfort
Learn how to test a Chromebook keyboard for accuracy, travel, ghosting, and durability. This step-by-step guide covers tools, practical tests, troubleshooting tips, and expert insights from Keyboard Gurus.

A Chromebook keyboard test helps you verify every key's responsiveness, layout accuracy, and durability using built-in diagnostics and simple at-home checks. You’ll confirm if any keys are stuck, respond slowly, or ghost under rapid typing, and you’ll compare results against a baseline. This quick test sets expectations for reliability and comfort on daily use.
What a Chromebook Keyboard Test Reveals
A Chromebook keyboard test goes beyond a casual typing check. It assesses key travel, tactile feedback, spacing, and the consistency of key registration across the entire keyboard. According to Keyboard Gurus, a thorough test helps identify subtle issues—such as intermittent key voice, dead zones, or inconsistent spacing—that can disrupt long study sessions or gaming marathons. For students, gamers, and professionals, understanding these nuances ensures you can plan for repairs, warranty coverage, or a smoother transition to a new device. By performing a structured test, you establish a reliable baseline you can revisit after software updates or physical exposure (spills, dust, or heavy typing).
This section outlines what exactly gets tested, why it matters, and how to interpret the results in a way that informs next steps for maintenance or upgrades.
Tools and Environment You’ll Need
To perform a Chromebook keyboard test accurately, you don’t need fancy gear. A few essential items and a quiet workspace will help you get precise results. Keyboard Gurus methods emphasize starting with a healthy baseline: ensure your Chromebook is charged, updated to the latest ChromeOS version, and in a neutral typing posture. Clear your desk, disable extra input methods temporarily, and have a paper checklist or digital note ready to log outcomes. If you rely on pass/fail judgments, you’ll benefit from consistency across multiple test sessions.
Key factors include stable internet access for online tests, a reliable browser, and a clear surface to prevent typing errors caused by misalignment. Optional tools like an external USB keyboard can be useful for comparison but aren’t required for a complete Chromebook keyboard test.
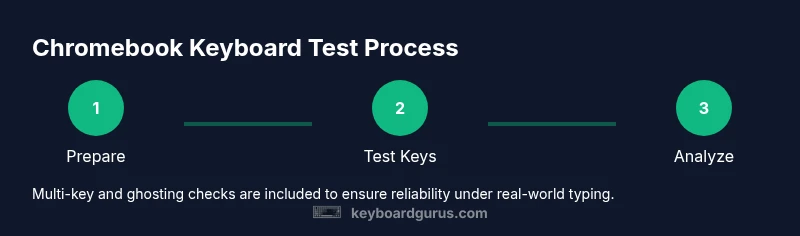
Step-by-Step Testing Plan (overview)
A well-structured plan helps you cover all keyboard aspects without missing edge cases. The steps below are designed to be executed in one sitting or broken into shorter sessions. You’ll document results for each key and compare your results against an established baseline. If multiple test sessions show the same issue, you’ll know it’s more likely a hardware fault rather than a temporary glitch. Keyboard Gurus recommends recording dates, ChromeOS versions, and model numbers for future diagnostics.
Basic Key Tests: Layout, Travel, and Responsiveness
Begin with the basics: verify that each key sits in the correct position, registers the intended character, and returns to its resting position promptly. Use a simple on-screen typing test to validate layout: compare the output to your physical keyboard. Check key travel by pressing each key with a steady press, noting tactile feedback and travel distance. For responsiveness, type at a steady pace and observe any misses or lag. If a key feels different from its neighbors, record it for deeper inspection.
- Confirm that the home row alignment matches the visual keyboard.
- Note any keys that register incorrectly or require extra force.
- Compare primary keys (letters) against punctuation and function keys for consistency.
Advanced Checks: Ghosting, Key Rollover, and Special Keys
Ghosting occurs when multiple keys pressed together don’t register correctly. Use multi-key tests to verify anti-ghosting behavior. Keyboard Gurus recommends testing combinations like A+S+D, or any three-key sequences used in gaming or touch-typing courses, to see if all pressed keys register simultaneously. Key rollover tests ensure the keyboard can handle simultaneous inputs, which is critical for gaming or fast typing.
Also test function keys, media controls, and any layout quirks (e.g., dedicated keys for brightness or volume). Some Chromebooks map function keys differently in ChromeOS, so verify these mappings align with your expectations.
Real-World Scenarios and Ergonomics
Your comfort matters as much as perfect registration. Try longer typing sessions and mixed content (coding, essay writing, gaming) to observe fatigue, key hot spots, and spacing issues. Pay attention to whether certain keys feel 'stickier' after long use, or if your wrists angle toward the keyboard in a way that makes typing slower or less accurate. Ergonomic factors include keyboard tilt, palm rest, and the distance from screen to hands. If you notice discomfort, consider adjusting posture, adding a wrist rest, or experimenting with keyboard height settings in ChromeOS.
Safety, Maintenance, and Replacement Guidelines
Regular maintenance reduces the chance of keyboard faults. Keep your Chromebook clean from dust and crumbs using gentle, non-abrasive methods and avoid liquids near the keyboard. If a key remains unresponsive after cleaning and software updates, this could indicate hardware failure. In such cases, check warranty status and explore repair or replacement options. Regular backups ensure you won’t lose work if a more serious keyboard issue arises.
Authority Sources and Further Reading
To deepen your understanding of keyboard testing practices and ChromeOS keyboard mappings, consult reliable sources and official documentation. For practical steps and model-specific guidance, see the Chromebook Help and major technology publications. These resources offer broader context on keyboard etiquette, diagnostics, and replacement considerations, helping you make informed decisions about repairs or upgrades. See links below for further reading.
What You’ll Learn from This Test (Summary)
By completing a Chromebook keyboard test, you’ll gain clarity on which keys are reliable, which need service, and how comfortable your typing experience is across real-world tasks. You’ll also develop a repeatable testing routine you can reuse after updates or hardware changes. The end goal is a predictable, efficient typing experience that matches your workflow and avoids surprises during exams, programming sessions, or gaming marathons.
Authority sources
- https://support.google.com/chromebook/answer/61762 (Chromebook keyboard help)
- https://www.cnet.com/topics/tech/mobile/ (Major technology publication)
- https://www.theverge.com/tech (Major technology publication)
Tools & Materials
- Chromebook with functioning keyboard(Ensure battery ≥ 50% before testing; update to latest ChromeOS)
- Web browser (up-to-date)(Chrome recommended for compatibility with ChromeOS)
- On-screen keyboard test page(Use a reliable site that records multiple key presses)
- Printable test checklist or digital note(Log results for each key (pass/fail, comments))
- External USB keyboard (optional)(Useful for comparison or calibration across devices)
- Quiet workspace(Reduces typing errors and improves focus)
- Timer or stopwatch(Helpful for measuring consistency over time)
Steps
Estimated time: 15-25 minutes
- 1
Prepare the device and workspace
Charge the Chromebook, close unnecessary apps, and connect to a stable network. Open a browser ready for testing and ensure ChromeOS is up to date. This baseline setup minimizes software interference during the test.
Tip: Log the ChromeOS version and device model for future reference. - 2
Run initial layout check
Use a standard typing test to ensure each key outputs the expected character. Compare to the printed keyboard layout or a reference image to confirm row and column alignment.
Tip: Pay attention to close neighbors that could cause mis-strikes during fast typing. - 3
Test individual keys for travel and feedback
Press every key and note travel distance, tactile feedback, and any stiffness. Mark keys that feel different or require extra force. This helps detect wear or stabilizer issues.
Tip: Group keys by row to speed up the audit while maintaining accuracy. - 4
Perform multi-key and ghosting checks
Type common three-key combos simultaneously to see if all keys register. Try sequences used in gaming and fast typing. Record any missed keys or delayed registrations.
Tip: If a keyboard shows ghosting, record the specific combos that fail for confirmation later. - 5
Test function and special keys
Verify keys like Backspace, Enter, Shift, Ctrl, and media controls map correctly and act as expected. Ensure non-alphanumeric keys align with ChromeOS behavior.
Tip: Double-check if Function keys change behavior with Fn toggles on your model. - 6
Compile results and plan next steps
Summarize findings in your checklist: pass/fail status per key, any patterns, and ergonomic notes. Decide if you need a repair, replacement, or warranty service based on the results.
Tip: If issues persist after software updates, prioritize hardware inspection or service.
Got Questions?
How do I start a Chromebook keyboard test?
Begin with an on-screen typing test to verify each key outputs the correct character. Then perform a layout check against the physical keyboard and log any discrepancies.
Start with a typing test, verify each key, and log any discrepancies you find.
What should I do if a key is unresponsive?
Clean around the key, ensure nothing is stuck underneath, and try an external keyboard for comparison. If the issue remains after updates, contact support or consider warranty service.
Clean around the key, then try an external keyboard to compare. If still unresponsive after updates, contact support.
Can I test ghosting and multi-key rollover on a Chromebook?
Yes. Use multi-key tests to see if several keys register simultaneously. Ghosting is more common on cheaper keyboards; document which combos fail for reference.
Yes, use multi-key tests to check for ghosting and record any failing combos.
Is this test useful for repairs or replacements?
The test identifies faults and helps you decide whether service is needed or if the device should be replaced under warranty. It does not repair hardware by itself.
The test helps decide if you need service or replacement; it doesn’t repair hardware on its own.
How long should a Chromebook keyboard last under normal use?
Lifespan depends on usage and care. Regular cleaning and careful typing habits can extend useful life, while heavy, continuous typing may wear keys faster.
Lifespan varies with use and care; regular cleaning helps, but heavy typing can wear keys quicker.
Do I need special software to test a Chromebook keyboard?
No specialized software is required. Use built-in ChromeOS features and straightforward online typing tests to assess key behavior.
No special software is needed; use ChromeOS features and simple online typing tests.
Watch Video
What to Remember
- Test for both accuracy and comfort, not just key registration
- Document results to track changes after updates
- Differentiate software quirks from hardware faults
- Use a baseline for cross-device comparisons
- Plan repairs or replacements based on documented evidence