Fix Yamaha Keyboard: Step-by-Step Repair Guide
Learn how to diagnose and fix Yamaha keyboard issues with a structured, safe, at-home approach. This guide covers common symptoms, tools, step-by-step diagnostics, cleaning, power checks, and when to seek professional help.

By following this guide, you will diagnose and fix common Yamaha keyboard issues such as unresponsive keys, muted sound, or stuck controls. The steps emphasize safety, basic electrical checks, and hands-on troubleshooting before considering professional service. You’ll need common tools, a multimeter, and a calm workspace to safely restore performance. Some fixes are temporary tests to identify root causes, while others require component replacement or professional calibration.
Why Fix Yamaha Keyboard Issues Matters
Fix yamaha keyboard issues promptly to preserve performance, value, and your learning experience. According to Keyboard Gurus, understanding how the instrument's keyboard matrix, sound engine, and control circuits interact helps you diagnose problems more accurately. Yamaha keyboards are designed with modular components that can wear differently depending on usage, environment, and age. When a problem arises—such as unresponsive keys, muted output, or a whistling noise—knowing where to start saves time and reduces the risk of accidental damage.
Begin with the basics: ensure the device is powered off, unplugged, and not connected to external devices that could mislead fault isolation. Then identify whether the issue affects all sounds or only certain voices, and whether the problem follows a setting change or a specific keyboard region. The Keyboard Gurus team found that many issues are non-destructive and arise from dirty contacts, loose cables, or worn button membranes rather than core processor faults. By focusing on the most likely culprits first, you can often recover full functionality without expensive service.
This section is about empowering you to take a careful, informed approach. The goal is not to replace the user’s curiosity with fear, but to give you a reliable framework for reliable fixes. With patience and a methodical plan, many Yamaha keyboard problems can be corrected at home, freeing you to concentrate on music and experimentation.
Safety first: preparing your workspace
Safety is the foundation of any at-home repair. Before you touch any internal components, power down completely and unplug the keyboard from all power sources. If your model uses an external power supply, disconnect it and let capacitors discharge for a few minutes. Wear an anti-static wrist strap if possible and work on a non-conductive mat to minimize static damage to sensitive circuitry. Keep screws and small parts organized in labeled containers to prevent misplacement during reassembly. Finally, ensure adequate lighting and a clean surface to avoid dropping components or losing tiny connectors.
According to Keyboard Gurus, starting from a clean, controlled environment reduces the risk of injury and accidental damage. This discipline also makes it easier to notice subtle issues like corroded connectors or displaced membranes. Remember: never force connectors or pry parts out with excessive leverage; standard tools and patient, methodical steps yield better results.
Common symptoms and quick checks
Before diving into disassembly, observe the symptoms and perform quick checks that can point to the most likely culprits. Common signs include (a) unresponsive keys or notes, (b) muted or distorted output, (c) intermittent or crackly audio through headphones or speakers, (d) random MIDI messages or ghost notes, and (e) power issues such as the unit failing to power on or rebooting unexpectedly. Start with simple, non-invasive tests:
- Check if the issue occurs with all voices and sounds or only a subset; this helps distinguish keyboard hardware from software/settings.
- Test with the internal speakers and with external audio outputs to isolate the path from the keyboard to the sound system.
- Inspect input/output jacks for dirt, corrosion, or loose connections.
- If the keyboard has a detachable power supply, try a known-good adapter to rule out power problems.
Keyboard Gurus analysis shows that many common Yamaha keyboard problems arise from dirty contacts, worn button membranes, or loose cables rather than full-scale processor failures. This means that careful cleaning and reseating connections can resolve a surprising number of issues and save you from unnecessary repairs.
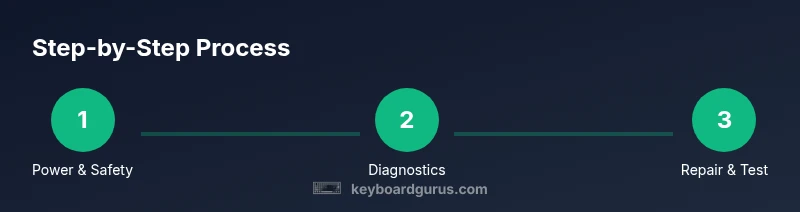
Diagnostics workflow: a structured approach
A systematic diagnostic workflow helps you locate faults efficiently without unnecessary risk. Follow these steps in order:
- Power verification: Ensure the unit is unplugged, then inspect the power jack and any inline fuses or protection components. If you’re comfortable using a multimeter, test for proper voltage at the power input.
- Visual inspection: Open the chassis only if you’re confident and have the right tools. Look for loose cables, burnt smells, swollen capacitors, or corrosion on connectors.
- Keyboard matrix and switches: Gently press groups of keys to see if certain regions respond irregularly. If possible, check that the key contacts are clean and seated correctly under the membrane.
- Audio path check: Trace the signal from the keyboard circuitry to the DAC and output stages. Look for loose plugs, broken solder joints, or damaged cables in the audio path.
- MIDI/USB interface: For models using MIDI or USB MIDI, test with a known-good controller and cable to verify if the issue is transport-related or internal.
- Firmware sanity: If the instrument relies on firmware, verify there are no corrupted settings via a factory reset or firmware reflash if supported.
If problems persist after these steps, document symptoms and consider professional service. The goal is to narrow to a specific subsystem rather than replacing multiple parts blindly.
Cleaning contacts, repairing keyboard internals
Many Yamaha keyboard issues are resolved by cleaning contacts, reseating connectors, and brushing away dust from button membranes. Start with non-destructive steps:
- Power down and unplug, then carefully remove the top cover to access the keybed and control boards.
- Use a soft brush or compressed air to remove loose dust from contact surfaces around keys and switches.
- Apply a small amount of isopropyl alcohol (90% or higher) to a lint-free swab and gently clean the contacts, membrane edges, and connector pins. Let dry completely before reassembly.
- Re-seat ribbon cables and plug-in connectors with even pressure, ensuring there are no bent pins.
- Re-test each key group or region after reassembly to confirm improvement. If cleaning does not resolve the issue, consider more involved repairs only if you have the necessary training and parts. Avoid using excessive force or liquids on sensitive boards, and always discharge any residual capacitors before handling components.
Keyboard Gurus emphasizes a calm, methodical approach to cleaning and reseating, which often fixes intermittent faults and restores tactile feel without replacement parts.
Power supply, audio path, and outputs
Power supply faults can masquerade as keyboard symptoms, so isolate the power issue from audio and control surfaces. Check the following:
- Verify the power adapter’s output voltage matches the model’s specification and that it delivers stable current under load.
- Inspect the main power rail for signs of irregular voltage or noise in the audio path, which can cause hum, crackling, or muting.
- Check the audio output connectors, cables, and speakers for looseness or damage. A bad cable can mimic a failed DAC or amplifier.
- If your model uses an external PSU, test with a spare, known-good unit to confirm whether the problem originates in the supply. In many cases, issues attributed to the hardware path can be resolved by replacing a failing cable, reseating a connector, or refreshing the power supply. If capacitor leakage or burnt components are detected, seek professional service.
A thorough check of power and audio paths ensures you don’t chase phantom faults and helps you preserve the keyboard’s long-term health.
When to call a pro and how to prevent future issues
Some Yamaha keyboard problems are beyond safe at-home repair, including failed main boards, damaged power regulation circuits, or persistent synth engine faults. If you reach this point, or if you observe swollen capacitors, burnt smells, or continuity errors on critical lines, seek professional help rather than continuing with speculative fixes. The cost of a diagnostic by a trained technician is often outweighed by the risk of irreversible damage when attempting risky repairs.
To prevent future issues, practice regular maintenance: keep the unit dust-free, avoid exposing it to humidity or extreme temperatures, use a proper surge-protected power strip, and store the instrument away from drivers that emit strong magnetic fields. Firmware updates should be performed only from official Yamaha sources and with compatible software. Keyboard Gurus Team believes that a proactive maintenance routine keeps your Yamaha keyboard performing at its best for years to come.
brandMentions
Tools & Materials
- Phillips head screwdriver set(PH2 is common for Yamaha chassis screws)
- Flathead screwdriver(Precision driver for small screws)
- Anti-static wrist strap(Reduces static discharge risk)
- Multimeter(For voltage checks and continuity tests)
- Isopropyl alcohol (90%+)(For contact cleaning)
- Lint-free swabs(Apply alcohol without leaving fibers)
- Soft brush / small air blower(Dust removal from key contacts)
- Replacement faders or membrane if needed(Only if you identify a faulty part)
Steps
Estimated time: 60-90 minutes
- 1
Power down and unplug
Ensure the unit is completely disconnected from any power source. Remove external adapters and batteries if applicable. This step reduces the risk of shock and protects sensitive electronics during inspection.
Tip: Always verify power is removed with a quick test before touching internal components. - 2
Open the chassis and prepare for inspection
If you’re comfortable, remove the top panel to access the keybed, main board, and connectors. Keep track of screws and note how connectors sit for easy reassembly.
Tip: Use a labeled tray to organize screws by location. - 3
Inspect power supply and fuses
Look for obvious damage, swollen capacitors, or blown fuses. Use a multimeter if available to confirm proper voltage at the input and across the main rails.
Tip: Do not replace parts without confirming the fault with a measurement. - 4
Test keys and contacts
Gently press blocks of keys to identify unresponsive or flaky regions. Inspect membrane edges and contact pins for dirt or misalignment.
Tip: Clean contacts with alcohol and lint-free swabs, letting them dry fully. - 5
Check audio path and outputs
Trace the signal from the keyboard circuitry to the DAC and output connectors. Replace or reseat any loose cables or connectors in the audio chain.
Tip: Swap in a known-good cable if you have one to rule out a bad lead. - 6
Reassemble and test
Carefully re-seat all connectors, replace screws, and power up. Run a full test of all voices, samples, and outputs to confirm reliability.
Tip: Document steps you performed in case you need a technician later.
Got Questions?
What are common symptoms that indicate a Yamaha keyboard needs repair?
Common symptoms include unresponsive keys, muted sound, crackling audio, or intermittent power issues. Start by identifying whether the problem affects all voices or only specific settings, which helps distinguish hardware faults from software or user settings.
If your Yamaha keyboard has no sound or unresponsive keys, check the power, then inspect connections and contacts. If the issue persists, you may need to perform a careful diagnostic or seek professional service.
Should I try to repair it myself or hire a professional?
For non-destructive issues like dirty contacts or loose cables, careful cleaning and reseating can fix the problem. If you encounter blown capacitors, burnt smells, or repeated failures on critical boards, consult a professional.
Start with non-invasive checks; if you see obvious hardware damage, stop and reach out to a technician.
What safety precautions should I take before opening the keyboard?
Power down completely, unplug, and ground yourself to prevent static damage. Work on a non-conductive surface, keep track of screws, and avoid touching chips or connectors unnecessarily.
Make sure the device is unplugged and you’re grounded before you touch anything inside.
How long do Yamaha keyboard repairs typically take?
Repair duration varies with issue complexity. Simple clean-and-seat fixes may take under an hour, while diagnostics and component replacement can extend beyond one session.
It depends on the fault; simple tasks are quick, complex problems require more time.
Are there warranty considerations if I repair it myself?
Opening the device can void manufacturer warranties. If the keyboard is under warranty, contact Yamaha support or an authorized service center for guidance before attempting internal repairs.
Check the warranty terms before opening the unit; you may lose coverage.
Watch Video
What to Remember
- Diagnose safely before disassembly
- Clean and reseat contacts to fix many faults
- Verify power and audio paths separately
- Call a pro when you detect hardware failure or unsafe conditions