How to Split Keyboard on iPhone: A Step-by-Step Guide
Learn how to split the iPhone keyboard for easier one-handed typing. This Keyboard Gurus guide covers gestures, settings, troubleshooting, and pro tips for a comfortable typing experience on iPhone.

To split the iPhone keyboard, use a two-thumb outward gesture on the keyboard to divide it into left and right halves, then adjust the width by dragging. Rejoin by pinching the halves back together. If the gesture isn’t responsive in a specific app, try a different app or update iOS to ensure gesture support.
Why splitting the iPhone keyboard matters
For anyone who types with one hand or prefers quicker thumb access, splitting the iPhone keyboard can dramatically improve reach and reduce hand strain. The split keyboard creates two independent typing zones on the left and right sides of the screen, allowing your thumbs to reach more keys without stretching. In practice, this layout supports faster short messages, notes, and quick replies, especially when you’re holding the device in one hand and typing with your thumbs. The core idea behind how to split keyboard on iphone is simple: the keyboard divides into two halves, positioned where your thumbs naturally rest. For many users, this layout reduces the distance fingers must travel, which can reduce fatigue during long sessions. If you’re new to this feature, start with short texts to acclimate to the new geometry and gradually type longer messages as you become comfortable.
The goal of a split keyboard is to improve typing comfort and speed without sacrificing accuracy. Ergonomics play a huge role in everyday device use, especially when you’re multitasking or on the go. Some apps may implement the split layout differently or restrict it in certain contexts, so you might see the two halves more clearly in some apps than in others. As you experiment, keep a mental map of your dominant thumb’s natural reach and use that to fine-tune the width and position of each half. Ultimately, the split keyboard is a practical tool for many users who want to minimize finger travel and maximize one-handed typing efficiency.
From an accessibility perspective, the split layout can help users who have motor control differences by reducing wide finger travel. If you experience discomfort with the standard keyboard, a trial run with split typing can be a worthwhile step toward a more comfortable posture. In this guide, we’ll cover gestures, variations across iOS versions, practical tips, and troubleshooting steps to help you master split-typing on iPhone.
How the split keyboard works on iPhone
The split keyboard is a visual division of the standard keyboard into two halves placed toward the left and right edges of the screen. The primary gesture that enables this layout is a two-thumb outward spread on the keyboard surface. When performed correctly, the keyboard halves separate and remain in place until you rejoin them. The gesture is designed to be intuitive: your thumbs naturally travel toward the edges, and the keyboard adapts to that motion. Some devices or iOS versions may show a small toggle or hint to split or dock the keyboard, but the gesture remains the most reliable method for most users. If you’re using a device in some apps, the keyboard may appear centered or maintain a single block; in others, the left and right halves will appear immediately upon the gesture.
Adjusting the width of the split is a key part of comfort. You can widen the halves by spreading your thumbs further apart, or narrow them by pinching the halves together. The goal is to create two typing zones that align with your natural thumb placement. For many people, a split keyboard reduces travel distance for the thumbs, making it easier to hit frequently used letters without twisting the hands. If you’re new to this setup, begin with a modest split and gradually adjust as you type more in different contexts, such as messages, emails, or notes.
Common configurations and iOS version variations
iPhone users may encounter slight differences in how split keyboard behaves across iOS versions and device sizes. In some iOS iterations, you’ll see the split option as a native gesture that activates when you start the outward pinch on any keyboard-enabled field. In other versions, you might find a toggle or an assistive hint within the keyboard’s interface, sometimes appearing near the space bar or bottom edge. It’s important to note that not every app may support the split keyboard equally; some apps optimize for standard layouts or center the keyboard regardless of the gesture. If you don’t see the split after performing the gesture, try a different app, refresh the page, or update to the latest iOS for consistent behavior. With practice, you’ll become adept at recognizing which apps reliably support the split layout and which ones require sticking with the standard keyboard.
Additionally, the accessibility and ergonomics of a split keyboard can be influenced by screen size and hold mode. On larger iPhone models, the halves naturally rest further apart, which can enhance reach but might reduce accuracy until you adjust. Conversely, smaller devices may feel cramped and require a narrower split. The key is to use the gesture to establish a comfortable baseline and then tailor the width for your thumbs’ reach across common letters. As you explore, keep notes about which apps and tasks benefit most from split typing, as this will guide your ongoing use and adjustments.
Quick methods to split the keyboard in practice
There are practical, repeatable ways to activate the split without searching for obscure settings. The most reliable method is the outward two-thumb gesture you perform directly on the keyboard while a text field is active. Start by placing your thumbs on the keyboard surface and gently spread them toward the edges. If done correctly, the two halves will appear and lock in place, leaving a comfortable gap for your thumbs to rest. If you don’t see the halves immediately, try again with modest spreads and ensure your thumbs aren’t accidentally swiping elsewhere. For users who prefer tactile cues, some iOS versions display a small hint or icon indicating that the keyboard can be split. In cases where the gesture doesn’t respond, verify that the app supports this layout, or switch to a different app to test responsiveness. Remember to practice in short bursts first, especially when you’re accustomed to standard typing.
If you encounter resistance, restarting the app or device can clear any temporary layout quirks. On some devices, you may also see an optional “Dock and Split” behavior when you rotate to landscape; test both orientations to determine which orientation provides the most comfortable layout for your hands. The more you practice, the more you’ll notice subtle cues that indicate when the split is active, such as a more pronounced gap between halves or a change in keyboard color or shading in your app.
Rejoining and adjusting the split for comfort
Rejoining the keyboard is just as important as splitting it. To merge the two halves back into a single keyboard, perform a pinching gesture from the two halves toward the center. The halves will smoothly slide back and merge into the standard layout. If the rejoin feels stubborn, try tapping the space bar or performing a tiny reset gesture to attract focus back to the standard keyboard. After rejoining, you can explore reinitiating the split with a slightly different width to better fit your typing comfort. If you frequently need a mixed setup—for example, one-handed in tight spaces—keep in mind that you can switch between split and standard layouts quickly depending on the task. The goal is to reduce strain while maintaining typing speed and accuracy.
For those who use one-handed typing regularly, the iPhone’s one-handed keyboard mode offers an alternative that may provide similar benefits with a different layout. Compare the two configurations across various tasks like messaging, note-taking, and email to determine which yields the best balance of comfort and efficiency. Finally, if you’re working in a text-heavy workflow, reassess your gesture technique and consider periodic posture checks to guard against long-term strain. A deliberate, patient approach will yield the best long-term results.
Troubleshooting and caveats
If the split keyboard isn’t appearing as expected, several factors could be at play. First, verify that you are using a relatively recent iOS version, as gestures may be inconsistent on very old releases. Second, some apps may not fully support the split layout, especially those with custom keyboards or non-standard text fields. In such cases, rely on the standard keyboard for reliability unless you find app-specific support for the split layout. Third, ensure your fingers are placed correctly on the keyboard surface and that you are performing a two-thumb outward spread rather than a broader swipe or a pinching motion, which is often used to zoom. If you still don’t see the split after trying in multiple apps, reboot the device and test again. Finally, be mindful of screen accessories like screen protectors or cases that may slightly alter touch sensitivity; if you notice inconsistent responses, try typing first without any protective layers to rule out interference.
In the event that you rely on accessibility features, review any related settings that could influence gesture detection, such as reduced motion or assistive touch options, which can subtly affect how gestures are recognized. If you plan to use the split keyboard in public or on the go, consider practicing in a quiet location first to build muscle memory and ensure you can consistently reproduce the gesture without distraction.
Accessibility considerations and best practices
Split keyboard typing can be a valuable accessibility feature for users who need to minimize finger stretch or who type with one hand frequently. By creating two distinct typing zones, you can maintain a natural thumb position while reducing awkward wrist angles. When adopting this layout, be mindful of posture and screen height to prevent neck or shoulder strain. Also, test the split layout across different apps because some environments may bias toward a single central keyboard. For users with motor control differences, take the time to adjust the width until the gesture feels smooth and repeatable. Practicing short sessions at increasing intervals helps build familiarity and reduces fatigue over time.
If you rely on assistive technologies or voice input in combination with split typing, consider how the two configurations interact. Some voice-to-text workflows may be more efficient when the keyboard is split, while others may benefit from a larger typing area. The ultimate goal is to create a comfortable, sustainable typing pattern. As you gain experience, you’ll be able to decide when the split keyboard is most advantageous and when to switch back to a standard layout.
How to revert to the standard keyboard for optimal typing
Reverting to the standard keyboard is quick and straightforward. Simply pinch the two halves together, or perform a gentle pull toward the center if the halves resist merging. If the two halves do not merge smoothly, try tapping a key or returning to a blank text field to refresh the keyboard view. In most cases, a quick device reboot is not necessary, but restarting the app or the device can resolve minor glitches. When you rejoin, you can immediately test again and compare the experience with your preferred new width. Over time, you’ll develop a personal baseline that saves time and reduces fatigue across tasks such as composing emails, taking notes, and chatting with friends.
Final notes and practical tips
The split keyboard is a powerful feature for many iPhone users, but its effectiveness depends on individual comfort and the apps you use. Start with modest tweaks and gradually adjust as you type more. Keep sessions short during the initial learning phase to prevent fatigue and build muscle memory. Use the split gesture in situations where reach is a limiting factor, such as large messages or messages in one-handed scenarios, and switch back when you need precision for longer sentences. With deliberate practice, you’ll find a rhythm that maximizes both speed and comfort while preserving accuracy. Remember, the goal is a more natural typing posture, not speed alone. Experiment, compare, and choose the approach that best fits your workflow.
Tools & Materials
- iPhone with compatible iOS version(Ensure the OS version supports split keyboard gestures.)
- Text-input app (Messages, Notes, Email, etc.)(Any app with a text field will work.)
- Optional: Screen-friendly case or grip(If you need extra stability while typing.)
Steps
Estimated time: 5-10 minutes
- 1
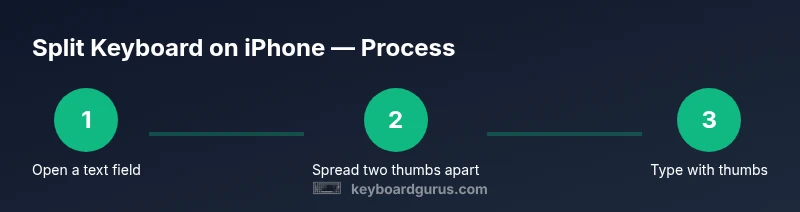
Open a text field
Tap a text field in any app to summon the keyboard and prepare for the split gesture. A stable view helps with accurate thumb placement.
Tip: If the keyboard is hidden by an app-wide bar, scroll or tap into a new text field to trigger the keyboard. - 2
Initiate the split gesture
Place two thumbs on the keyboard surface and gently spread them apart toward the left and right edges.
Tip: Keep your thumbs relaxed to avoid unintended swipes. - 3
Position the split for comfort
Move the two halves outward or inward until they align with your thumbs’ resting positions.
Tip: If the halves feel too wide, slide them closer and re-spread to a comfortable width. - 4
Type with both thumbs
Use each thumb within its respective half to type common letters and phrases efficiently.
Tip: Aim for accuracy first; speed will come with practice. - 5
Adjust width as needed
If you need a different reach, pinch or spread to modify the gap between halves.
Tip: Some apps may limit how wide the halves can expand; adjust expectations accordingly. - 6
Rejoin when finished
Pinch the halves back toward the center to merge into a single keyboard.
Tip: If rejoining is sluggish, try tapping a key to refresh the keyboard state. - 7
Explore one-handed keyboard mode
In some iOS versions, a dedicated one-handed keyboard mode exists for even easier thumb typing.
Tip: Test both split and one-handed modes to find your preferred setup. - 8
Practice across contexts
Try the split layout in Messages, Notes, and email to understand how it behaves in different apps.
Tip: Consistency across contexts helps you build muscle memory faster.
Got Questions?
Can I split the keyboard on all iPhone apps?
Most native and many third-party apps support the split keyboard, but some apps may center the keyboard or restrict the layout. If you don’t see two halves, try a different app or update your iOS.
Most apps support it, but you might need to try another app if you don’t see the split.
How do I rejoin the keyboard after splitting?
Pinch the two halves together with two fingers. If the halves don’t merge, tap near the space bar to refresh the keyboard state.
Pinch the halves back together to merge.
Is there a gesture to adjust the width while split?
Yes. You can spread or pinch to widen or narrow the split. This works best after you’ve started the gesture and have the two halves visible.
Spread or pinch to adjust width.
Can I enable split keyboard automatically in the future?
iOS does not automatically split keyboards; you’ll need to perform the gesture when needed or enable one-handed keyboard mode in settings if available.
The split gesture is manual; consider one-handed mode too.
What should I do if the split keyboard won’t appear?
Ensure you are using a supported iOS version, try a different app, and confirm you’re performing the outward gesture correctly. If needed, restart the device.
Check iOS version and try again, or restart.
Watch Video
What to Remember
- Split keyboard reduces reach and fatigue
- Two-thumb outward gesture is primary method
- Rejoin by pinching halves together
- Not all apps support the feature equally