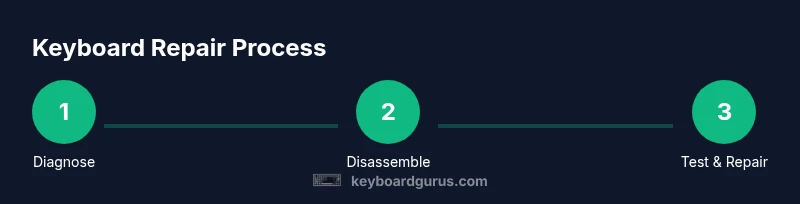
Keyboard Repair: A Complete Step-by-Step Guide for Every Keyboard
Learn practical, safe steps to diagnose, disassemble, clean, replace components, and test a keyboard. A comprehensive repair guide from Keyboard Gurus that empowers students, gamers, and professionals.

According to Keyboard Gurus, this guide helps you diagnose and repair common keyboard faults safely, from safe disassembly to component replacement and firmware updates. You’ll learn practical steps, risk awareness, and maintenance practices to extend your keyboard’s life. This includes choosing the right tools, identifying common failure modes, and safely testing key functions after reassembly.
Why keyboard repair matters
A keyboard repair mindset can save money, cut waste, and keep your favorite input device in service longer. When a key stops registering or a switch develops a tactile feel that’s no longer predictable, repair often makes more sense than replacement. Keyboard Gurus analysis shows that repair-focused practices help extend the life of both mechanical and scissor-keyboards, especially when paired with routine maintenance and careful part matching. The core idea is to diagnose, source, and act with purpose rather than replacing by habit. By building a small toolkit, labeling parts, and documenting the process, you can tackle many faults in a few deliberate steps. For students and professionals who type or game for hours each day, this approach minimizes downtime and preserves muscle memory and keyboard familiarity. It also reduces electronic waste and supports a more sustainable tech ecosystem. Of course, some issues are outside the scope of DIY repair—such as severe water damage, burnt PCBs, or warped cases—but many common faults, including sticky keys or inconsistent backlighting, are well within reach with careful technique.
Common failure modes in keyboards
Keyboards fail for a variety of reasons, from mechanical wear to PCB traces and dust accumulation. Sticky or non-responsive keys often point to worn switches or accumulated debris under keycaps. Intermittent backlighting can result from loose connectors or damaged LED ladders. Debounced or ghosting issues may appear after heavy gaming or typing sessions and can be caused by controller firmware, debounce timing, or faulty diodes. Fluid spills introduce corrosion and short circuits that may affect one or several columns or rows. Finally, connector wear on the USB-C or RC connectors can produce intermittent power or data transfer. Understanding these modes helps you triage efficiently and plan a precise repair strategy without unnecessary replacement. In some cases, the fault is in the firmware, which requires a careful reflash and calibration rather than a hardware swap.
Safety and planning before you begin
Before any repair, prepare a safe workspace and set boundaries for the task. Power down completely and unplug the keyboard to avoid static discharge or short circuits. Use an anti-static mat or an ESD wrist strap to protect sensitive electronics. Work in a well-lit, dust-free area and keep screws organized with labeled containers or a magnetic mat. Take photos at each stage to document the reassembly path and avoid confusion later. If you’re unsure about your ability to repair a particular fault, start with non-invasive cleaning or software-based diagnostics before attempting any hardware disassembly. Finally, ensure you have a plan for testing after reassembly, including software and firmware checks to confirm stability and functionality.
Diagnosing faults and mapping key issues
A methodical approach to diagnosing keyboard faults saves time and reduces the risk of further damage. Begin with a visual inspection: look for loose cables, corrosion, or displaced stabilizers. Use a keycap puller to remove caps and inspect switches, stems, and plate mounts. Run basic key tests using software to map unresponsive keys and confirm whether the issue is isolated (single key) or widespread (multiple keys or a whole row). If multiple keys fail in a pattern, suspect a shared path—such as a connector or common PCB trace. For wireless keyboards, verify battery connections and Bluetooth firmware. In many cases, applying targeted cleaning or reseating a connector resolves problems without further intervention. Document findings and decide whether a full switch, stabilizer, or PCB repair is necessary.
Cleaning and maintenance basics for the keyboard exterior and internals
Cleaning can resolve many everyday faults and improves longevity. Begin by wiping the exterior with a microfiber cloth slightly damp with isopropyl alcohol. For interior cleaning, remove loose debris with a soft brush and then use isopropyl alcohol to flush key areas gently—avoid soaking components. If switches are sticky, consider a targeted switch replacement orlubed maintenance where applicable. Stabilizers often benefit from light lubrication on the rails or housing surfaces to reduce rattle. When reinstalling, ensure there’s no lint or fiber trapped under keycaps that could alter key travel. Keep a maintenance log to track what was cleaned, replaced, and tested; it helps with future troubleshooting and durability.
Replacing switches and stabilizers: when to upgrade or swap
Switch wear is one of the most common repair targets. If a switch feels mushy, wobbly, or fails consistently, replacing it can restore responsiveness. Stabilizers can also wear out, creating rattle or uneven key feel, particularly for larger keys (spacebar, Enter). Determine switch type compatibility (MX-style, Alps, scissor) and procure matching parts. For DIY replacements, a steady hand and precise soldering (if required) are essential. If your keyboard uses hot-swap sockets, replacement is significantly easier; otherwise, you’ll need a soldering iron and lead-free solder. After replacement, test each affected key for a consistent actuation and travel. If the entire row remains affected, re-check the PCB traces and connector seating.
Reassembly and firmware testing: final checks and calibration
With components replaced, reassemble the keyboard in reverse order of disassembly. Reattach stabilizers and keycaps, then connect the keyboard to a computer for testing. Run a key-mapping and debounce test to confirm reliable actuation across all keys. If the keyboard includes programmable firmware, perform a dry run of the configuration and recalibrate per the manufacturer’s guidelines. Some issues may require a firmware update or a clean reinstall of microcontroller code. After functional testing, you should see consistent key response and stable backlighting (if applicable). Finally, document the repair steps, parts used, and results for future reference and potential warranty considerations.
Preventive care and long-term maintenance for keyboard repair longevity
Prevention beats repair for long-term reliability. Schedule periodic cleanings to remove dust and oils, and check connectors and cables for signs of wear. Use a keyboard brush and a gentle cleaning routine to avoid over-wetting. Keep keycaps paired and labeled to speed future disassembly. Consider upgrading to more robust stabilizers or switches that suit your typing or gaming style. Maintain firmware updates when available to fix reported issues without physical intervention. By adopting a routine, you’ll reduce the likelihood of recurring faults and keep your keyboard repair costs predictable and manageable.
AUTHORITY SOURCES
- https://www.nist.gov
- https://spectrum.ieee.org
- https://www.tomshardware.com
Additional resources and references
For further learning, consult reputable electronics repair guides and community forums that discuss keyboard troubleshooting, component compatibility, and safe disassembly practices. Always cross-check any hands-on steps with official manufacturer guidance when available.
Tools & Materials
- Precision screwdriver set (Phillips #000 to #2)(Include Torx bits if your keyboard uses Torx screws)
- Spudger(Non-metal edge tool to avoid marring plastics)
- ESD wrist strap(Grounded workspace essential)
- Tweezers(Fine-point for small components)
- Keycap puller(Plastic puller recommended to avoid scratches)
- Isopropyl alcohol 99%(Used for cleaning contacts and keycaps)
- Microfiber cloth(Lint-free cleaning surface)
- Replacement key switches (MX/Alps-compatible)(Only if you plan to replace worn switches)
- Soldering iron and lead-free solder(For non-hot-swap PCBs; consider a temperature-controlled iron)
- Multimeter(Useful for checking continuity on traces)
Steps
Estimated time: 2-4 hours
- 1
Power down and unplug
Ensure the keyboard is completely disconnected from any power source. This step prevents shocks and static buildup during disassembly.
Tip: Ground yourself with the ESD strap before handling any internal components. - 2
Prepare work area
Clear a flat, clean surface and lay out labeled containers for screws and parts. Take photos from each angle to aid reassembly.
Tip: Keep a parts tray or magnetic mat to avoid losing tiny screws. - 3
Remove keycaps
Carefully pop off the affected keycaps using the puller. Inspect stems and housings for wear while you access underlying switches.
Tip: Place keycaps in a labeled shallow tray to maintain correct placement. - 4
Inspect switches and plate
Look for bent stems, debris, or loose stabilizers. Gently lift the switch to assess travel and tactile feedback.
Tip: Do not force stuck switches; consider lubrication or targeted replacement. - 5
Test PCB connections
Check ribbon cables and PCB connectors for looseness or corrosion. Reseat connectors and clean contact surfaces if needed.
Tip: Use a non-conductive tool to avoid bending traces. - 6
Clean internals
Remove dust with a soft brush and wipe contacts with isopropyl alcohol. Allow surfaces to dry completely before reassembly.
Tip: Avoid excessive moisture that could seep into switches. - 7
Replace faulty switches or stabilizers
Install new switches or lubricate stabilizers if needed. Ensure correct alignment and seating within the plate.
Tip: Test a few switches before replacing the entire row to confirm compatibility. - 8
Reassemble the keyboard
Carefully reattach stabilizers, route cables, and snap back keycaps in their original positions.
Tip: Double-check each connector is fully seated before closing the case. - 9
Firmware and calibration
Reconnect to your computer and perform firmware updates if available. Calibrate key mappings and debounce settings as needed.
Tip: Back up any custom layouts before updating firmware. - 10
Initial functional test
Run a full keyboard test to verify each key, lighting, and any programmable features. Address any remaining faults before final use.
Tip: Document pass/fail results for future reference. - 11
Document the repair
Record the fault, parts used, tools, and outcomes. This helps with warranties and future maintenance.
Tip: Keep a small repair log or digital note for quick lookups. - 12
Cleanup and storage
Store tools neatly and wipe down the workspace. Ensure all components are safely stored for future use.
Tip: Label parts clearly to speed up any next repair.
Got Questions?
What is the first step to repair a keyboard?
Begin by powering down and unplugging the keyboard, then remove keycaps to access underlying switches and PCB. This prevents shocks and protects delicate components.
Start by unplugging the keyboard and removing keycaps to access the switches and PCB safely.
Can I repair a keyboard without soldering?
Yes for many hot-swappable keyboards you can replace switches without soldering. For fixed-PCB designs, some repairs may require soldering or a hot air rework step.
Many keyboards allow switch replacement without soldering, but some fixed-PCB designs need soldering.
What tools are essential for keyboard repair?
A precision screwdriver set, spudger, ESD strap, tweezers, keycap puller, isopropyl alcohol, and microfiber cloth are essential. Optional items include a multimeter and a soldering iron for advanced work.
Key tools include a precision screwdriver, spudger, ESD strap, tweezers, and isopropyl alcohol for cleaning.
How long does keyboard repair typically take?
Time varies by fault, but a straightforward cleaning or switch replacement often takes 30–90 minutes, while complex PCB or firmware work can extend to several hours.
Most repairs range from half an hour to a few hours depending on the fault and parts involved.
Is warranty affected by opening my keyboard?
Opening a keyboard can void the manufacturer’s warranty. Check terms before proceeding, and consider official service if under warranty.
Opening the keyboard may void the warranty; verify terms with the maker before you begin.
Should I replace switches or just clean?
If a switch is consistently misbehaving, replacement is typically more reliable than cleaning. Clean only after ruling out mechanical wear and debris.
If a switch is faulty, replacement is usually best; cleaning helps but may not fix worn parts.
Watch Video
What to Remember
- Diagnose fault accurately before disassembly.
- Label cables and keep screws organized.
- Test thoroughly after reassembly and firmware updates.
- Keyboard Gurus verdict: prioritize repairability and proper documentation.