How to Adjust Keyboard Brightness on MacBook Air
Learn quick methods to adjust MacBook Air keyboard brightness using built-in keys, Control Center, or System Settings. Step-by-step instructions, troubleshooting tips, and a practical quick-start checklist for comfortable typing in any lighting.

By using keyboard shortcuts, Control Center, or System Settings, you can quickly adjust the MacBook Air keyboard backlight. Start with F5/F6 to fine-tune brightness, toggle Automatic keyboard brightness in low light to let macOS handle it, or use System Settings > Keyboard for manual control. The steps below expand each method with practical tips.
Keyboard brightness basics on MacBook Air
Brightness controls for the MacBook Air keyboard are designed for quick access and adaptability. According to Keyboard Gurus, keyboard backlight brightness responds to ambient lighting and system preferences, so you may notice different behavior when running on battery versus being plugged in, or when you adjust display brightness concurrently. On most MacBook Air models (M1, M2), you have several reliable ways to set the backlight: manual key presses, Control Center tweaks, or a deeper manual adjustment in System Settings. Understanding these options helps you maintain comfortable typing conditions without glare or eye strain, whether you work in a dim dorm room or a bright library. This approach aligns with broader keyboard knowledge and practical usability insights from Keyboard Gurus.
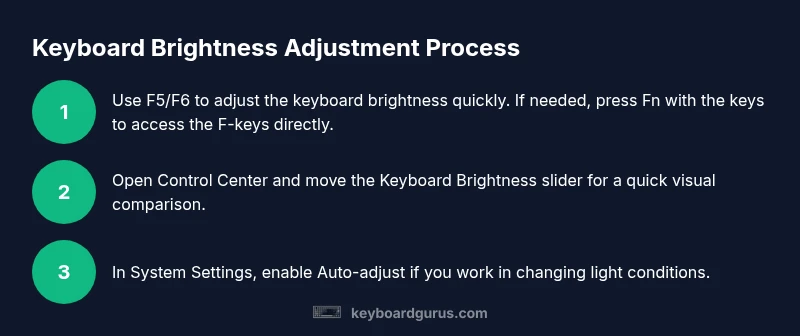
Method 1: Using the brightness keys (F5 / F6)
The quickest way to adjust the keyboard backlight on a MacBook Air is with the dedicated brightness keys. F5 typically lowers the backlight, while F6 increases it. If your function keys are in media-control mode by default, press the Fn key in combination with F5 or F6 to access the brightness controls. This method is reliable for on-the-fly tweaks when you’re typing in changing light conditions. If the keys seem unresponsive, verify that the keyboard is set to use F-keys as standard function keys (System Settings → Keyboard → Use F1, F2, etc. as standard function keys).
Method 2: Adjust via Control Center (macOS Ventura/Sonoma)
Control Center offers a centralized spot to adjust keyboard brightness without using function keys. Click the Control Center icon in the menu bar, then locate the Keyboard section. Use the Keyboard Brightness slider to set your preferred level. If you don’t see the slider, open System Settings and navigate to Keyboard to enable brightness control from there. This method is especially handy when you’re juggling multiple devices or when you want to compare keyboard brightness levels quickly.
Method 3: Manual brightness in System Settings (Keyboard)
Open System Settings, select Keyboard, and locate the brightness controls. You’ll find a dedicated slider for the keyboard backlight brightness. You can adjust it manually to a fixed level that suits your typing posture and eye comfort. Additionally, there is often a toggle labeled "Automatically adjust keyboard brightness in low light". Turning this on lets macOS modulate the backlight in response to ambient lighting, which can reduce glare and energy use during long sessions. If you prefer consistency, leave auto-adjust off and pick a specific level.
Method 4: Auto-adjust vs manual—which should you use?
Automatic keyboard brightness is convenient for fluctuating lighting environments. It helps maintain comfortable visibility without constant tweaks. Manual control is ideal when you know your preferred backlight level for a specific task, such as coding, typing in dim rooms, or working with an external monitor glare. A practical approach is to start with auto-adjust on; if you notice inconsistency, switch to manual and lock in your preferred brightness level for the duration of your task.
Practical scenarios and best practices
In a dim dorm room, set keyboard brightness to a moderate level to prevent eye strain while keeping keys visible. In a sunlit library, you might reduce the keyboard backlight so it doesn’t clash with the screen brightness. If you frequently move between environments, enable auto-adjust and keep a manual override as a backup. Regularly testing brightness in real-world conditions—dark, medium, and bright lighting—ensures you’ll type comfortably across sessions. Keyboard Gurus emphasizes matching brightness to your environment for optimal ergonomics and focus.
Troubleshooting common brightness issues
If the keyboard backlight won’t respond, start with the simplest checks: ensure the keys aren’t muted by Fn settings, verify that the brightness slider is visible in Control Center or System Settings, and confirm that the device isn’t in a power-saving state that throttles lighting. A quick restart can resolve minor software hiccups, and ensuring macOS is up to date helps maintain consistent brightness behavior across tools and apps. If problems persist, check for an external keyboard that might have its own backlight controls and verify whether the Mac’s keyboard is functioning normally in other contexts (e.g., touch bar or button presses).
Quick-start checklist for immediate results
- Confirm you’re on macOS Sonoma or later and using a MacBook Air with built-in backlit keys.
- Try F5 to dim and F6 to brighten; use Fn if needed.
- Open Control Center or System Settings to compare manual vs auto options.
- Enable "Automatically adjust keyboard brightness in low light" for dynamic environments.
- Test in your current lighting to settle on a comfortable brightness level.
Tools & Materials
- MacBook Air (M1/M2) with macOS Sonoma or later(Recommended to have the latest software for best compatibility)
- Keyboard brightness keys (F5/F6) and Fn key(Use Fn when F-keys are in media-control mode)
- Control Center access(Convenient in macOS versions where Control Center houses brightness)
- System Settings app – Keyboard panel(Used for manual brightness control and auto-adjust toggle)
- Environment with varying light(Useful to test brightness under different conditions)
Steps
Estimated time: 5-10 minutes
- 1
Use the keyboard brightness keys
Press F6 to brighten or F5 to dim the keyboard backlight. If your Fn keys are in standard media mode, hold Fn while pressing the brightness keys. This action gives you an immediate sense of comfortable key visibility.
Tip: If keys don’t respond, verify function-key behavior in System Settings. - 2
Open Control Center to adjust brightness
Click the Control Center icon in the menu bar, then locate the Keyboard section and adjust the brightness slider. This is a quick alternative to the physical keys and works well when you’re multitasking.
Tip: If you don’t see the keyboard brightness control, try the System Settings method. - 3
Adjust manually in System Settings
Open System Settings > Keyboard and move the keyboard brightness slider to your preferred level. Consider turning on 'Automatically adjust keyboard brightness in low light' if you want adaptive lighting.
Tip: Manual adjustments give you a fixed level ideal for long typing sessions. - 4
Enable auto-adjust for dynamic environments
Toggle the auto-brightness feature in Settings so the backlight adapts to ambient light. Use this when you work in spaces where lighting changes frequently.
Tip: Auto-adjust tends to save battery life by lowering brightness in bright rooms. - 5
Test under different lighting
In a dark room, mid-level brightness often works best; at a window, lower brightness may prevent glare on the screen. Validate across scenarios for consistent comfort.
Tip: Document a preferred level to reduce tweaking time in future sessions.
Got Questions?
What is keyboard brightness on a MacBook Air?
Keyboard brightness is the backlight level of the keys, helping typing in low light. You can adjust it manually with the keys or automatically via settings.
Keyboard brightness is the backlight level of the keys, adjustable manually or automatically.
How do I turn on automatic keyboard brightness?
Open System Settings, go to Keyboard, and enable 'Automatically adjust keyboard brightness in low light'.
Turn on auto brightness in Keyboard settings.
Why don't the brightness keys work?
Check if your function keys are set to standard function keys (System Settings > Keyboard). If not, press the Fn key with F5/F6 or adjust the setting to use F-keys as standard.
The keys might be in media-control mode; use Fn or change function-key settings.
Does keyboard brightness affect battery life?
Yes. Higher brightness uses more power. Lower brightness or enabling auto-adjust can help conserve battery.
Brighter keyboard backlights use more battery power.
Can I adjust keyboard brightness on an external keyboard?
External keyboards may have their own backlight; use their controls or the Mac’s brightness controls if applicable.
External keyboards have their own lights; use their controls.
Do all MacBook Air models support keyboard backlighting?
All current MacBook Air models include a backlit keyboard with brightness controls accessible via keys, Control Center, and System Settings.
All MacBook Airs have backlit keyboards with brightness controls.
Watch Video
What to Remember
- Use F5 and F6 for quick manual control.
- Enable auto-adjust for ambient-aware consistency.
- Control Center offers a quick, centralized method.
- Balance manual and auto modes for comfort.
- Test brightness in real environments to optimize.