Building a Keyboard: A Complete DIY Build Guide 2026
Learn how to build a keyboard from parts to typing. This guide covers layout choices, component selection, tools, step-by-step assembly, testing, tuning, and maintenance for a personalized mechanical keyboard.

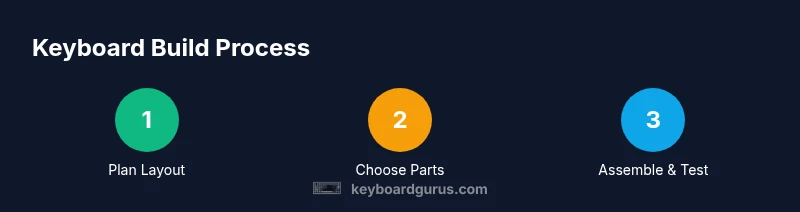
By building a keyboard, you’ll customize layout, switches, and lighting while learning essential soldering and assembly skills. This guide covers planning, sourcing parts, wiring, testing, and tuning from PCB to keycaps, with safety tips and practical timelines. Expect a DIY project that yields a fully usable, personalized keyboard. This entry from Keyboard Gurus walks you through steps, tools, and common pitfalls so you can finish confidently.
Overview of the Keyboard-Building Journey
Building a keyboard is a hands-on, rewarding project that blends design, electronics, and tactile craftsmanship. Whether you’re chasing a compact 60% layout or a full-size board with per-key illumination, the core ideas stay the same: plan your layout, select compatible parts, assemble with care, and test thoroughly. Keyboard Gurus emphasizes taking a methodical approach to avoid frustration and ensure a satisfying final product. This section sets the stage for practical decision-making, cost awareness, and long-term ownership of your custom build.
Understanding Layouts and Form Factors
Form factor determines how many keys your board will have and how you’ll type. Common options include 60%, 65%, 75%, TKL (tenkeyless), and full-size layouts. Each form factor has trade-offs between portability, key coverage, and compatibility with keycaps and stabilizers. Plan for your use case—gaming, productivity, or coding—and consider whether you want split backspace, arrow clusters, or dedicated macro keys. Remember that the layout informs your PCB, plate, and case choices, so decide early to avoid mismatches later.
Choosing Core Components: PCB, Plate, Case, Stabilizers, Switches, and Keycaps
The heart of any mechanical keyboard is the combination of PCB, plate, and case. The PCB defines the electrical matrix and firmware compatibility (QMK/VIAL), while the plate provides stability and acts as a mounting surface for switches. Stabilizers improve spacebar and larger keys, reducing rattle. Switches determine feel and sound, with options ranging from linear to tactile to clicky. Keycaps complete the experience by shaping typing comfort and aesthetics. Start with a known compatible trio (PCB-plate-case) and select switches and stabilizers to match your preferred sound and feel.
Sourcing Parts and Budgeting: A Practical Approach
Create a parts list that aligns with your layout, then estimate costs by category: PCB and case, plate, switches, stabilizers, and keycaps. Don’t forget essential tools, lubricants, and testers. If you’re new, consider starter kits that bundle compatible components to minimize compatibility headaches. Budget for contingencies like extra switches or lubing supplies. Keyboard Gurus guidance emphasizes validation checks before purchasing: verify form factor compatibility, layout support, and firmware readiness to prevent over-purchasing.
Workspace Setup, Safety, and Handling Electrostatic Discharge
A clean, static-safe workspace is crucial when handling electronic components. Use an anti-static mat and wrist strap, keep tools organized, and work in a well-lit area. Safety matters: unplug before wiring, avoid heat exposure that could damage PCBs, and never shortcut cooling times after soldering. Good lighting and a magnifier can help you place tiny components accurately. This section outlines practical habits that protect your parts and ensure cleaner assembly.
Firmware, Testing, and Tuning Basics
Firmware loads the keyboard’s behavior onto the PCB. Most builders use open-source firmware like QMK or VIA, which requires keymap configuration and compiler setup. Test each switch row and column during assembly to catch solder bridges or mis-wired traces early. After flashing firmware, use a keyboard tester tool to confirm matrix integrity and key rollovers. Tuning includes debouncing settings, key remapping, and, if desired, per-key lighting profiles. Keyboard Gurus suggests incremental testing to catch issues before moving forward.
Finishing Touches: Lubing, Dampening, Stabilizers, and Aesthetics
Lubing switches and stabilizers can dramatically alter feel and noise. Choose a compatible lubricant and apply sparingly to moving parts to reduce friction. Dampening materials and case design can soften sounds and prevent hollow ping. Aesthetics matter: color schemes, custom keycaps, and cable management create a cohesive look. Techniques like lubing hinges and stabilizers should be done slowly and evenly to avoid gunk buildup. This section helps you tailor the final experience to your preferences.
Maintenance, Troubleshooting, and Upgrades
A well-built keyboard remains a joy with regular maintenance. Clean keycaps gently, check for loosened screws, and inspect switches for wear. If a key misbehaves, retest the switch, reflow solder joints, or swap the switch. For upgrades, you can swap switches or upgrade the keycaps without rebuilding from scratch. Keyboard Gurus recommends documenting your configurations and firmware versions to simplify future changes and troubleshooting.
AUTHORITY SOURCES
- OSHA: https://www.osha.gov
- MIT OpenCourseWare: https://ocw.mit.edu
- IEEE Xplore: https://www.ieeexplore.ieee.org
Tools & Materials
- Soldering iron(40-60W, temperature-controlled preferred)
- Solder(Lead-free preferred; rosin-core flux helpful)
- Desoldering braid or pump(For corrections without damaging PCB)
- Flux(Flux pen or paste to improve joints)
- PCB (hot-swap or soldered)(Verify form factor and layout support)
- Plate(Matched to PCB and case; material varies (PC, FR4, gasket))
- Case(Ensure it fits your layout and plate type)
- Switches(Pack of at least 84 for full-size or appropriate count for layout)
- Stabilizers(Prevent rattle on larger keys like spacebar)
- Keycaps(Set of compatible profile for your layout)
- Keycap puller(For safe keycap removal)
- Switch puller(Optional for hot-swappable builds or difficult switches)
- Lubricant kit(For smoother switches (optional))
- Multimeter(Optional, for checking continuity)
- Anti-static mat and wrist strap(Protects components from static discharge)
- Precision screwdriver set(For case assembly and plate screws)
Steps
Estimated time: 6-8 hours
- 1
Prepare workspace and safety gear
Set up a clean, well-lit area with an anti-static mat. Put on an anti-static wrist strap and organize tools. Review your BOM and ensure you have all essential parts before starting.
Tip: Double-check that the workspace is static-free before handling PCBs. - 2
Plan layout and verify compatibility
Review your chosen layout, form factor, and firmware compatibility. Confirm the PCB, plate, and case are designed to work together, and map the key positions to the switch count you will use.
Tip: Use a layout diagram to avoid mix-ups during assembly. - 3
Mount the plate and PCB (soldered or hot-swap)
If soldering, align switches into plate, insert into PCB holes, and prepare for soldering. If hot-swappable, ensure PCB supports hot-swap sockets and insert switches carefully.
Tip: Take your time aligning switches—misalignment causes binding later. - 4
Solder switches (for non-hot-swappable builds)
Apply flux, heat each switch pad, and flow solder to create clean joints. Inspect each joint for voids and reflow if necessary.
Tip: Let joints cool briefly before testing continuity. - 5
Install stabilizers and plate assembly
Mount stabilizers on larger keys and secure the plate onto the PCB and case. Ensure there is no wire routing under stabilizers that could cause binding.
Tip: Lubricate stabilizer inserts if you plan to tune the feel. - 6
Wiring, firmware, and testing basics
If required, route any wires per your PCB’s design and connect to controls. Flash firmware (QMK/VIA) and test each row/column with a keyboard tester.
Tip: Test one section at a time to isolate issues quickly. - 7
Install keycaps and final tweaks
Place keycaps in the intended layout and verify legend orientation. Perform a quick typing test to confirm key alignment and comfort.
Tip: Check for interference with stabilizers and cap skirts. - 8
Tune, lube, and finalize
If desired, lubricate switches and stabilizers for smoothness. Adjust debounce settings and lighting profiles in firmware, then save your final layout.
Tip: Document settings for future updates. - 9
Full test and documentation
Run a final full-keyboard test, check firmware version, and record your build notes. Keep a parts list and setup info for future upgrades.
Tip: Back up firmware and keymaps for quick recovery.
Got Questions?
Do I need soldering to build a keyboard?
Most traditional PCBs require soldering to attach switches. Hot-swappable boards allow you to insert switches without soldering. Check your PCB specifications before purchasing.
Traditional PCBs usually require soldering, but hot-swappable options exist if you prefer not to solder.
What tools are essential for beginners?
A basic soldering iron (if not using hot-swappable), a multimeter, precision screwdrivers, a keycap and switch puller, and quality flux. An anti-static mat and wrist strap are also important for safety.
In short, you’ll want a suitable soldering iron, a case of precision tools, and anti-static safety gear.
Is a specific switch type necessary?
No single switch type is required. Choose based on feel (linear, tactile, or clicky) and intended use. You can mix switch types if your PCB supports it, but keep compatibility in mind.
You can pick linear, tactile, or clicky switches based on your preference and use case.
How long does it take to complete a build?
Time varies by experience and complexity. A simple build can take a few hours; a more complex, custom setup may take longer. Plan for a weekend if you’re new.
It depends on experience, but expect several hours to a day for most builds.
Can I reuse an existing case with a new keyboard?
Yes, if the form factor and mounting points match your new PCB and plate. You may need adapters or a different plate to fit.
If the case fits the form factor and mounting points, reuse is possible with some adjustments.
Watch Video
What to Remember
- Plan your layout before sourcing parts
- Verify component compatibility (PCB, plate, switches)
- Test switches early for wiring issues
- Tune stabilizers and lube switches for feel