How to Make a Bullet Point on Keyboard
Learn practical ways to create bullet points on any keyboard across Windows, macOS, and mobile. This guide covers shortcuts, character tricks, and formatting tips for clean, accessible lists.

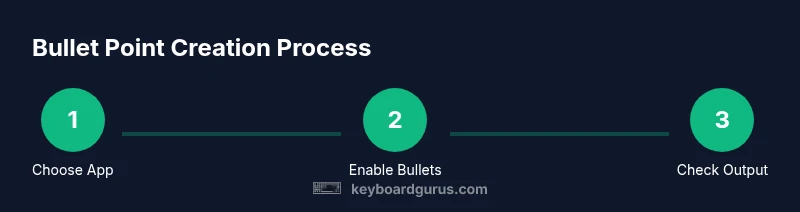
Here's how to make a bullet point on a keyboard: start by choosing your target app (word processor, email, or note app). Then use the built-in bullets feature or insert a bullet character directly with platform-specific shortcuts. This guide covers Windows, Mac, and mobile methods, plus tips for accessible, well-formatted lists.
How to Make a Bullet Point on Keyboard: Cross-Platform Basics
Bullet points are a cornerstone of clear writing. They help readers scan ideas quickly and compare items at a glance. Whether you’re drafting notes for class, organizing a project plan, or composing an email, knowing how to make a bullet point on keyboard saves time and reduces formatting friction. This section sets the stage for cross-platform methods, common bullet characters, and practical rules you can apply in any app. You will learn how to choose between simple ASCII bullets for plain-text contexts and fully formatted bullets for rich-text editors. By the end, you’ll have a toolkit that keeps your lists consistent across Windows, macOS, and mobile environments.
Quick-start shortcuts for Windows, Mac, and mobile
Most apps share two broad approaches to bullets: applying a list style from the formatting toolbar or inserting a bullet character directly. On Windows, you can often start a bullet list with the Bullets button or a simple keyboard shortcut in your editor; in some apps you can also type a bullet using Alt codes (for example, Alt+0149 to insert •, provided you’re using a numeric keypad). On macOS, Option+8 consistently yields a bullet symbol •, and many editors accept a list command from the menu. On mobile devices, bullets are usually accessible from the punctuation row or via long-press options on dash or period keys. The main idea is to pick a method that feels fast and reliable in your workflow.
Typeable bullet characters and where to insert them
In quick-note scenarios or environments without robust list features, you can insert a bullet character manually. Windows users commonly rely on Alt+0149 (with the numeric keypad) to create the bullet •, while macOS users use Option+8. On iOS and Android devices, you’ll typically find bullets in the punctuation panel, or you can long-press a hyphen, asterisk, or period to reveal bullet options. While manual bullets are handy for short notes, rely on the app’s list tools when you want automatic indentation, consistent spacing, and proper accessibility semantics.
When to use simple ASCII bullets vs formatted bullets
ASCII bullets like - or * are convenient for plain-text notes or emails where rich formatting isn’t available. However, in word processors and presentation tools, built-in bullet formatting ensures consistent indentation, spacing, and alignment. If you’re sharing documents across platforms, formatted bullets maintain their appearance when exported, while plain ASCII bullets can look inconsistent in different clients. For maximum readability, reserve ASCII bullets for plain-text contexts and use the app’s bullet feature for formal documents.
Using bullets in popular apps: Docs, Sheets, Notes, Email
Google Docs and Microsoft Word provide a Bullets button that automatically formats the current paragraph as a list and continues the bullet sequence as you press Enter. Apple Notes and Google Keep also support lists, though their default bullet style may differ. When composing emails, bullets improve readability and structure—but verify rendering in both HTML and plain-text modes. If you copy-paste lists between apps, you may need to reapply the list style to preserve proper formatting.
Troubleshooting and accessibility tips
If bullets don’t show as expected, check whether you’re in rich-text mode versus plain text. Templates or styles can override bullet formatting, causing bullets to disappear or become plain text. For accessibility, ensure each item begins on its own line with a list marker or bullet character. Avoid excessive nesting, as deep hierarchies can confuse screen readers. When exporting to HTML, use semantic lists (ul and li) rather than plain bullets for better compatibility with assistive technologies.
Advanced: custom bullets and numbering
Most editors let you customize bullets with different symbols (dots, dashes, squares) or even icons from fonts. You can also create nested bullets by indenting items, or switch to a numbered list for step-by-step instructions. To customize, select the list and choose a style from the formatting toolbar, or define a custom bullet in the font or symbol menu. Consistency remains key: pick a bullet set and apply it uniformly across the document.
Tools & Materials
- Keyboard(Any standard layout; wired or wireless)
- Mouse or trackpad(For accessing menu options quickly)
- Target application(Word processor, note app, email client, etc.)
- Num keypad (Windows Alt codes)(Only if you plan to type Alt codes)
- Mobile device with keyboard(If testing on iOS/Android)
Steps
Estimated time: 15-25 minutes
- 1
Open the document and place the cursor
Open the document where you want bullets and position the cursor where the first bullet should appear. This ensures the list starts exactly where you intend.
Tip: Starting in the right spot saves editing time later. - 2
Apply the bullet list feature
Use the app’s Bullets button or a standard keyboard shortcut to turn the current paragraph into a list item. This activates automatic bullet formatting for subsequent lines.
Tip: If you don’t see the button, check the Format/Paragraph menu or customize the toolbar. - 3
Insert a manual bullet character (optional)
If the app doesn’t support lists, insert a bullet symbol directly using Alt+0149 (Windows) or Option+8 (Mac).
Tip: This creates a single bullet symbol, not a full list. - 4
Continue the list with Enter
Press Enter to add another bullet item. Most editors auto-insert the bullet for the new line.
Tip: Press Enter twice to end the list. - 5
Create nested bullets
Indent a line (Tab or Increase Indent) to create a sub-bullet. This helps organize complex ideas.
Tip: Keep nesting shallow for readability. - 6
Convert bullets for shared formats
If copying to another app, use Paste Special or clear formatting to keep bullet shape intact.
Tip: Plain-text paste may strip bullets; verify in the target app.
Got Questions?
What is a bullet point and why use bullet points?
A bullet point marks individual items in a list, improving readability and scannability. Bullet points help organize ideas and ensure consistent formatting across sections.
Bullets help you organize items so readers can scan quickly.
How do I make bullet points in Word or Google Docs?
In most editors, select your text and click the Bullets button or use a platform-specific shortcut to start a list. Each new line continues the bullets automatically.
Use the Bullets command to start a list, then press Enter for more items.
Can I use custom bullets like icons or emojis?
Yes, many editors let you choose different bullet symbols or insert icons from fonts or emoji sets. Consistency across the document is key.
You can switch bullets to icons, but keep the style uniform.
Why do bullets look different in other apps?
Different apps apply distinct default styles; exporting or copying may change their appearance. Use a standard bullet style for consistency.
Bullets may look different due to app-specific styles.
Are bullet lists accessible to screen readers?
Yes, when structured properly with separate list items, screen readers announce each item. Use semantic lists rather than plain text bullets for better accessibility.
Proper lists are more accessible to screen readers.
What should I do if I need to share bullet-heavy notes?
Test the document in plain text and HTML exports to ensure bullets render correctly. Consider using simple ASCII bullets in plain-text contexts.
Test bullets before sharing across apps.
Watch Video
What to Remember
- Master the built-in bullet features across apps
- Use manual bullets only when formatting is unavailable
- Test bullets when exporting or sharing
- Keep nesting simple for screen reader clarity
- Customize bullets consistently across documents