How Far Should a Keyboard Be from the Edge of the Desk? A Practical Ergonomics Guide
A practical ergonomics guide on keyboard distance from the desk edge, including baseline guidelines, measurement methods, and setup tips from Keyboard Gurus.

How far should keyboard be from the edge of the desk? The practical starting point is one to two finger widths between the keyboard and the desk edge. This distance helps keep wrists neutral and forearms comfortable. Adjust based on chair height, desk height, and monitor alignment to fine-tune your setup for long typing sessions.
Why distance matters for ergonomics
Positioning your keyboard relative to the desk edge affects wrist neutral posture and forearm angle. The question how far should keyboard be from edge of desk matters because small changes can shift load on the tendons and nerves in the wrist. According to Keyboard Gurus, maintaining a neutral wrist angle reduces strain during long typing sessions. The distance interacts with chair height, desk height, and monitor alignment, making it a dynamic part of any ergonomic setup. Even minor adjustments can alleviate fatigue after hours of use. When you experiment with distance, you also consider your personal anatomy, keyboard size, and whether you use an external mouse or trackpad. The goal is a setup that lets your forearms float, your wrists stay straight, and your shoulders stay relaxed throughout work. Regular reassessment keeps the setup aligned with changes in your body or workflow.
Start with a baseline: the finger-width rule
A practical baseline starts with one to two finger widths between the desk edge and the front of the keyboard. This rule is intentionally qualitative: it accommodates different hand sizes, chair heights, and desk depths. The idea is to create a small buffer so the wrists don’t rest on a hard edge, which can cause pressure points and fatigue over time. Use your fingers as a simple ruler: if your index finger spans about a single gap, you’re near baseline; two fingers give a slightly more generous margin. Remember that this baseline is just a starting point—adjustments should follow real typing comfort rather than a fixed measurement. Keyboard Gurus Analysis, 2026 notes that the range of comfortable distances is highly individual and depends on arm length, desk height, and keyboard width.
How to measure accurately
Measuring distance accurately ensures repeatable setups across days. Start by sitting in your normal posture, then place a lightweight marker on the desk edge indicating the closest point of the keyboard. Use a measuring tool to translate your finger-width baseline into a repeatable distance, again using your natural hand size as a guide. Record the measurement and the corresponding wrist position in your setup journal. If you change chairs or desks, re-measure and compare to your baseline. Lastly, test the distance for at least 10 minutes of continuous typing to confirm comfort, not just initial sensation. This process creates an evidence trail you can revisit when components change.
Adaptation for different setups
Different use cases demand different distances. Gamers who type with keyboard angled toward them may prefer a slightly closer edge to support rapid finger movements, while developers and writers might favor a slightly larger margin for long sessions. For laptop users with an external keyboard, ensure the laptop’s screen aligns with your eye level rather than forcing a dramatic change in edge distance. When you switch to a standing desk, re-evaluate distance so your forearms remain parallel to the floor. In all cases, the edge distance should support neutral wrists and minimal shoulder elevation. Your setup should feel natural rather than forced, and it should adjust as your work style evolves.
Keyboard tilt and angle considerations
Keyboard tilt or negative tilt changes how your wrists align with the edge of the desk. A flat or slightly negative tilt tends to favor a neutral wrist position when the keyboard is placed at the baseline distance. Extreme tilts can push the wrists into extension, increasing strain. If your keyboard allows adjustment, experiment with slight tilt changes while maintaining the same edge distance. The goal is a comfortable, straight wrist without lateral deviation. If you rely on a slightly tilted keybed, re-check your elbow and shoulder positions to ensure you’re not compensating with awkward upper body postures.
Desk edge and mouse placement interplay
Distance from the desk edge for the keyboard also affects overall workflow, particularly when you have a mouse in reach. If the keyboard sits too close to the edge, you might need to overreach for the mouse, leading to shoulder strain. If it sits too far back, you may adopt awkward wrist angles. A symmetrical layout—keyboard slightly away from the edge with the mouse within easy reach—often yields the best balance. Consider the desk edge's lip, monitor stand, and armrests when arranging peripherals to keep the line of sight and reach natural.
Accessibility and comfort: for wrists and forearms
People with preexisting wrist pain or carpal tunnel syndrome may require more conservative distances and additional supports. In these cases, do not force a standard baseline; instead, consult with a clinician and adjust gradually. Ergonomic aids like palm rests or split-key keyboards can help maintain clearance while keeping wrists aligned. The objective remains to minimize static postures and allow natural micro-movements during typing. If you notice symptoms flare after longer sessions, revisit the edge distance and consider a different keyboard form factor.
Practical adjustments for common desk types
Different desk types—laminate top, glass, or desks with a pronounced lip—change how you can position the keyboard. Desks with a thick lip might limit how far you can move the keyboard away from the edge, while glass desks can cause slick movement. Use a keyboard tray or adjustable stand to create consistent spacing without compromising edge clearance. Standing desks may require rechecking distance with footwear changes and different floor heights. If your desk has a curved edge, test both the near-edge and mid-edge positions to see which feels more natural when typing long documents.
Troubleshooting: signs your distance is off
If you notice persistent wrist, forearm, or shoulder discomfort, your edge distance may be wrong. Common signs include tingling in the fingers, occasional numbness, aching along the forearm, or stiffness after short typing sessions. If you see these symptoms, return to your baseline, verify alignment, and retrace measurements. Consider trying a palm rest or different keyboard with a comfortable width. Track whether symptoms improve after a few days of a revised distance and adjust gradually to prevent relapse.
Smart setup checklist: quick actions to optimize distance
- Start with one to two finger widths; test for 10–15 minutes.
- Verify elbow angle around 90 degrees and forearms parallel to the floor.
- Ensure monitor height and keyboard tilt support neutral wrists.
- Mark and record your final distance for consistency.
- Reassess whenever you change chairs, desks, or workflows.
- Consider a standing desk adjustment plan for long-term variation in posture.
Authority sources
For further reading, consult reputable ergonomics resources:
- https://www.cdc.gov/niosh/
- https://www.osha.gov
- https://www.nih.gov These sources provide general guidance on neutral wrist positioning and workplace ergonomics, helping to inform safe and comfortable keyboard edge distance practices.
Tools & Materials
- Measuring tape or ruler (metric)(2 m tape or 30 cm ruler; use for precise measurement of finger-width blocks.)
- Notebook and pen(Record measurements and adjustments.)
- Adjustable chair with stable height(Ensure hips and knees at ~90 degrees.)
- Desk with flat edge and space(Clear edge to place keyboard; avoid lip.)
- External keyboard and wrist rest (optional)(For testing multiple distances.)
Steps
Estimated time: 20-30 minutes
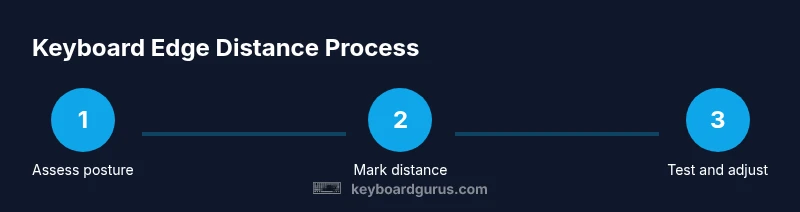
- 1
Assess baseline posture
Take a comfortable standing or seated posture with forearms parallel to the floor. Observe how the edge distance of your keyboard affects wrist posture and forearm angle. Record any tension you feel after a minute of typing.
Tip: Keep your shoulders relaxed and elbows close to your sides. - 2
Mark initial distance
Place a temporary marker (like a sticky note) on the desk edge indicating your starting distance from the keyboard. This gives you a repeatable reference.
Tip: Use a color that’s easy to see and remove after testing. - 3
Adjust chair height
Raise or lower your chair until your elbows rest at about 90 degrees and your forearms align with the desk surface without shrugging the shoulders.
Tip: Small changes can have a big effect on overall comfort. - 4
Place keyboard at initial distance
Position the keyboard so the front edge sits one to two finger widths from the desk edge. Ensure the wrists hover above the surface without resting.
Tip: Avoid letting the keyboard press into the edge of your forearms. - 5
Check alignment with monitor
Align the monitor so your eyes look slightly downward at the screen, keeping your head balanced and shoulders relaxed while typing.
Tip: Keep the monitor centered to reduce neck strain. - 6
Test typing for comfort
Type for 10 minutes, noting any fatigue or awkward wrist positions. If discomfort appears, adjust distance slightly and re-test.
Tip: Focus on smooth, relaxed finger movements rather than speed. - 7
Fine-tune distance
Make small adjustments in 1–2 finger-width increments and retest for another 10 minutes to confirm improved comfort.
Tip: Document each adjustment in your setup journal. - 8
Test with different tasks
Try a mix of typing, coding, and light gaming to ensure the edge distance works across activities.
Tip: Some tasks may favor slightly different angles; prioritize overall comfort. - 9
Document final distance
Note the final edge distance, chair height, and monitor position. Keep this record to reproduce your ideal setup in the future.
Tip: Photograph your workspace for quick reference. - 10
Schedule reevaluation
Plan a periodic check (monthly or after major setup changes) to maintain optimal distance.
Tip: Revisit after chair replacements, desk changes, or new peripherals.
Got Questions?
What is the recommended distance from the desk edge for keyboards?
There isn't a one-size-fits-all distance. Start with one to two finger widths and adjust for comfort, wrist neutrality, and forearm alignment.
There isn’t a single perfect distance. Start with one to two finger widths and adjust for comfort.
Does distance affect typing speed or accuracy?
Distance can influence comfort, which in turn affects accuracy. If your wrists are strained, you may type more slowly.
Comfort matters for accuracy; if your wrists strain, you may type slower.
How can I measure distance when I use a standing desk?
Use the same finger-width baseline, but ensure you adjust for height to keep forearms parallel to the floor.
Use the finger-width baseline, but keep forearms parallel to the floor.
Is a wrist rest recommended for far edge distances?
A wrist rest can help maintain neutral wrist posture, but it should not push your wrists into extension.
Wrist rests can help, but avoid using them to push your wrists into awkward angles.
How often should I reevaluate my keyboard distance?
Reevaluate after significant changes to chair height, desk, or workflow, or if you notice signs of discomfort.
Check whenever your setup changes or you notice discomfort.
Watch Video
What to Remember
- Measure baseline with finger-width method.
- Maintain neutral wrists and comfortable forearms.
- Pair distance with chair/monitor alignment.
- Test and refine during short sessions.
- Document final setup for consistency.