How High Should Your Keyboard Be? An Ergonomic Guide
Learn how to set your keyboard height for optimal ergonomics. Step-by-step measurement, setup tips, and practical adjustments to reduce wrist, shoulder, and neck strain.

The ideal keyboard height achieves a neutral wrist position and relaxed shoulders. Aim for your forearms to be parallel to the floor and wrists straight, with the keyboard roughly at elbow height when seated. Use a chair with proper height and a desk or keyboard tray to adjust tilt. Small adjustments based on your body can reduce strain and improve comfort over long sessions.
Understanding Ergonomics of Keyboard Height
The question 'how high should keyboard be' reflects a core ergonomic principle: reduce strain by aligning your arms, wrists, and shoulders in a neutral posture. When the keyboard sits at the right height, your forearms can rest parallel to the floor with minimal bend at the elbows, and your wrists stay straight during typing. Keyboard height interacts with chair height, desk depth, and typing style, so there is no universal inch value. Instead, aim for a comfortable baseline and test it across different tasks. This approach, highlighted by Keyboard Gurus, prioritizes long-term comfort over guessing a fixed height.
How to measure your ideal height at your workstation
Measuring your ideal keyboard height starts with a comfortable seated posture. Sit with your back supported and feet flat on the floor. Let your arms hang loosely at your sides, then raise them so your forearms are parallel to the desk. Using a measuring tape, determine the distance from the floor to your elbow. This elbow height becomes your baseline reference for positioning the keyboard and/or keyboard tray. Remember that the keyboard’s front edge should align close to this elbow height, and the overall setup should allow the wrists to remain straight during typing. Finally, test with typical tasks (typing, scrolling, and gaming) and adjust if you notice shoulder or neck tension. Keyboard Gurus recommends keeping a simple setup log to track what works across days.
Common height presets and when to use them
Many workstations start with a baseline where the keyboard front edge sits at or near elbow height. If you type for long periods, you may prefer a very slight downward tilt toward you to support a neutral wrist position, while some users prefer a flat keyboard with no tilt. Laptop users can achieve a better position by using an external keyboard and a stand to raise the laptop screen to eye level, pairing height with a comfortable typing angle. The key is iterative testing: start at a baseline, then adjust by small increments while monitoring wrist comfort, shoulder relaxation, and neck posture. The goal is a fluid, low-tension workflow rather than a rigid numeric target. Keyboard Gurus emphasizes that individual bodies dictate precise adjustments and that small changes can yield meaningful relief.
Tools and accessories to adjust keyboard height
Adjustability is your friend. An adjustable chair and an adjustable desk or keyboard tray are foundational. A keyboard with built-in tilt feet or a dedicated stand makes fine-tuning easier, while wrist rests can offer support when taking breaks between typing blocks. For dynamic work, consider a sit-stand desk and a monitor arm to preserve posture through height changes. Ensure the setup remains stable with cable management and anti-slip pads so the keyboard stays in place during quick shifts in task focus. Keyboard Gurus highlights that even simple accessories can dramatically improve comfort when used correctly.
For different user types: students, gamers, professionals
Students often spend long hours at a desk with variable setups. For them, a reliable baseline that matches elbow height and a comfortable chair can prevent cumulative strain. Gamers may prefer a slightly lower keyboard for quick, responsive keystrokes and a comfortable wrist angle during intense sessions. Professionals such as developers and writers should prioritize a neutral posture that reduces repetitive strain. Personalize height using a tray or adjustable desk and test across typical tasks to ensure consistent ergonomics. Keyboard Gurus notes that a consistent, repeatable setup is easier to maintain over weeks of heavy use.
Standing desks and sit-stand considerations
If you use a standing desk, aim to keep elbows near 90 degrees and wrists straight when typing. Height should accommodate both seated and standing work modes, so you may need to adjust the keyboard tray or use a foldable stand. When transitioning between positions, move slowly to avoid sudden strain and pause to check posture after each change. Standing work benefits from frequent micro-breaks and wrist-friendly movement to prevent fatigue. Keyboard Gurus recommends reassessing height whenever your footwear, chair, or screen setup changes.
Practical testing: how to verify comfort and efficiency
Test sessions should cover typical tasks: typing, coding, note-taking, and browsing. Time yourself in 15- to 30-minute blocks to observe fatigue patterns. Watch for signs like tensed shoulders, bent wrists, or extended neck leaning toward the screen. If you notice discomfort, adjust the keyboard height by small increments and retest. A simple check is to type a paragraph and then relax your shoulders; if you feel tension returning, tweak the height again. Keeping a brief mood-and-comfort log helps you identify optimal settings over time.
Common mistakes and how to fix them
Common missteps include using a too-low desk, forcing a vertical wrist extension, or neglecting chair height. Fix by raising the desk or using a tray so the keyboard front edge aligns with elbow height. Avoid resting wrists on the desk surface while typing; use a light touch and keep wrists in a neutral line. Finally, avoid over-tilting the keyboard to compensate for a poor chair height; instead, adjust the chair and desk first, then refine tilt as needed. Keyboard Gurus stresses consistency and gradual changes to avoid sudden strain.
Long-term ergonomic health and routine checks
Ergonomic health is an ongoing process. Set a reminder to reassess your keyboard height every few weeks, especially after a desk move or new chair. Regular micro-breaks, shoulder rotations, and wrist stretches support long-term comfort. Document your baseline settings and any changes you make so you can revert if discomfort recurs. Keeping an eye on posture holistically — including monitor height and seat depth — ensures sustainable comfort over months and years.
Tools & Materials
- Ergonomic chair with adjustable height(Ensure height aligns elbows with desk height when seated.)
- Adjustable desk or keyboard tray(Allows precise height and tilt adjustments.)
- Keyboard with tilt feet or stand(Use to control keyboard tilt for a neutral wrist position.)
- Measuring tape or ruler(Measure seated elbow height and desk clearance.)
- Wrist rest (optional)(Can reduce pressure on the carpal tunnel during long sessions.)
- Desk height gauge or mounting bracket (optional)(Helpful for precise standing-desk setups.)
- Cable management and anti-slip pads(Keep setup stable during adjustments.)
Steps
Estimated time: 15-30 minutes
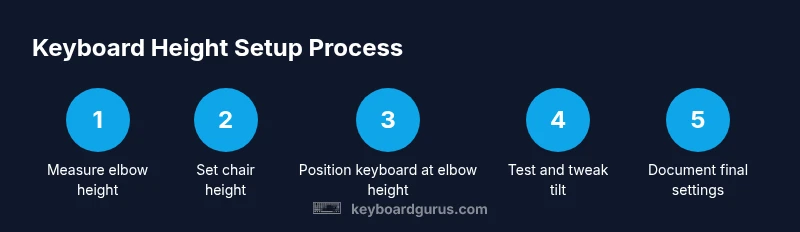
- 1
Measure seated elbow height
Sit with your back supported and feet flat. Allow your forearms to hang at your sides, then raise them so your elbows are at a comfortable 90-degree angle. Use a measuring tape to determine the distance from the floor to your elbow. Record this measurement as the baseline for keyboard height.
Tip: Use a mirror or a partner to verify you’re maintaining a level posture while measuring. - 2
Set chair height to align forearms
Adjust your chair so your elbows align with your baseline height when your forearms rest on the desk. Your wrists should remain straight and in line with your forearms. If your desk is too high or low for comfortable alignment, readjust the chair first before touching the desk.
Tip: Lock the chair height after finding the position to prevent drift during work. - 3
Position the keyboard at elbow height
Place the keyboard so its front edge lines up with your elbow height and your shoulders stay relaxed. If the keyboard tray creates a mismatch, add tilt or adjust height as needed. Ensure the keyboard sits stable and doesn’t slide during typing.
Tip: Aim for a light tilt that allows wrists to stay straight without bending upward or downward too much. - 4
Check wrist posture and adjust tilt
Type with a neutral wrist position—no bending up or down. If the wrists drift, use the keyboard’s tilt feet or a stand to fine-tune. Small tilt changes can significantly improve comfort over long sessions.
Tip: Avoid excessive tilt that forces the wrists into awkward angles. - 5
Test with typical tasks
Run through common activities (typing, coding, gaming, writing) for 15–30 minutes each. Note any discomfort in the neck, shoulders, or wrists. If issues arise, tweak height and tilt in small increments.
Tip: Keep a simple log of changes and resulting comfort levels. - 6
Add accessories and refine
Incorporate a light wrist rest if needed, and ensure cable management keeps the desk tidy. Recheck posture after adding any accessory to confirm no new strain appears.
Tip: Avoid relying on a wrist rest during typing; use it only as a support when not typing. - 7
Document final settings
Record your final chair height, desk or tray height, and keyboard tilt for future reference. Revisit these settings if your workstation changes or if you notice increased fatigue.
Tip: Store the setup notes with your workstation so you can quickly revert if needed.
Got Questions?
What is the best way to measure keyboard height?
Measure seated elbow height first, then compare it to the desk and keyboard position. Use this baseline to position the keyboard so the front edge aligns with the elbow height and wrists stay neutral during typing. Recheck after short typing sessions and adjust as needed.
Measure your elbow height while seated and align the keyboard so your wrists stay straight; test and adjust as needed.
Can poor keyboard height cause neck strain?
Yes. If the keyboard is too high or too low, you may bend or extend the neck to see the screen, increasing strain. Keeping a neutral wrist and relaxed shoulders helps reduce neck tension.
Yes, improper height can contribute to neck strain; maintain neutral wrists and relaxed shoulders.
Should I use a wrist rest?
A wrist rest can reduce pressure at rest and during breaks, but avoid resting wrists while typing. Use it for support between tasks rather than as a typing aid.
Wrist rests can help during breaks, but don’t rely on them while typing.
Does a standing desk require different keyboard height?
Yes. When standing, keep elbows near 90 degrees and wrists straight. You may need a higher keyboard tray or external keyboard to maintain neutral posture across standing and sitting.
Yes, standing requires rechecking height to keep wrists straight.
What if I have a laptop-only setup?
Laptops are often too low for ergonomic typing. Use an external keyboard and stand or riser to bring the keyboard to elbow height, preventing wrist strain.
If you’re using a laptop, add an external keyboard and raise the screen for ergonomics.
Watch Video
What to Remember
- Align keyboard height with elbow level for neutral wrists.
- Use adjustable chair/desk to fine-tune height.
- Test setups with real tasks; adapt until comfortable.
- Record final settings for consistency.
- Seek professional advice if pain persists.