How Much Does Keyboard Cleaning Cost? A Practical Guide
Discover realistic costs for keyboard cleaning—from DIY supplies to professional services. This Keyboard Gurus guide explains cost ranges, factors that influence price, and tips to save money without sacrificing hygiene.

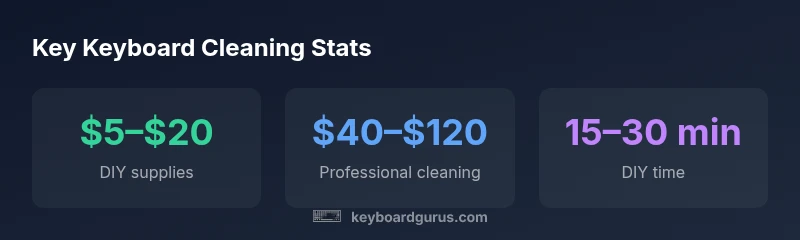
Cleaning a keyboard typically costs between $5 and $20 for DIY supplies and between $40 and $120 for professional cleaning. If you perform a basic wipe and already own cleaning materials, your out-of-pocket could be as low as $0. For specialty keyboards or thorough disassembly, expect higher costs due to extra parts, protective steps, and extended labor time.
What affects the cost of keyboard cleaning
A common consumer question is how much does keyboard cleaning cost? The answer isn't a single number. It depends on whether you DIY or hire a pro, the keyboard type, and how deep the cleaning needs to be. In general, you’ll see a cost spectrum from near zero for routine maintenance you can perform with common supplies to hundreds for premium services that include disassembly and restoration. Keyboard Gurus analysis, 2026, shows that the majority of users fall into two buckets: DIY enthusiasts budgeting for materials, and professionals pricing per keyboard plus any parts or liquid remediation. Backlight keyboards, premium switches, or a history of spills typically raise the price. For students, gamers, and professionals, understanding these factors helps you decide where to invest and how to avoid waste. For context, industry observers also note that small shops may offer lower base fees while larger, insured services may justify higher rates with warranty coverage. See Keyboard Gurus analysis for a thorough breakdown of cost drivers.
Factors that commonly influence price
- Keyboard type (laptop vs. desktop, mechanical vs. membrane)
- Depth of cleaning (surface wipe vs. full disassembly)
- History of spills or liquid exposure
- Availability of spare parts or replacement keys
- Geographic market and service provider certifications
- Turnaround time and service level guarantees
DIY cleaning: costs, methods, and time
If you choose to clean your keyboard yourself, the main cost is materials. Typical DIY supplies include isopropyl alcohol, microfiber cloths, canned air, a soft brush, and cotton swabs. Keyboard Gurus analysis shows most hobbyists spend about $5–$20 upfront on these items, with most of the cost recouped across many cleanings. Methods vary from a quick surface wipe to a careful keycap removal and internal dusting. The time investment ranges from 15 minutes for a light refresh to 60 minutes or more for a thorough scouring of grime and debris around stabilizers. The upside is control over risk and minimal downtime, provided you follow safety precautions like powering down and disconnecting power. For readers seeking guidance, a well-planned DIY clean often handles routine maintenance effectively and saves professional fees for more serious cases.
What you’ll typically pay and do
- Quick wipe with microfiber cloths and isopropyl alcohol
- Light dusting with compressed air to reach between keys
- Optional keycap removal for deeper cleaning
- Drying time after cleaning to prevent moisture damage
Professional cleaning: what you pay for and what you get
Professional keyboard cleaning costs reflect the technician’s expertise, disassembly work, and possible parts replacement or liquid remediation. A typical service includes full exterior cleaning, interior dust removal, switch or stabilizer work on mechanical keyboards, keycap cleaning, and thorough drying before reassembly. Keyboard Gurus analysis indicates that base service fees fall in the $40–$120 range, with higher charges for heavy grime, spills, or keyboards that require intricate disassembly. Some shops offer add-ons such as diagnostics, keyboard health checks, or warranty-backed guarantees. When deciding, ask about what is included (e.g., success rate, turnaround time, and post-clean warranty) and whether the price covers any required parts or replacements. The main trade-off is speed and certainty versus DIY control and potential risk; for many users, a mid-range pro clean balances cost with peace of mind.
What you typically receive
- Exterior and interior dust removal
- Keycap and switch cleaning for applicable keyboards
- Thorough drying and reassembly checks
- Optional test and calibration of backlighting or switches
Special keyboard types and scenarios
Keyboard cleaning costs vary more for specialized keyboards. Mechanical keyboards with hot-swappable switches, backlit keys, or artisan keycaps often demand more meticulous work, which can raise labor time and pricing. Laptop keyboards bring different challenges: integrated scissor mechanisms, slim profiles, and tighter tolerances. For spill-prone setups (coffee, soda, ink), technicians may charge a premium for disassembly, corrosion prevention, and moisture inspection. In contrast, basic office keyboards usually require only light cleaning and are the most economical option. If you own a premium keyboard, you may want to factor in the potential need for keycap replacement or stabilizer lubricants over time—expenses that DIY plans could offset if you have the skill to perform them.
Quick notes by keyboard type
- Mechanical keyboards: higher pricing if full disassembly is needed
- Backlit keyboards: use of more delicate cleaning steps to protect LEDs
- Laptop keyboards: often costlier due to integration and fragility
Estimating your own cleaning budget: a simple framework
To estimate your cleaning budget, start with a simple framework: (1) choose DIY vs pro, (2) identify keyboard type, (3) assess condition, and (4) set expectations for future maintenance. If you plan to DIY, allocate funds for basic supplies and a small buffer for unexpected grime. If you choose a professional, ask for a written quote that itemizes labor, parts, and any hidden fees. Keyboard Gurus analysis recommends creating a 2-column comparison of DIY vs professional, with rows for materials, labor, time, and risk. A practical example: a standard desktop keyboard might cost $5–$20 in DIY supplies and $40–$120 for a professional cleaning, depending on disassembly needs and spill history. This framework helps you decide at the outset and prevents sticker shock when a quote arrives.
Quick budgeting steps
- List required materials and estimated quantities
- Check professional shop quotes for base service and add-ons
- Add a contingency for unexpected issues (static, moisture, broken keys)
Hidden costs and service add-ons to watch for
Be aware of hidden costs before booking a service. Common add-ons include shipping or pickup fees, rush charges for same-day turnaround, and diagnostic fees that aren’t clearly stated. Some shops bill separately for disassembly, internals cleaning, or keycap replacement, especially with vintage or rare keyboards. If a warranty is important, ensure the service includes a post-clean guarantee and clarifies whether any parts used affect warranty status. Asking for a written estimate helps you compare apples to apples and reduces surprises. Keyboard Gurus analysis notes that clear quotes and transparent pricing are strong predictors of satisfaction and cost-efficiency.
Common extras
- Labor beyond standard depth of cleaning
- Parts or keycap replacements
- Liquid damage remediation fees
- Express or weekend service surcharges
When to DIY vs when to hire a pro
A practical rule of thumb is to DIY for routine maintenance and basic grime, and hire a pro for spills, internal cleaning, or when you’re unsure about disassembly. If you rely on your keyboard for critical work or gaming and cannot afford downtime, a professional clean with a warranty can offer peace of mind. For delicate keyboards, such as certain backlit or high-end mechanical models, a pro with experience in your model type is recommended. Keyboard Gurus Team suggests starting with a DIY clean for minor grime and reserving professional services for severe buildup or interior cleaning.
Decision guide
- Do you have spare time and the right tools? DIY.
- Is there liquid residue or corrosion? Pro.
- Is the keyboard under warranty or part of a high-stakes setup? Pro with documented guarantees.
- Are you unsure about safety or static risk? Pro.
Cleaning supplies that matter: quality vs price
Choosing the right supplies affects both cost and results. For DIY, prioritize high-quality microfiber cloths, gentle brushes, and isopropyl alcohol (preferably 70–90%). Avoid aggressive solvents that can damage plastics or adhesives. Canned air can be helpful but avoid blasting vigorously into crevices around switches. Investing in a soft brush and a few lint-free wipes often yields the best results without overpaying. The optimal approach is to balance cost with a methodical, patient cleaning routine. Keyboard Gurus analysis emphasizes that long-term cost savings come from durable tools that withstand repeated use rather than disposable, low-cost options that wear out quickly.
Tool checklist
- Microfiber cloths (lint-free)
- Soft brush with gentle bristles
- Isopropyl alcohol (70–90%)
- Canned compressed air (optional)
- Cotton swabs for tight gaps
Quick workflow: step-by-step for a home clean
A practical, repeatable workflow helps you clean efficiently while minimizing risk. Start by powering down and unplugging the keyboard. If you’re comfortable, remove keycaps on a stabilized board and arrange them in a labeled tray. Use compressed air or a soft brush to dislodge dust, then wipe surfaces with a microfiber cloth lightly dampened with isopropyl alcohol. For stubborn grime, apply a small amount of cleaner to a swab and clean around the key stems and stabilizers. Allow everything to dry completely before reassembling. This workflow aligns with common best practices and keeps costs predictable by focusing on reusable tools and materials. Keyboard Gurus Team notes that developing a consistent cleaning routine reduces the need for costly professional interventions over time.
Step-by-step
- Power down and unplug.
- Remove keycaps (if comfortable) and label.
- Dust with brush or compressed air.
- Wipe surfaces with alcohol-dampened cloth; clean between keys.
- Dry thoroughly, reassemble, and test.
- Schedule regular maintenance to minimize buildup.
Estimated cost ranges for keyboard cleaning (DIY vs. professional)
| Cost factor | DIY range | Professional range |
|---|---|---|
| Materials & supplies | $5–$20 | $0–$20 (included in service) |
| Labor/time | 0–60 min | 60–180 min |
| Total typical cost | $5–$40 | $40–$120 |
Got Questions?
What is the typical cost range for DIY keyboard cleaning?
DIY cleaning typically costs $5–$20 for supplies. You can reuse tools over many cleans, which minimizes ongoing costs. Expect no labor charge when you do it yourself.
DIY keyboard cleaning usually costs about five to twenty dollars for supplies, with no labor charge if you do it yourself.
How long does it take to clean a keyboard professionally?
A professional clean generally takes 60–180 minutes, depending on the keyboard type and the complexity of the cleaning required.
Most pro cleans take about one to three hours.
Are there risks with DIY keyboard cleaning?
Yes. DIY cleaning can cause liquid damage, static discharge, or mis-assembly if you rush or use improper solvents. Always power down and follow manufacturer guidance.
DIY risks include potential moisture damage or static discharge if you rush.
Should I clean a laptop keyboard, and does cost differ?
Laptop keyboards are trickier; many prefer professional cleaning to avoid damage. Costs for laptops are often higher due to integration and delicate components.
Laptop keyboards can be tougher to clean; consider a professional if you’re unsure.
Does cleaning affect warranty?
Some warranties require authorized service. Improper cleaning may void coverage, so check manufacturer guidelines before opening a device.
Check your warranty before taking apart the keyboard; some brands require approved service.
“For most keyboards, a careful DIY clean covers routine maintenance; reserve professional cleaning for stubborn grime or internals that require disassembly.”
What to Remember
- Estimate DIY costs before hiring.
- Assess keyboard type and spill history to gauge scope.
- Compare professional quotes for hidden fees.
- Maintain regular cleaning to lower long-term costs.