How to Clean Keyboard Caps: A Practical Guide
Learn to clean keyboard caps safely and effectively with a material-aware approach, complete with tools, step-by-step methods, and maintenance routines for ABS and PBT caps.

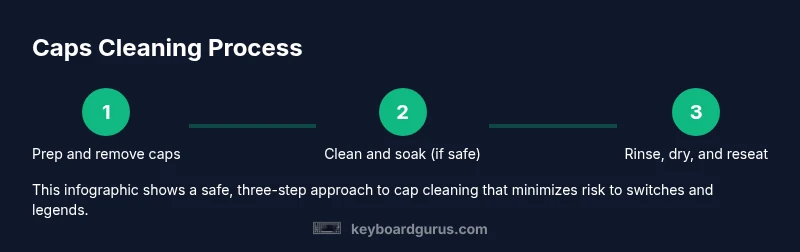
By following these steps, you will safely remove all keycaps, clean them without damaging legends or switches, and reattach them correctly. You’ll learn which tools to use, which cleaners are safe for ABS and PBT caps, and how to dry and maintain caps for long-lasting legibility. This preview accompanies the full guide.
Why cleaning keyboard caps matters
If you're wondering how to clean keyboard caps, regular cleaning keeps legends readable, reduces grime, and maintains hygiene. Caps accumulate finger oils, dust, and environmental grime that dull finishes and hinder tactile feedback. A thoughtful cleaning routine extends cap life and preserves backlit visibility. Keyboard Gurus emphasizes gentle methods that protect delicate legends and avoid water intrusion into the PCB. The goal is to create a reliable baseline for both casual typing and heavy gaming while minimizing downtime and risk to electronics.
Understanding keyboard cap materials and types
Keycaps come in several materials and constructions, with ABS and PBT being the most common. ABS caps are usually smooth and can develop a shiny patina with use, while PBT caps resist shine and typically hold legends longer. Some caps are double-shot or dye-sub keyed, which affects how you clean and whether you can safely hydrate the surface. The shape and profile—OEM, Cherry, SA, XDA—also influence how thoroughly you can scrub without lifting legends. When you start learning how to clean keyboard caps, material-aware cleaning is essential for preserving feel and legibility.
Pre-cleaning safety and prep steps
Safety comes first. Before you touch any keycaps, unplug the keyboard and remove any cables. Work on a clean, flat surface with a soft mat or a tray to catch caps as you lift them. Photograph or label key positions to ensure accurate reattachment. Gather your tools and cleaners, then place the caps in a shallow container. If you’re cleaning a backlit keyboard, avoid moisture near the switches; only the caps should contact liquid during cleaning. This prep minimizes mix-ups and protects electronics during the process.
How to clean keyboard caps safely
When you’re ready to clean keyboard caps, use a mild approach that respects material differences. For many caps, a gentle soak in warm water with a drop of mild dish soap works well, followed by a careful rinse and air-dry. If you prefer dry cleaning, use a soft brush to dislodge dust and a microfiber cloth for residue. Remember: never submerge the keyboard PCB; only the caps go into liquid. This section explains a flexible, safety-first method that adapts to your cap type and cleaning goals.
Cleaning different cap materials (ABS vs PBT) and caveats
ABS caps can handle a mild wash but may develop a shine over time; PBT caps resist shine but can be more brittle if scrubbed too aggressively. For either material, avoid harsh solvents and strong detergents that could damage legends. If a cap has painted or printed legends, test a small area first to ensure the printing won’t fade. In general, use warm water, mild soap, and careful brushing to balance cleanliness with legend preservation.
Special cases: backlit keyboards, spacebar, stabilizers
Backlit caps expose legends to light, so cleanliness matters for visibility. Spacebar and stabilizers require extra attention since debris can affect key travel. When cleaning these, remove only the caps and handle the surrounding keys gently to avoid loosening stabilizers. Avoid soaking the entire keyboard; the aim is cap-level cleaning while preserving the structural components.
Drying, reassembly, and maintenance tips
Completely dry caps before reattaching them. Lay caps on a clean, lint-free surface and air-dry in a warm, ventilated area. Before reassembly, inspect each cap for moisture, residue, or cracks. When you reseat, press firmly until you feel a click. Consider a routine maintenance schedule: a quick wipe every few weeks and a deeper clean every few months to prevent grime buildup.
Troubleshooting common issues and mistakes to avoid
Even with care, you might see legends fade or caps crack. Avoid using heat to dry caps, and never force caps onto stems. If a cap won’t fit, don’t force it; check alignment and the stem design. If you notice persistent stickiness, re-check the foam or gasket around spacebars, and ensure you thoroughly rinse any soap residue. This section highlights practical fixes and common missteps to prevent repeated issues.
Quick daily maintenance routine to keep caps clean
A short, effective daily routine keeps your caps looking fresh. Wipe the keycaps with a microfiber cloth after long sessions, and dust with a soft brush weekly. Install a removable keyboard cover if you have one, and avoid eating over the keyboard to minimize crumbs. These small habits prevent grime from building up between cleanings.
Tools & Materials
- Keycap puller(Prefer a wired puller designed for mechanical switches)
- Soft-bristle brush(For gentle scrubbing between legends)
- Microfiber cloth(Lint-free, dampened slightly with water or mild soap)
- Bowl of warm water with mild dish soap(Safe, gentle cleaning solution)
- Isopropyl alcohol (70%)(For quick disinfection, use sparingly)
- Toothpick or cotton swabs(For crevices and stubborn grime)
- Tray or shallow container(Keeps removed caps organized)
- Paper towels or lint-free towels(For drying and blotting)
Steps
Estimated time: 30-45 minutes
- 1
Power down and prepare the workspace
Unplug the keyboard and clear your desk. Set out a soft mat or tray to catch caps as you remove them. Take a quick photo of the keyboard layout in case you need to reassemble from memory.
Tip: Label rows or photograph the layout to avoid mix-ups. - 2
Remove keycaps safely
Use a keycap puller to lift each cap straight up from its stem. Avoid twisting or prying to prevent stem damage. Work systematically to prevent losing track of positions.
Tip: Remove one row at a time and place caps into a labeled container. - 3
Decide on a cleaning method
Choose between a gentle soak or dry-clean approach based on cap material and legend condition. Soaking caps is common for ABS and some PBT, but never immerse the keyboard.
Tip: Test a single cap first to verify legend durability. - 4
Clean the caps
Soaked caps: agitate lightly, scrub with a soft brush, rinse, and lay flat to dry. Dry-cleaned caps: brush away grime and wipe with a damp microfiber cloth.
Tip: Avoid scrubbing hard on printed legends to prevent fading. - 5
Dry and inspect
Place caps on a clean surface and allow them to air-dry completely. Inspect for any moisture, residue, or cracks before reassembly.
Tip: Patience pays off; moisture trapped under caps causes issues. - 6
Reattach caps
Line up each cap with its stem and press until you hear a click. Reattach in the reverse order of removal to maintain the original layout.
Tip: If a cap won’t seat, check alignment and stem orientation. - 7
Test and finalize
Reconnect the keyboard and test every key for proper travel and legends. If any key feels off, reseat that cap.
Tip: Give it a gentle test run to confirm reliability.
Got Questions?
Can I soak keycaps in water?
Soaking caps in warm, soapy water is common for many caps, but never soak the keyboard or switches. Some legends may be affected by moisture; always test first and avoid excessive soaking.
Yes, you can soak caps separate from the keyboard, but avoid the switches and PCB.
Can I clean keycaps with isopropyl alcohol?
Isopropyl alcohol can disinfect, but use it sparingly and avoid prolonged exposure on painted legends or dye-sub caps. After cleaning, rinse with water to remove any residue.
Alcohol can help disinfect, but don’t overdo it and test first.
What cleaners are safe for most keycaps?
Warm water with a mild dish soap works well for most ABS and PBT caps. Avoid harsh solvents and abrasive scrubbers that can wear legends or plastics.
A mild soap and water solution is usually enough.
Will cleaning remove faded legends?
Cleaning primarily removes grime; faded legends may not be fully recoverable. Gentle cleaning can improve readability, but restoration might require repaints or replacement caps.
Cleaning helps readability but cannot restore heavily faded legends.
Should I remove all caps or only dirty ones?
If overall grime is heavy or you plan a full refresh, remove all caps. For light cleaning, focus on the visibly dirty caps first.
Start with the dirty caps, but plan a full removal if needed.
How should I dry caps after cleaning?
Dry caps on a clean surface with good airflow. Avoid direct heat and ensure they are completely dry before reassembly to prevent moisture-related issues.
Let the caps air-dry completely before reassembly.
Watch Video
What to Remember
- Unplug before starting
- Use the right keycap puller
- Dry caps thoroughly before reassembly
- Avoid soaking the keyboard
- Material differences matter for care