How to Remove Stickers from Keyboard: A Practical Guide
Learn safe, effective methods to remove stickers from your keyboard without damaging keycaps or switches. This educational guide covers heat, solvents, tools, and aftercare for a clean, refreshed setup.

Removing stickers from a keyboard is doable in a few careful steps without damaging keycaps or switches. Start with gentle heat to loosen adhesive, then lift with a plastic tool, and finish with a safe cleaner like isopropyl alcohol or a citrus-based remover tested on a hidden area. Avoid harsh solvents on plastics and seals.
Why removing stickers from a keyboard matters
Stickers on a keyboard can obscure key labels, degrade with time, and hurt resale value. Removing them cleanly preserves the tactile feel and aesthetics, especially for gaming setups or student rigs. According to Keyboard Gurus, the safest approach prioritizes the plastic shell and stabilized keycaps rather than aggressive scraping. The Keyboard Gurus team found that choosing the right method depends on sticker type, adhesive strength, and whether the keys are backlit. This guide will walk you through tested strategies while minimizing risk to switches, stabilizers, and backlighting. Whether you’re restoring a vintage board or refreshing a modern RGB setup, the goal is a clean, legible keyboard without collateral damage. You’ll learn to distinguish sticker types, select compatible cleaners, and apply patient techniques that protect coatings and finishes. By the end, you’ll have a repeatable method you can reuse for future cleanup, with safety steps that reduce the chance of warping or discoloration.
Key takeaway: patience and preparation beat rough scrubbing every time.
Understanding sticker types and their challenges
Not all stickers behave the same way. Vinyl decals can lift cleanly but may leave a tight residue that resists simple wiping. Paper stickers tend to crumble or leave fibrous glue, which requires a gentler touch and sometimes a solvent. Holographic or thick adhesives leave a stubborn film that can irritate backlit areas if solvents seep into seams. Adhesive strength varies with humidity, heat, and age, so the removal strategy should adapt to the sticker’s composition. According to Keyboard Gurus analysis, starting with the least invasive method minimizes risk. Practice on a hidden corner of the keyboard or a spare keycap to calibrate your technique. Some keyboards use coated keycaps or resin seals that respond differently to cleaners, so always test first. In every case, document your approach so you can rebuild if you need to reassemble later.
Safety, prep, and planning before you start
Before you begin, unplug the keyboard and remove keycaps if you plan to work around each letter individually. Clear a clean, well-lit workspace and gather the right tools: a plastic lift tool, soft microfiber cloth, cotton swabs, isopropyl alcohol, and a citrus-based adhesive remover as an optional ally. Plan to tackle one area at a time to prevent adhesive from spreading. If you’re dealing with backlit keys, avoid soaking around the LED channels and test any cleaner in a discreet area first. Creating a small map of key positions helps you reassemble later without misplacing a symbol. Keyboard Gurus recommends starting with the edge of the sticker and moving inward, rather than prying the center first, which can pull on nearby labels.
Method 1: Heat and gentle lift
Gentle heat loosens many stickers by softening the adhesive without melting plastic. Use a hair dryer on a low setting, held several inches away (about 6–8 inches) and moved in slow, sweeping motions for 15–25 seconds on the sticker edge. Gently insert a plastic spudger or thin card under the edge and lift, applying steady, small-angle pressure. Work in small sections to avoid lifting surrounding labels or coatings. If the sticker resists, reapply a touch more heat and try again from a different corner. This method minimizes the risk of crumbling the glue into the crevices.
Tip: Keep heat moving and avoid concentrating it on one spot for too long to prevent warping or discoloration.
Method 2: Solvents and cleaners
If heat alone isn’t enough, apply a small amount of cleaner to a cotton swab and dab around the sticker edge to soften the adhesive. Isopropyl alcohol (70–90%) is a common choice for many plastics and inks; citrus-based removers can be effective but test first because they may affect coatings. Never pour solvent directly onto the keyboard. Work slowly, using circular motions to lift residue and wipe with a clean microfiber cloth as you go. For stubborn films, reapply solvent, wait a moment, and continue lifting from the edge.
Tip: Always test solvents on a hidden area first to ensure compatibility with your keycaps and any protective coatings.
Method 3: Mechanical aid and residue removal
If the adhesive leaves a stubborn film, use a soft plastic tool to gently scrape in a direction away from the edges of letters. Avoid metal tools that could scratch the plastic. Keep a damp cloth handy to wipe away loosened residue and prevent it from slipping under keys. For delicate backlit keyboards, avoid applying solvent where it could seep into seams. Work methodically, lifting in small strips rather than trying to remove the entire sticker at once.
Tip: Use multiple tiny passes rather than one heavy pull to preserve cap integrity.
Combined approaches and troubleshooting
Often, successful sticker removal requires a hybrid approach: a light heat pass to loosen, followed by a targeted solvent application, then a careful lift. If you still see residue after initial attempts, rewarm the area and reapply a cleaner in a new direction. Some sticky films respond better to a second, slower pass rather than a forceful lift. In persistent cases, you can repeat steps on a portion of the sticker until the edge becomes accessible enough to lift cleanly. Always keep your workspace dry and free of debris that could embed in the adhesive.
Tip: Document the sequence you used—this makes it easier to repeat or adjust for future stickers.
Aftercare, testing, and long-term maintenance
After all stickers are removed, wipe the entire keyboard with a lightly damp microfiber cloth and a tiny amount of mild soap if needed. Dry thoroughly before reattaching any keycaps. Reconnect the keyboard and test all keys to ensure no sticky residues hinder travel or actuation. For best results, store your keyboard in a climate-controlled area to minimize future adhesive sticking and to protect coatings from drying out or discoloration. Regular gentle cleaning helps maintain label clarity and tactile feedback.
Tools & Materials
- Plastic spudger or thin plastic card(Non-metal to avoid scratching; use to lift edges)
- Soft microfiber cloth(Lint-free and non-abrasive)
- Cotton swabs(Targeted application around edges)
- Isopropyl alcohol (70–90%)(Dampen cloth or swab; avoid soaking)
- Citrus-based adhesive remover (optional)(Test on hidden area first; may affect coatings)
- Hair dryer on low setting(Keep 6–8 inches away; avoid high heat)
Steps
Estimated time: 25-40 minutes
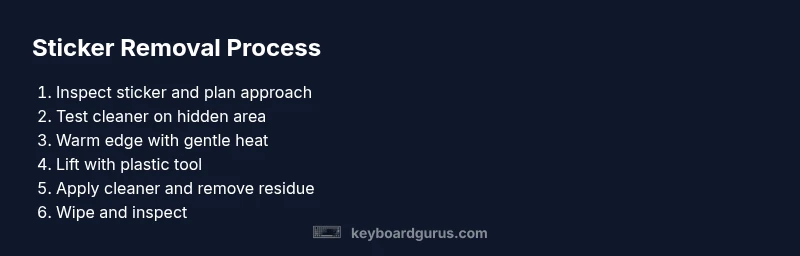
- 1
Inspect sticker area and plan approach
Start by turning off and unplugging the keyboard. Examine the sticker to gauge its type (vinyl, paper, or thick adhesive) and decide whether removing keycaps will help. Map your layout if you plan to remove multiple stickers. This planning minimizes accidental misplacement and reduces repeated passes.
Tip: Take a photo of the keyboard layout before you start to help reassembly. - 2
Test cleaner on a hidden area
Dampen a cotton swab with isopropyl alcohol (or your chosen remover) and test on a non-visible corner of a keycap or on a spare keycap. Confirm that there is no discoloration or coating damage before proceeding.
Tip: If any adverse reaction occurs, stop and switch to a milder method. - 3
Warm the sticker edge for loosening
Using a hair dryer on a low setting, sweep heat over the sticker edge for 15–25 seconds. Keep the dryer moving to avoid overheating a single spot. The goal is to soften the adhesive, not warp the plastic.
Tip: Maintain a steady distance of 6–8 inches to prevent heat damage. - 4
Lift the edge with a plastic tool
Gently slip the edge of the plastic spudger beneath the sticker. Pry up with small, consistent motions, working from the edge inward. If resistance is high, reapply a little heat and try again from a new edge.
Tip: Work in small sections to avoid lifting adjacent labels. - 5
Apply cleaner and remove adhesive
Dab a clean cotton swab with isopropyl alcohol (or citrus remover) and work around the sticker edge in a circular motion to lift the adhesive film. Wipe away loosened residue with a microfiber cloth as you go.
Tip: Change swabs frequently to prevent spreading old adhesive. - 6
Wipe down and inspect for residue
Finish by wiping the entire area with a dry microfiber cloth. Inspect the label area for any remaining film. If residue persists, repeat the appropriate steps on the stubborn spot, using a fresh edge and swab.
Tip: If you see any milky residue, dampen a new swab and repeat gentle circular motions. - 7
Reinstall keycaps and test
Align all removed keycaps in their original positions and press firmly to re-seat. Plug the keyboard back in and test each key to confirm smooth actuation and no residue interference.
Tip: Having a reference photo helps ensure correct keycap placement. - 8
Final wipe and long-term care
Give the keyboard a final wipe with a clean microfiber cloth. If you plan ongoing maintenance, designate a routine clean every few weeks to prevent sticker buildup and maintain a pristine surface.
Tip: Store your keyboard away from direct sunlight to preserve coatings.
Got Questions?
Is it safe to remove stickers from a backlit keyboard?
Yes, but take care to avoid moisture around the LED channels. Use low heat and test cleaners on hidden areas first to prevent coating damage. If unsure, use non-aqueous methods and limit exposure to sensitive zones.
Yes. Be cautious around the backlit areas—test in hidden spots first and use low heat and minimal moisture.
What cleaners are safe for keyboard stickers?
Isopropyl alcohol is a common, safe option for many plastics when used sparingly. Citrus-based removers can work but should be tested first to avoid affecting coatings or inks.
Isopropyl alcohol is usually safe; if you use citrus cleaners, test a hidden area first.
What if the sticker leaves residue after removal?
Reheat the area gently and apply a small amount of cleaner with a fresh cotton swab. Work in small circles and wipe away residue as you go. If needed, repeat the process in stages until the surface is clean.
If residue stays, rewarm and re-clean in small steps until it comes off.
Should I remove keycaps to remove stickers?
Removing keycaps can give better access to edges and prevent adhesive from seeping into the switch area. If you’re not comfortable, work carefully around each key without removing caps, but you may risk incomplete removal.
It can help, but only if you’re comfortable with keycap removal.
How long does it take to remove stickers from a keyboard?
Most sticker removals take 20–40 minutes depending on sticker type and the amount of residue. Rushing can damage keycaps or coatings, so patience pays off.
Usually 20 to 40 minutes, depending on the sticker and residue.
Watch Video
What to Remember
- Start with gentle heat to loosen adhesive.
- Test cleaners on hidden areas before full use.
- Use a plastic tool and patient, small lifts.
- Re-seat keycaps carefully and test before use.
- Adopt a regular maintenance routine to prevent future residue.