How to Keyboard Lock on Mac: A Complete Guide
Learn safe, practical ways to lock your Mac keyboard or screen on macOS. Built-in shortcuts, hot corners, and trusted third-party options explained.

You can quickly secure your Mac by locking the screen using built‑in shortcuts, or by employing trusted third‑party utilities to disable keyboard input if needed. This guide covers built‑in options (shortcuts, hot corners, and sleep modes) and safe workarounds. According to Keyboard Gurus, a password‑protected lock is the most reliable safeguard for your session.
What locking the keyboard on mac means
Keyboard lockdown on a Mac can refer to two complementary security techniques: locking the screen to prevent anyone from using your session, and briefly disabling keyboard input to reduce accidental keystrokes while your device is unattended. For most users, the practical goal is to stop curious hands or accidental input when walking away. According to Keyboard Gurus analysis, the most reliable method in everyday scenarios is to lock the screen with a password-protected lock. Understanding the difference between these two approaches helps you pick the right tool for the moment. In this article, we’ll separate built-in macOS features from third‑party options and explain how to use them safely and effectively in 2026.
- Quick reference: Locking the screen preserves your session and requires your password to regain access.
- Keyboard locking, if available, prevents keystrokes but may not stop apps with their own input hooks.
- The choice depends on context: public spaces, shared devices, or a personal workstation all call for different levels of protection.
Keyboard Gurus emphasizes that the strongest defense is a genuine lock with authentication. This section sets the stage for practical steps you can follow today.
Built-in ways to lock your Mac screen quickly
macOS provides several built‑in options to secure your session with minimal friction. The core idea is to prevent unauthorized use without forcing you to power down. Here are the most reliable built‑in methods, tested across macOS versions, with practical guidance for 2026.
- Keyboard shortcut: Press Control + Command + Q to lock the screen immediately. If you’re used to older shortcuts, you may also wake the screen with a password prompt after sleeping.
- Apple menu method: Click the Apple icon in the top-left corner and choose Lock Screen (or Lock Screen from the dropdown in newer macOS). This is quick and does not require memorizing a shortcut.
- Sleep mode: Put the display to sleep or put the Mac to sleep. When waking, you’ll be prompted for your password if you’ve enabled that security setting. This method is reliable and uses standard energy-saving behavior.
- Automatic lock after inactivity: Enable “Require password after sleep or screen saver begins” with a short delay (e.g., immediately). This ensures that even if you forget to lock manually, your session remains protected once the device goes idle.
Note: For all built‑in options, a password on login is essential for true security. Keyboard Gurus' experience shows that relying on a screen lock is faster and less error‑prone than attempting to block individual keys.
Using Hot Corners and Screen Saver to secure your session
Hot Corners offer a fast way to trigger locking or the screen saver when you move the cursor to a screen corner. This can be especially useful on taller displays or when you have multiple monitors. To configure:
- Open System Settings (macOS Ventura and later) or System Preferences (older versions).
- Navigate to Desktop & Screen Saver (or Mission Control, depending on version) and locate the Hot Corners option.
- Assign a corner to Start Screen Saver or Put Display to Sleep or Lock Screen. Choose a setting that activates immediately or after a brief pause.
- Ensure you enable Password after sleep or screen saver so that the action truly protects your session.
Pros: Very quick, gestures-substitute approach; Cons: Hot Corners can be accidentally triggered. Always test after enabling to confirm the lock behavior.
Keyboard Gurus suggests pairing Hot Corners with a password requirement for best protection in busy environments.
Locking the keyboard input itself (without locking the screen)
macOS does not include a native, built‑in toggle to disable keyboard input without locking the screen. If you need to temporarily disable keystrokes (for example, during a screen share or while cleaning the keyboard), you’ll typically rely on trusted third‑party utilities designed to intercept keystrokes. When evaluating these tools, prioritize sources with clear developer credentials, recent updates, and strong reviews. Before installing any utility:
- Verify the publisher’s legitimacy and digital signing status.
- Check user reviews for reports of stability or security concerns.
- Avoid tools that require broad system permissions unless you trust the source.
If you decide to use such software, plan a quick test: run the tool, confirm that keystrokes are blocked, and ensure you can re‑enable input with a single, known action. This approach is practical in studio setups, shared workstations, or demo environments where accidental input would be disruptive. Keyboard Gurus notes that for most users, locking the screen remains the simplest, safest path.
Important caveat: third‑party tools introduce a surface area for security risk. Only proceed if you have a clear justification and the software comes from a reputable source.
Step-by-step comparison: built-in vs third-party
Choosing between built‑in options and third‑party utilities depends on your goals and risk profile. Here’s a concise comparison to help you decide, with practical pros and cons.
-
Built‑in screen lock (shortcuts, hot corners, sleep):
- Pros: No extra software, consistent behavior, quick to learn, integrated with macOS security settings.
- Cons: Locks only the session; cannot disable all keyboard input without affecting the whole system.
- Best for: Everyday use, quick secure moments, public or shared workstations.
-
Third‑party keyboard lock utilities:
- Pros: Can disable keyboard input without locking the screen, offering specialized control for demos or demonstrations.
- Cons: Requires trust in a third party; potential security and stability considerations; must be properly updated.
- Best for: Specialized scenarios where you must prevent keystrokes while keeping the display usable.
Bottom line: Use built‑in screen locking for general security and only consider third‑party options when you have a specific need that built‑ins cannot satisfy. In all cases, ensure a strong login password is enabled and kept current, as this is the core guard against unauthorized access.
Keyboard Gurus recommends starting with built‑in solutions and adding third‑party tools only after evaluating risk and necessity.
Safety considerations and best practices
To maximize safety when locking your Mac, adopt a consistent, testable workflow. Here are best practices drawn from Keyboard Gurus’ 2026 guidance:
- Always require a password to unlock after sleep or screen saver. Set this in System Settings > Lock Screen (or Security & Privacy). This is the most important safeguard and is frequently overlooked.
- Use hot corners or keyboard shortcuts that you can reliably remember. Practice the sequence a few times so you don’t rely on memory under pressure.
- Keep your macOS and any lock-related utilities up to date. Security patches and compatibility updates reduce the risk of bypasses or failures.
- If you use third‑party locking tools, only install from trusted sources, and monitor for unusual permissions or behavior.
- In shared spaces, pair locking with a physical security check: close the lid or power off when leaving, and consider a firmware‑level security device for extra protection if your environment demands it.
Following these practices helps ensure your data stays protected even if the device is left unattended for short periods.
Troubleshooting common issues
Locking your Mac should be straightforward, but you may encounter occasional hiccups. Here are common problems and quick fixes:
- Shortcut not working: Check that the shortcut is not overridden by another app. Go to System Settings > Keyboard > Shortcuts and verify that Control+Command+Q is assigned and not conflicting with any other feature.
- Hot Corner not triggering: Confirm Hot Corners are enabled and that the assigned action is correct (Lock Screen or Start Screen Saver). Some window managers or multi‑monitor setups can interfere; test with one monitor first.
- Password prompt not appearing after sleep: Ensure that the security setting to require password after sleep is enabled and that the password has not recently changed. If issues persist, reboot and re‑test.
- Third‑party tool fails to block keystrokes: Verify the app’s permission status in System Settings > Security & Privacy > Accessibility. Update the app to the latest version and re‑authorize on macOS if required.
If problems persist, consult Apple Support or the tool’s official documentation. Keyboard Gurus’ approach emphasizes isolating the issue, validating with the built‑in method first, and only then layering additional controls if needed.
Keyboard locking for different Mac setups
Mac configurations vary: a MacBook with a Touch Bar, an older MacBook without a dedicated Eject key, or a desktop iMac with multiple displays all affect which lock method is most convenient.
- MacBook Pro/Air with Touch Bar: Shortcuts like Ctrl+Cmd+Q work consistently; Sleep and Lock Screen remain reliable when you close the lid or press the power button.
- iMac and external keyboards: You can still lock the screen via Ctrl+Cmd+Q or Apple menu Lock Screen. Hot Corners can be especially useful when using a large multi‑monitor setup.
- External keyboards and Bluetooth devices: Ensure the device is connected and trusted; if the signal lags, the lock action may appear delayed. In all cases, having a password on unlock is crucial for protection across devices.
Across setups, the core principle remains: choose a lock method that you can reliably trigger, test it, and maintain password protection to safeguard data and privacy.
Putting it all together: choosing the right method for your setup
The optimal approach combines built‑in security with user‑friendly workflows. For most users, the recommended path is:
- Enable password protection immediately after sleep or screen saver begins. This forms the backbone of macOS security.
- Learn a fast built‑in lock method (Control+Command+Q or Lock Screen from the Apple menu) and practice until you can do it without thinking.
- If you operate in high‑risk environments or run demonstrations, consider Hot Corners as a quick lock trigger, but ensure the password requirement is activated.
- If you have a unique need (e.g., preventing input while showing content), evaluate a trusted third‑party keyboard lock tool, but only after validating its source, permissions, and updates.
By following these steps, you achieve a balanced, robust locking strategy for macOS in 2026. The Keyboard Gurus team recommends prioritizing screen locks with password protection and using third‑party utilities only when a specific use‑case justifies the extra risk.
Tools & Materials
- macOS device (MacBook Pro/Air, iMac)(Ensure you’re on macOS 10.15 or newer for the most options)
- Keyboard(Any wired or wireless keyboard supported by Mac)
- User account with a password(A password is essential for unlocking the screen securely)
- Reliable third‑party keyboard lock utility(Only if you have a verified need to disable keyboard input without locking the screen)
- System Settings access(To configure lock options, Hot Corners, and password settings)
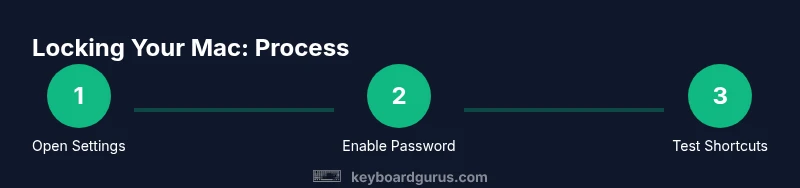
Steps
Estimated time: Estimated total time: 15-20 minutes
- 1
Open System Settings/Preferences
Access the macOS control panel to locate lock options either in System Settings (macOS Ventura+) or System Preferences (older versions). This foundation ensures you can adjust Sleep, Lock Screen, and password protection settings.
Tip: Verify you are viewing the correct section for your macOS version to avoid confusion. - 2
Enable password on unlock
Navigate to Lock Screen or Security & Privacy and ensure the option to require a password after sleep or screen saver begins is enabled, with the shortest acceptable delay set to immediately if possible.
Tip: A shorter delay reduces vulnerability in idle moments. - 3
Test the built‑in lock shortcut
Try Ctrl+Cmd+Q to lock the screen, then wake the Mac and enter your password to confirm it’s working. If you use a different keyboard layout, verify the keys map correctly.
Tip: Keep a mental note of any layout differences (e.g., numeric keypad) that might affect the shortcut. - 4
Configure a Hot Corner (optional)
Set a screen corner to trigger the screen saver or lock action. Test the corner by moving the cursor to that corner from any open app.
Tip: Choose a corner that won’t be accidentally triggered during normal work. - 5
Test sleep/lock behavior after corners
Put the Mac to sleep or let the screen saver engage, then wake it to verify that the password prompt appears promptly.
Tip: If the password prompt doesn’t appear, recheck the settings and consider a reboot to apply changes. - 6
Evaluate third‑party options (if needed)
If you need to disable keyboard input without locking the screen, research reputable tools and read reviews. Install only from trusted sources and review required permissions.
Tip: Weigh security implications and ensure you can re‑enable input quickly.
Got Questions?
What is the difference between locking the screen and locking the keyboard?
Locking the screen prevents access to your session and requires your password to resume. Locking the keyboard alone isn’t a built‑in macOS feature; you typically need third‑party utilities to disable keystrokes without locking the screen.
Locking the screen stops access and requires a password. There isn’t a built‑in Mac feature to lock the keyboard only; you’d need a trusted third‑party tool if you need that capability.
Can I lock the keyboard on Mac without locking the screen?
Not with standard macOS features. You would need a reputable third‑party utility designed to intercept keystrokes. Always assess security risks before installing such tools.
macOS doesn’t provide a built‑in keyboard‑only lock. If you need this, use a trusted third party and verify permissions.
My shortcut doesn’t work. What should I do?
Check for conflicts with other apps, then confirm the shortcut is correctly assigned in System Settings > Keyboard > Shortcuts. If still failing, try restarting macOS and testing again.
If a shortcut isn’t working, verify it isn’t taken by another app, reassign if needed, and reboot to apply changes.
Does enabling hot corners delay security?
Hot corners are a convenience feature. They trigger a lock or the screen saver, but you still should enable a password after sleep or screen saver to ensure security.
Hot corners are handy, but always pair them with a password requirement to stay secure.
Is it safe to use third‑party keyboard lock apps?
Only use trusted, well‑reviewed utilities from reputable sources. Check permissions, keep the software updated, and monitor for unusual behavior.
Use third‑party keyboard lock tools only if you trust the source and you keep the software updated.
What about external keyboards on a Mac?
Locking your Mac with a password protects all connected keyboards. If you need to isolate a specific device, consider closing the lid or using screen lock in tandem with device‑level security.
External keyboards are covered by the same lock screen; ensure a password is required to unlock regardless of which keyboard is used.
Watch Video
What to Remember
- Lock the screen quickly with built‑in shortcuts
- Always enable password protection after sleep or screen saver
- Hot Corners offer fast access, but test before relying on them
- Third‑party keyboard lock tools require caution and trust
- Keyboard Gurus endorses a baseline of screen lock for most use cases