How to Type for Kids: A Friendly Guide
A kid-friendly guide to teaching typing, from posture to games, with expert insights from Keyboard Gurus. Learn step-by-step routines, safe practices, and engaging activities that build confidence and accuracy in young typists.

Learn how to type for kids by building proper posture, finger placement, and engaging practice routines. You’ll set up a kid-friendly workspace and follow a step-by-step method with age-appropriate drills and games. You’ll need a kid-sized keyboard, a comfortable chair, a timer, and a distraction-free environment to start.
Why Typing for Kids Matters
Typing skills lay a foundation for digital literacy and efficient communication in school and beyond. If you’re exploring how to type for kids, you’re choosing a skill set that supports note-taking, writing, and collaboration across subjects, from science reports to creative projects. According to Keyboard Gurus, early exposure to keyboard literacy reduces frustration and builds confidence, helping children view technology as a tool for learning rather than a source of anxiety. The Keyboard Gurus team found that when typing practice is framed as play—short, meaningful, and age-appropriate—kids stay engaged and develop muscle memory faster. In this section, we explore why these skills matter, how they complement handwriting and reading, and what milestones to expect at different ages.
Setting Up the Right Workspace for Young Typists
A clean, organized workspace minimizes distractions and signals to kids that typing is a focused activity, not a noisy game. Start with a desk at the right height so the child’s forearms are parallel to the desk and wrists remain straight. A stable chair with good back support and a footrest if needed helps maintain proper posture. Choose a keyboard that fits small hands—either a dedicated kid-sized model or a standard keyboard with larger keys and clear keycaps. Position the screen at eye level to avoid neck strain, and keep the mouse (or trackpad) within easy reach. Finally, create a routine cue, like a dedicated “typing time” block on the calendar, to reinforce consistency and reduce drift. In practice, simplicity and comfort win over heavy technology whenever possible.
Mastering Posture and Finger Placement
Good typing starts with positioning. Sit tall with shoulders relaxed, feet flat, and elbows close to your body. Place the hands on the home row: left hand pinky on A, ring on S, middle on D, index on F; right hand index on J, middle on K, ring on L, pinky on ;. Your thumbs should rest on the space bar. Keep wrists neutral, not bent, and avoid resting wrists on the desk edge while typing. Practice gentle releases and smooth keystrokes rather than forceful tapping. This foundational step reduces muscle tension and builds reliable muscle memory that speeds up later drills.
Home Row Drills: The Foundation
Home-row drills teach the brain to locate keys without looking. Start with simple patterns like four-key taps (ASDF, JKL;) and then progress to letter sequences that use the home row letters. Include short, guided exercises such as typing single words that emphasize home-row letters before moving to simple sentences. Use color-coded finger maps to reinforce correct finger usage and gradually reduce guidance as the child becomes more confident. Regular short drills beat long, unfocused sessions.
Gamified Practice: Keeping Kids Engaged
Gamification turns typing into a game rather than a chore. Use kid-friendly typing apps and printable games that reward accuracy and consistency. Short, bite-sized challenges—like “home-row relay” or “quick-word race”—provide motivation without overwhelming attention spans. Celebrate small milestones with stickers, stamps, or extra play time. When kids associate practice with positive feedback, they’re more likely to return for the next session.
From Letters to Words: Building Speed and Accuracy
After mastering the home row, introduce real words and short sentences. Emphasize accuracy before speed—encourage slow, deliberate typing to cultivate correct finger placement. Gradually increase word length and introduce punctuation in controlled drills. Include daily warm-ups, like typing a short paragraph or a favorite sentence, to reinforce consistency. Tracking errors by key and by word helps identify pattern gaps the child can target in the next session.
Tracking Progress and Adjusting Goals
Set built-in milestones that align with the child’s age and attention span. Use a simple chart to record weekly words-per-minute (WPM) estimates, accuracy, and self-reported effort. If progress stalls, adjust goals downward temporarily and reintroduce a playful drill or game. Regular reflection with the child—asking what they enjoyed, what felt hard, and what they want to improve—keeps motivation high and fosters ownership over learning.
Selecting Kid-Friendly Tools and Resources
Choose tools that support gradual skill development: kid-sized keyboards, adjustable desks, age-appropriate typing games, and kid-friendly fonts and screen settings. Look for apps with progressive levels, clear feedback, and no intrusive ads. Supplement digital games with printable drills and a home-row poster you can refer to during practice. Always screen resources for safety and privacy, favoring platforms designed for children and families.
Common Myths About Typing in Early Education
Many myths surround early typing. Some believe kids must type perfectly from day one; others think handwriting should come first. In reality, combining typing with handwriting practice is ideal for most kids, and starting early builds confidence. Focus on accuracy, posture, and consistent practice rather than speed; speed emerges naturally as skill and comfort grow. Debunking myths helps families set realistic expectations and enjoy typing as a shared learning journey.
Tools & Materials
- Kid-sized keyboard(Prefer 3-6 row keyboard with large keys, or a standard keyboard with larger keycaps; avoid compact layouts for small hands.)
- Adjustable chair(Ensure feet flat on the floor; hips and knees at about 90 degrees.)
- Desk or lap desk(Wide enough for keyboard and space to rest wrists.)
- Timer or typing apps(Use short, guided sessions (5-15 minutes) to begin; switch apps as needed to maintain engagement.)
- Posture reminder tools(Sticker prompts or a small mat to remind kids to sit tall.)
- Finger placement chart(Color-coded home-row map to reinforce correct finger use.)
- Water and breaks(Keep hydrated and encourage short breaks to prevent fatigue.)
Steps
Estimated time: Estimated total time: 6-8 weeks (20-30 minutes per session, 3-4 sessions per week)
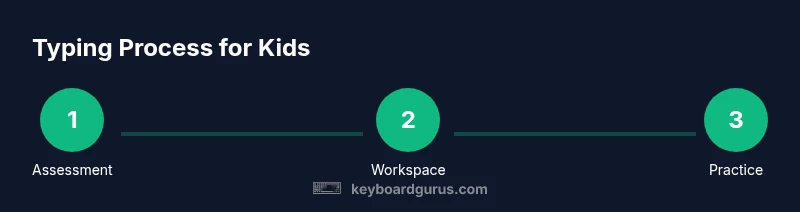
- 1
Assess baseline typing level
Observe the child typing simple words to gauge current speed and accuracy. Note difficulties with specific letters or finger coordination so you can tailor the first drills. Record initial results on a simple chart to track progress over time.
Tip: Keep the mood light; celebrate small successes to build confidence. - 2
Arrange a kid-friendly workstation
Set up a clean, comfortable space with a suitable keyboard and an adjustable chair. Ensure the screen is at eye level and the child can reach the keyboard and mouse without strain. This creates a positive, distraction-free environment for learning.
Tip: Make the space inviting with gentle lighting and a predictable routine. - 3
Place fingers on the home row
Teach the exact home-row positions: left pinky on A, ring on S, middle on D, index on F; right index on J, middle on K, ring on L, pinky on ;, with thumbs on the space bar. Have the child press each key in sequence to build familiarity.
Tip: Use a color-coded finger chart and practice without looking at the keyboard. - 4
Practice short guided drills daily
Introduce brief drills focusing on accuracy over speed. Use words that emphasize home-row letters before progressing to mixed-letter words. End each drill with a quick review of correct posture and finger placement.
Tip: Consistency beats intensity; aim for a small, repeatable daily routine. - 5
Incorporate typing games
Add gamified practice to boost motivation. Choose games that reward accuracy and steady practice rather than sheer speed. Rotate between different games to keep sessions fresh.
Tip: Choose child-friendly apps with clear progress indicators and minimal ads. - 6
Review progress and adjust pace
Weekly reflections help you adjust goals and choose appropriate new drills. If accuracy remains steady, introduce slightly longer texts or punctuation drills. If frustration rises, slow the pace and revert to simpler tasks.
Tip: Maintain a positive tone; errors are part of learning.
Got Questions?
At what age should kids start learning to type?
Many kids begin learning basic typing concepts in early elementary school, focusing on letter recognition and finger placement. Start with simple activities and gradually progress as attention spans and motor skills develop.
Kids can start with basic typing concepts in early elementary school; adjust activities to their readiness.
Should kids learn typing before handwriting?
Typing and handwriting can develop in parallel. Early typing builds keyboard familiarity, while handwriting reinforces letter formation. A balanced approach supports overall writing skills.
Typing and handwriting can go hand in hand; don’t have to choose strictly one.
What if my child loses interest?
Switch to shorter sessions, introduce new games, and celebrate small wins. Allow the child to choose preferred activities within the typing routine to boost intrinsic motivation.
If interest fades, try a fun game or a tiny challenge and celebrate progress.
Which keyboard is best for kids?
A kid-sized keyboard or a standard keyboard with large, clearly labeled keys works well. Avoid tiny or overly crowded layouts that can hinder finger placement.
Look for kid-friendly keyboards or adjustable layouts that fit small hands.
How often should kids practice typing?
Short daily practice tends to be more effective than longer, infrequent sessions. Consistency builds motor memory faster.
Try daily practice, even 10-15 minutes, to build steady progress.
Can typing improve quickly with the right drills?
Improvements come with consistent, focused practice and proper technique. Prioritize accuracy and posture before speed to ensure durable gains.
Speed will come as accuracy and comfort grow; stay patient and consistent.
Watch Video
What to Remember
- Set up a comfortable, distraction-free workspace
- Prioritize posture and home-row finger placement
- Keep sessions short and consistent for best retention
- Gamify practice to sustain engagement over time
- Track progress and adapt goals to the child’s pace