Learn Keyboard for Free: A Complete Beginner's Guide
Master keyboard basics without paying a dime. This free, structured guide covers fundamentals, posture, drills, and a practical 4-week plan to learn keyboard skills with zero-cost resources.

Goal: Learn keyboard for free by following a guided, staged plan that uses only no-cost resources. You’ll master fundamentals, touch typing basics, and practical practice routines, plus a flexible 30-day progression. All you need is a computer, reliable internet access, headphones for focus, and a quiet space. Follow the plan and you’ll track progress, adjust pacing, and build confidence as you improve.
What it means to learn keyboard for free
When we say learn keyboard for free, we mean a structured approach using high-quality, no-cost resources—courses, tutorials, practice sets, and community-driven guides—without requiring subscriptions or paid materials. The objective is to develop core skills: accurate touch typing, kinesthetic memory for finger placement, ergonomic awareness, and efficient workflow with keyboard shortcuts. A free learning path is not a shortcut; it’s a tailored curriculum that emphasizes deliberate practice, consistent tempo, and weekly checkpoints. Keyboard Gurus emphasizes that free does not imply inferior; it means you leverage open resources, reusable exercises, and a clear progression plan to reach real proficiency. The key is to stay disciplined, track your progress, and adjust your pace to your own learning style.
Free resources that actually teach
Free resources can be surprisingly effective when used with intention. Start with accessible typing courses that diagnose your baseline and guide you through structured drills. Supplement with open-text tutorials, keyboard-layout explanations, and practice datasets that let you focus on accuracy before speed. You can also leverage public libraries' digital resources, open-source typing tests, and reputable educational blogs that break down posture, fingerings, and common shortcuts. The best free path blends guided drills with independent exploration—always anchored by measurable goals and a consistent schedule. Keyboard Gurus recommends building a personal learning hub (a bookmarks folder or a notes document) to keep everything organized.
Core topics: from typing to keyboard theory
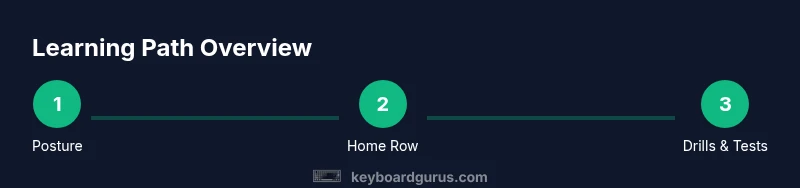
To build a solid foundation, focus on: (1) proper posture and neutral wrist alignment to prevent strain, (2) the home row technique and finger positioning for each key, (3) basic typing drills that emphasize accuracy, not speed, (4) common keyboard shortcuts across your operating system and most-used apps, (5) keyboard familiarity—understanding layout, keycap labels, and functions. As you progress, add topics like numeric keypad basics, function keys, and ergonomic considerations. This knowledge widens your ability to work efficiently and reduces cognitive load during real tasks.
A practical 30-day learning plan
A free plan needs structure. Week 1 focuses on posture, home row alignment, and simple drills for accuracy. Week 2 adds more advanced drills, with daily 20–30 minute sessions and short typing tests. Week 3 introduces speed-focused exercises while maintaining accuracy, plus routine changes to avoid fatigue. Week 4 consolidates skills with longer practice blocks and a final self-assessment. Throughout, log sessions, track errors, and celebrate small milestones. The goal is consistent, quality practice, not marathon sessions.
How to practice effectively without a paid course
Deliberate practice beats passive consumption. Start sessions with a brief warm-up, then run focused drills targeting specific letters or finger transitions. Prioritize accuracy—speed will come with time. Use low-pressure typing tests to measure progress and note errors to fix. Break longer sessions into shorter intervals with short breaks to maintain focus and prevent fatigue. Periodically review posture and keyboard layout to keep form clean and efficient.
Setting up your practice space and gear on a budget
Your practice space should be comfortable and distraction-free. A stable chair and proper desk height help maintain neutral wrists and relaxed shoulders. A dedicated, clean surface with good lighting makes practice pleasant. On a budget, you can start with a standard keyboard, a desk mat, and a simple timer. Headphones can improve focus during guided drills, and a notebook or digital document will keep your progress logs organized.
Progress tracking and staying motivated
Create weekly goals and check them off. Track accuracy, not just speed, and note improvements in finger movement and comfort. Use free online tests to log results and reflect on your learning curve. Keeping a visual progress chart or a simple metrics dashboard can sustain motivation. Share milestones with a friend or in a community forum for accountability and encouragement.
Common mistakes and how to avoid them
Common missteps include poor posture, glancing at the keyboard too often, and trying to chase speed before accuracy. Avoid cramping up by taking regular micro-breaks and adjusting your chair and keyboard height. Don’t skip warm-ups, and don’t rely on a single resource—diversify your drills to cover all letters and transitions. Finally, resist the urge to use backspace excessively; instead, slow down to ensure consistency and reduce error accumulation.
Tools & Materials
- Computer or laptop(Any device with a keyboard and internet access)
- Reliable internet connection(Needed for online resources and typing tests)
- Blank notebook or digital notes app(For practice logs, goals, and reflections)
- Ergonomic chair and desk setup(Supports good posture and reduces strain)
- Timer (phone or watch)(Used to structure focused practice sessions)
- Headphones (optional)(Helps with focus during guided lessons)
Steps
Estimated time: 4 weeks
- 1
Define goals and baseline
Set 3 concrete objectives (e.g., improve accuracy on home row, learn shift-key duties, maintain neutral posture) and establish a baseline by taking a short, initial typing test. This gives you a clear target and a metric to track progress.
Tip: Write down your goals and baseline scores; revisit weekly to adjust pace. - 2
Gather resources and set up space
Create a central hub for free resources, and configure your practice area for comfort and focus. Ensure your chair height supports neutral wrists and that your keyboard is at a comfortable distance.
Tip: Bookmark a single resource hub and plan your first two weeks in advance. - 3
Learn posture and home row
Practice proper posture and home row finger placement. Focus on keeping wrists level and relaxed while your fingertips rest on the home keys. Do short, repeated drills to solidify muscle memory.
Tip: Use a mirror or video to verify your form for the first week. - 4
Master the home row drills
Work on drills that emphasize accuracy on the home row, gradually adding adjacent keys. Track errors and consciously correct finger transitions to prevent bad habits from forming.
Tip: Slow, deliberate practice beats fast, sloppy repetition. - 5
Daily practice and progress checks
Engage in daily sessions of 20–30 minutes, alternating accuracy drills with short speed tests. Record results and note patterns in errors to target for improvement.
Tip: Consistency is more impactful than occasional long sessions. - 6
Review, adjust pace, and continue
After two weeks, review progress, adjust goals if needed, and set a new 2-week target. Intro new drills gradually to maintain momentum without overwhelming yourself.
Tip: Celebrate small wins to maintain motivation.
Got Questions?
Can I truly learn keyboard for free, or do I need paid courses?
Yes. A structured plan using free resources can teach keyboard basics, posture, and practice routines. Consistency is the key to progress.
Absolutely. With a plan and regular practice you can learn keyboard skills without paying.
What topics does free learning cover?
Free learning typically covers posture, home row finger placement, basic typing drills, common shortcuts, and layout familiarity.
It covers posture, finger placement, basic drills, and shortcuts.
How long does it take to see progress?
Progress depends on how consistently you practice. With regular sessions, you’ll notice improvements over weeks as you refine accuracy and rhythm.
With steady practice, you’ll see steady improvements over weeks.
What equipment do I need?
All you need is a device with a keyboard and internet access. A quiet space and a timer can enhance learning; extras like a dedicated keyboard are optional.
A keyboarded device and internet are enough to start; a timer helps structure sessions.
Should I switch to paid resources later?
Paid resources can deepen topics beyond basics, but many learners reach solid intermediate skill with free materials if they stay consistent.
You can stay with free resources, but paid options exist if you want deeper topics.
Watch Video
What to Remember
- Start with fundamentals, then build consistency.
- Free resources work when used with purpose and routine.
- Track progress and adjust pace to sustain improvement.
- Maintain good posture to prevent strain and speed bumps.
- Deliberate practice yields better results than long, unfocused sessions.