How to Lock Your Computer with Keyboard: A Practical Guide
Learn fast, OS-specific keyboard shortcuts to lock your computer, plus safe practices and troubleshooting tips to protect your session when stepping away.

Locking your computer with keyboard shortcuts lets you secure your session in seconds when you step away. This guide covers OS-specific keystrokes (Windows, macOS, Linux), plus reliable alternatives and best practices to avoid leaving your device exposed. It also explains auto-lock settings and practical troubleshooting to ensure your screen stays private between uses.
Why locking matters
Locking your computer when stepping away is a fundamental security habit. It prevents casual snooping, protects sensitive work, and reduces the risk of unattended access. According to Keyboard Gurus, a quick, reliable lock is often more effective than relying on screensaver alone, especially on devices that automatically resume when touched. Keyboard Gurus analysis shows that people underestimate the time an unlocked screen remains exposed after a brief pause in activity, which creates opportunities for data exposure or unauthorized access. The key idea is simple: as soon as you are away from the keyboard, engage a lock, and require credentials to resume. That discipline pays off across personal devices, shared laptops in libraries, and corporate environments alike.
Keyboard shortcuts by operating system
Locking your screen is fastest when you know the right keyboard shortcuts. Different systems use different key combos, and knowing the correct one saves precious seconds in busy environments. In Windows, the classic Win+L locks the session instantly. macOS users typically use Control+Command+Q to lock, while many Linux desktop environments offer a dedicated lock shortcut such as Super+L (or Windows/Cmd-style keys depending on the distro). If you customize your layout or switch keyboard languages, verify the exact keys in your settings, since a layout change can make a familiar combo stop working. Keyboard Gurus analysis shows that many users overlook the impact of keyboard layout changes on lock shortcuts, leading to frustrated attempts at securing a device. Proactive verification ensures you never walk away with an unlocked screen.
Windows
- Lock instantly: Win+L. If you’d rather use the login screen path, Ctrl+Alt+Delete followed by Lock is another reliable approach.
- Unlock: Enter your password, PIN, or Windows Hello credential depending on your setup.
- Why it works: Windows maintains a lock state independent of the active window, so the current task can be left without exposing data. If accessibility features are enabled, ensure the shortcut isn’t overridden by sticky keys or accessibility shortcuts.
macOS
- Lock: Control+Command+Q is the standard quick-lock shortcut on modern macOS.
- Alternative: You can set a short password requirement after sleep or screen saver begins in Security & Privacy settings.
- Unlock: Enter your password or use Touch ID if available.
- Why it works: macOS locks the screen while leaving running apps intact, so you can resume where you left off without closing programs. If you rely on a password, enable strong passphrases and consider adding two-factor authentication for added protection.
Linux
- Lock: GNOME generally uses Super+L; KDE and other environments may use Ctrl+Alt+L or a distro-specific binding.
- Unlock: Provide your user password or your configured authentication method.
- Why it works: Linux desktops often offer highly customizable shortcuts; verify the binding after updates or when switching desktop environments to avoid a lockdown gap.
Linux lock shortcuts can vary by distribution; if your environment doesn’t show the expected shortcut, check Settings > Keyboard Shortcuts for the exact binding and rebind if needed.
Quick lock methods beyond shortcuts
If you forget a shortcut, there are reliable alternatives to lock your screen quickly. Use the Start menu or app launcher to select Lock (Windows). On macOS, you can click the Apple menu and choose Lock Screen, or configure Settings to require a password after sleep. For Linux, you can usually access a Lock option from the system tray or session menu. For shared devices, turning on a screensaver with a password requirement provides an additional layer of privacy if a shortcut fails. Keyboard Gurus emphasizes having at least two independent lock methods, so you’re protected even if one method is temporarily unavailable.
Auto-lock and screensaver considerations
Auto-lock ensures your device becomes inaccessible after a period of inactivity, even if you forget to press a shortcut. Windows lets you configure lock behavior via Settings > Personalization > Lock screen > Screen saver settings and Sign-in options. macOS users should enable "Require password" after sleep or screen saver in Security & Privacy. Linux desktops vary by environment, but you’ll typically find Lock and screensaver options under System Settings > Privacy or Power Management. Setting a modest inactivity interval (for example, 3–10 minutes) provides a safety buffer while minimizing intrusion into ongoing work. The goal is to balance convenience with security, so you maintain privacy without repeatedly interrupting productive flow.
Security and unlocking basics
Locking is a frontline defense, but it’s not the full security story. Always require a password, PIN, or biometric to unlock, and avoid leaving passwords written on sticky notes or exposed in open dashboards. If your device supports two-factor authentication, enable it to add a second barrier to entry. For laptops with biometric options, ensure they are configured to prompt for your credentials on wake. Remember: a lock is only as strong as the credential used to unlock, so keep credentials unique, long, and confidential. Keyboard Gurus recommends regularly reviewing your unlock requirements to align with your current risk tolerance.
Troubleshooting common lock issues
If a lock shortcut doesn’t work, there are a few common culprits. A changed keyboard layout can map wrong keys, keyboard hardware faults can impede signals, and a misconfigured accessibility feature can override shortcuts. Check that the layout matches your intended language and that any sticky keys or filter keys features are disabled while attempting to lock. If you find the screen doesn’t lock but the display goes dark, verify that the screensaver or power settings aren’t circumventing the lock step. Connecting an external keyboard or testing with a different user account can help isolate the problem. Keyboard Gurus notes that most lock issues stem from configuration drift after updates or user-specific settings rather than hardware faults alone.
Best practices for shared devices
On shared devices, create a standard lock workflow that every user can follow rapidly. Encourage users to enable auto-lock, configure strong unlock credentials, and confirm the lock immediately after stepping away. Regularly audit devices in shared spaces to ensure the lock features aren’t disabled and that devices enforce sign-in requirements after wake. Document the exact shortcuts and settings for each OS in a quick-reference card placed near the device. The goal is to minimize friction while maximizing security, ensuring that anyone can lock their session with confidence. Keyboard Gurus recommends training sessions or quick onboarding guides for teams that share equipment, to reinforce consistent privacy habits.
Quick checks before stepping away
Before you step away, perform a fast check: verify the screen shows a locked state or a login prompt, confirm that the selected path requires credentials to unlock, and confirm there are no sensitive windows left visible on the screen. If you leave a device for a short break, even a less than a minute, a locked screen dramatically reduces the chance of incidental exposure. If you’re unsure whether you locked properly, perform a quick wake test from another seat or power cycle to confirm the lock remains active. Routine checks like this become second nature with consistent practice.
Keyboard Gurus' recommended workflow for consistent privacy
The Keyboard Gurus team recommends a simple, repeatable workflow: learn your OS shortcuts, enable auto-lock, and verify the lock state each time you step away. Maintain a quick-reference sheet for your most-used devices and ensure all team members understand the standard procedure. Periodically test the unlock experience to confirm user credentials are required and functioning as expected. By embedding these habits into daily routine, you can reduce accidental exposures and maintain higher privacy across your digital workspace. The Keyboard Gurus team’s verdict is: lock first, unlock with verification, and review the process regularly to stay secure.
Tools & Materials
- None(Locking does not require physical tools and can be done with built-in OS shortcuts.)
Steps
Estimated time: 1-3 minutes
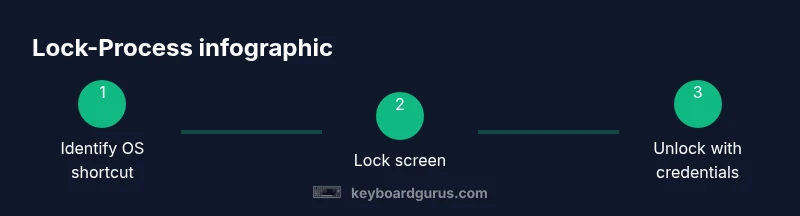
- 1
Identify your OS shortcuts
Familiarize yourself with the default lock shortcuts for Windows, macOS, and Linux. Confirm whether any custom keyboard layouts are active that might alter the expected keys. Practicing the lock sequence a few times in a distraction-free environment helps prevent hesitation when you need to step away quickly.
Tip: Open the OS settings and test the shortcut with the screen visible to confirm it locks the session. - 2
Lock Windows with Win+L
Press Windows key plus L to lock instantly. This works regardless of the active application, so you can secure the session even if you’re in the middle of a task. If the shortcut is overridden, use Ctrl+Alt+Delete and choose Lock from the menu as a reliable fallback.
Tip: Ensure Windows hello or password sign-in is configured to unlock smoothly. - 3
Lock macOS with a keyboard shortcut
Use Control+Command+Q to lock the screen on modern macOS. If you rarely touch the keyboard, consider enabling a password requirement after sleep or screen saver starts for automatic protection.
Tip: Test the wake behavior: press any key or trackpad to see the password prompt appear promptly. - 4
Lock Linux with a desktop shortcut
Many Linux environments support Super+L or Ctrl+Alt+L. Check your distro’s keyboard shortcuts in Settings and customize as needed. Locking on Linux often respects your current user session and will require credentials to unlock.
Tip: If you use Wayland or X11, verify the shortcut persists after system updates. - 5
Lock from the login/lock screen
If shortcuts fail, use the lock option from the login/lock screen or the system menu. This guarantees the session is secured even when keys aren’t responding.
Tip: Keep the lock screen accessible with a simple credential (PIN/password) that you can remember. - 6
Enable auto-lock after idle time
Configure auto-lock so the system locks after a period of inactivity. This provides protection even if you forget to lock manually. Settings vary by OS, but the concept remains the same across Windows, macOS, and Linux.
Tip: Choose a balance between convenience and security (e.g., 3–10 minutes of inactivity). - 7
Test unlocking flow
After locking, test unlocking by entering the credential. Confirm biometrics or password prompt appear reliably and that you return to the expected desktop state after unlock.
Tip: If unlock feels slow, investigate sign-in options and performance of credential providers. - 8
Adapt to shared device scenarios
For shared laptops, establish a universal lock protocol so every user can secure the device in one or two keystrokes. Train users to verify the lock state after stepping away.
Tip: Provide a one-page quick guide near the device for quick reference. - 9
Regularly review settings
Periodically audit lock settings and ensure updates haven’t reset or disabled key protections. Update credentials, review biometric options, and reapply auto-lock settings as needed.
Tip: Set a calendar reminder to review security settings quarterly.
Got Questions?
What is the fastest way to lock my computer?
The fastest method depends on your OS: Windows uses Win+L, macOS uses Control+Command+Q, and many Linux environments use Super+L or a distro-specific shortcut. Always test your chosen method to confirm it locks immediately.
Use the OS shortcuts: Win+L on Windows, Control+Command+Q on macOS, or Super+L on Linux for a quick lock.
Can I lock my computer without using a password?
You can enable settings that require a password on unlock, but locking without any credential undermines privacy. Best practice is to require a password, PIN, or biometric to re-enter.
Yes, you should require a password on unlock; locking without credentials is not recommended.
What if the screen doesn’t lock when I press the shortcut?
Check the keyboard layout, confirm the shortcut isn’t overridden by accessibility features, and try the lock-from-menu option. If still failing, test with another user or reboot to reset transient settings.
Check the layout, try the menu lock, and if needed, test with another user or reboot.
Is there a universal key combo for all platforms?
No universal shortcut exists across Windows, macOS, and Linux. Each OS uses its own primary lock combination; be sure to know and customize the one for your setup.
There isn’t a universal shortcut—each OS has its own lock combo.
Does locking stop background processes?
Locking secures the user interface and prevents access until credentials are provided, but it does not terminate background processes. Logout or suspend if you need to end sessions completely.
Locking hides the desktop but doesn’t stop background tasks; log out if you need full termination.
How do I unlock after locking?
Wake the device, then enter your password, PIN, or use biometrics if available. The exact credential depends on your security settings.
Wake the device and enter your password or use biometrics to unlock.
Watch Video
What to Remember
- Lock instantly with OS shortcuts to protect your session.
- Enable and test auto-lock across devices.
- Verify unlock prompts to avoid open sessions.
- Have multiple lock methods available as fallbacks.
- Review and update security settings regularly.