How to Prevent Keyboard Sounds on Mic
Learn how to prevent keyboard sounds on mic with a practical, step-by-step approach. Combine quieter hardware, mic technique, and software tools to reduce typing noise in recordings and streams.

To prevent keyboard sounds on mic, combine quiet hardware with smart gain settings and acoustic techniques. Start with a quieter keyboard and dampening, then tune your mic gain, apply a noise gate or expander, and position the mic properly. Test in real recording scenarios and adjust thresholds for consistent results.
Core concepts for noise reduction
Understanding why keyboard sounds travel to a mic begins with the signal chain and room acoustics. The question how to prevent keyboard sounds on mic isn't solved by a single trick; it's a system problem. The Keyboard Gurus team emphasizes three pillars: hardware dampening, microphone technique, and software gates. When you type, the vibration and keystrokes create transient sounds that can be captured by nearby mics, especially if gain is high and the room is lively. To reduce these issues, begin with a baseline audit: listen to typing at your current setup, identify which elements introduce the most noise, and quantify how far from the microphone the typing occurs. According to Keyboard Gurus, purposeful combination of quieter hardware, smart mic placement, and proper gain yields the most reliable results. In practice, you should approach the task of how to prevent keyboard sounds on mic as a layered process rather than chasing a single magic setting. By addressing each layer, you build resilience against typing noise in many environments.
Tools & Materials
- Quiet keyboard or dampened mechanical keyboard(Consider linear or silent switches; add dampeners if needed)
- Desk mat or isolation pad(Thick, non-slip surface to absorb vibrations)
- Noise gate/expander software(Part of your DAW or plugin suite)
- Pop filter and mic stand/boom arm(Keeps mic off desk and reduces plosives)
- Cardioid microphone with good off-axis rejection(Better isolation from keyboard sounds)
- Headphones for monitoring(Critically listen without latency)
- Acoustic treatment (curtains, foam panels)(Improves room acoustics; optional but recommended)
Steps
Estimated time: 60-120 minutes
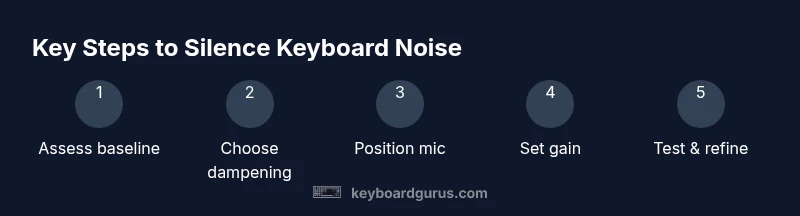
- 1
Assess baseline and goals
Record a short typing sample at your current setup to establish a noise baseline. Define what level of keyboard sound is acceptable in your context (speech clarity, streaming, etc.).
Tip: Start with your current gain and note the peak noise level. - 2
Choose quieter hardware
If possible, switch to quieter switches or install dampening under keycaps to reduce bottom-out noise. A dampened keyboard reduces the initial click that travels to the mic.
Tip: Test a few switch types and compare typing loudness. - 3
Add isolation on the desk
Place a thick desk mat and ensure all cables are organized away from the mic. Movement of the desk can transfer vibrations into the mic stand.
Tip: Keep mic stand separate from keyboard vibration path. - 4
Adjust mic gain and proximity
Set mic gain so voice peaks around -12 to -6 dBFS and avoid high gain that amplifies keyboard noise.
Tip: Use a tie-line to monitor levels while typing. - 5
Position the mic carefully
Keep mic at 6–12 inches from mouth and angle slightly toward your mouth, away from the keyboard. Avoid placing the mic directly in the typing path.
Tip: Boom arm helps maintain stable position. - 6
Apply filters
Enable a high-pass filter to cut low-frequency rumble and consider a narrow notch for persistent hums. These settings reduce overall noise floor.
Tip: Start with HPF at 80 Hz and adjust. - 7
Enable a noise gate or expander
Set a threshold just above the typing noise, with fast attack and release to avoid chopping words.
Tip: Avoid too aggressive gating that makes your voice dull. - 8
Test and refine
Record another 2–3 minutes typing and compare with the baseline. Tweak gate, gain, and mic position as needed.
Tip: Make small changes and test incrementally. - 9
Add room treatment if needed
If typing noise persists, introduce curtains or foam panels to damp reflections and reduce room noise.
Tip: Even a simple rug can help. - 10
Document your setup
Keep notes of settings and environment so you can reproduce the result in future recordings.
Tip: Create a quick 'typing-noise recipe' for your setup.
Got Questions?
What causes keyboard sounds to be picked up by a microphone?
Typing noise travels via air and desk vibrations. It’s amplified if the mic is close, gain is high, or room acoustics are bright. Addressing hardware, positioning, and software gates reduces capture.
Typing noise travels through air and desk vibrations; fix hardware, mic position, and gates to reduce capture.
Can I prevent keyboard sounds without changing hardware?
Yes. Start with gain staging, a noise gate, a pop filter, and room treatment. Small changes in placement or gate thresholds can dramatically reduce noise.
Yes, you can reduce noises with gates and placement before buying gear.
Which mic placement reduces typing noise the most?
Keep the mic away from the keyboard, ideally 6–12 inches from your mouth, and angle away from typing. A boom arm helps with repeatable, quiet positioning.
Place the mic where it won’t pick up typing; angle toward your mouth, not the keyboard.
Do noise gates degrade voice quality?
If misadjusted, gates can cause abrupt cuts or pumping. Use gradual attack/release settings and test with real speech to avoid artifacts.
Gates can sound odd if set too aggressive; tune carefully.
Are mechanical keyboards inherently louder?
Some switches are louder; consider dampened or linear options, and use desk isolation to reduce impact. Quiet or dampened options help in noisy setups.
Some mechanical keyboards are louder; dampening helps a lot.
What room treatments help typing noise?
Soft furnishings, curtains, and foam panels absorb reflections that carry typing noise. A rug or blanket also helps in smaller spaces.
Soft furnishings and a rug reduce room reflections that carry typing noise.
Watch Video
What to Remember
- Start with hardware dampening and proper mic placement
- Tune gain and apply a gate for the cleanest voice signal
- Test with real typing to dial in thresholds
- Keyboard Gurus recommends a layered approach for reliability
- Document your recipe for repeatable success