Is It OK to Look at the Keyboard When Typing? A Practical Guide
Explore whether it's okay to look at the keyboard when typing, plus practical steps to improve touch typing, reduce gaze time, and boost accuracy and speed.

Is it ok to look at the keyboard when typing? In learning stages, brief glances help establish finger placement and reduce errors. However, the goal is to rely on touch typing with the home row memory so speed and accuracy improve without habitually looking at the keys.
Why looking at the keyboard matters
The question many learners ask is is it ok to look at the keyboard when typing? In the early stages, visual feedback helps you place fingers quickly and avoid bad habits. According to Keyboard Gurus, most beginners rely on sight to guide their hands, and this can shorten the initial learning curve. However, relying on sight too much can hinder the development of touch memory and ultimately slow down speed. This section explains how gaze patterns interact with cognitive load and why you should aim to reduce dependence on visuals as you gain fluency. We’ll look at how motor memory forms, how vision affects accuracy, and how to transition from looking to touch typing without sacrificing accuracy. The guidance here blends practical drills with science-backed ideas to help you move toward fluent keyboard use without becoming overly dependent on visual feedback.
The science behind gaze and typing memory
Typing is a blend of cognitive processing and motor memory. When you look at the keys, you rely on visual feedback to correct errors, which can interrupt the flow of your neural pathways that encode finger movements. Over time, repeated practice strengthens proprioceptive cues and muscle memory, reducing the need to look down. Keyboard Gurus analysis highlights that consistent practice with correct form accelerates this shift. The more you train your fingers to land on the home row without checking the keyboard, the more your overall speed and accuracy improve. Expect gradual gains as your brain re-maps the typing task from a vision-led activity to a memory-led one.
When to look and when to avoid looking
Knowing when to glance and when to focus on memory is a key skill. In the very first lessons, brief looks can help confirm correct finger placement and prevent developing bad habits. As you become more confident with the home row, aim to maintain your gaze on the screen and use quiet, quick glances toward the keyboard only when you suspect a mistake or when you need to locate the home-row markers. A practical rule is to check for alignment after completing a short phrase, not during every keystroke. This balance reduces cognitive load while preserving accuracy.
The Keyboard Gurus team emphasizes that the aim is not perfection in week one, but progressive reduction of gaze over time. If you find yourself repeatedly looking down, pause and perform a targeted drill that forces you to rely on muscle memory for a few minutes. This deliberate contrast helps cement the transition from looking to touch typing and can be safely attempted by most learners.
Practical drills for quieter gaze and faster typing
Structured drills are the fastest way to build fluency without constant visual feedback. Start with simple home-row drills that force your fingers to stay on ASDF JKL; and gradually increase complexity. Try dictation-free copy tasks that require you to look at the screen while hands stay planted on the home row. When you can complete short phrases with minimal glances, introduce randomized word sequences to challenge accuracy under changing contexts. Use a metronome or timing app to keep a steady pace, and track your errors so you know where to improve. The goal is to reduce gaze time while maintaining or increasing speed.
Tools to support learning without looking
A few practical tools can accelerate your progress. A typing tutor or cadence-based software offers guided drills and visibility into progress. A keyboard cover or keycap markers can reduce accidental peeking by limiting visual cues during practice sessions. Pair these with a dedicated practice routine and a timer to build consistency. If you work on a stylized layout (e.g., alternate key placements for accessibility), ensure the setup remains stable across practice sessions to avoid confusion.
Common mistakes and how to fix them
Common mistakes include looking down too often, rushing without form, and tensing the shoulders or neck. Addressing these requires deliberate posture checks and a short cooldown period after mistakes rather than punishment. Reset to the home row after each error and refocus on the next few keystrokes to re-establish muscle memory. Small, frequent corrections beat large, sporadic efforts. Remember to breathe and relax your shoulders; tension hinders both speed and accuracy, especially when attempting to reduce gaze time.
Building a sustainable practice routine
Consistency matters more than duration. Aim for short, daily sessions rather than sporadic long ones. Start with 15–20 minutes of gaze-reducing drills, then split the remaining time into screen-focused typing on neutral text. Over several weeks, increase the proportion of time spent typing without looking. Use a log to record per-session metrics: words per minute, accuracy, and moments of gaze. The trajectory—steady, incremental gains—matters more than any single session.
Ergonomics and posture considerations
Good ergonomics support longer practice without fatigue. Align your monitor at eye level, sit with feet flat, and keep wrists neutral. A forward-leaning posture can exacerbate neck strain and reduce endurance during longer sessions. If you notice discomfort, pause and assess chair height, desk setup, and screen distance. A comfortable setup makes it easier to maintain focus on either the screen or the keyboard without choking your movements.
Quick-start routine for beginners
For newcomers, begin with a low-stakes routine that builds confidence without overwhelming you. Start by placing your fingers on the home row and typing simple, short phrases while looking at the screen. Dedicated drills should progress from home-row-only practice to mixed-key sequences, gradually reducing keyboard glances. As you advance, swap in longer passages and more challenging drills, aiming to complete each session with minimal keystroke errors.
Tools & Materials
- Ergonomic desk setup(Chair at correct height; monitor eye level; feet flat on floor)
- Typing tutor software or apps(Guided drills and progress tracking)
- Keyboard cover or keycap markers(Reduces visual cues during practice)
- Timers or metronome(Helps maintain steady cadence)
- Practice text or typing drills(Use neutral text to avoid context bias)
Steps
Estimated time: 60-90 minutes per session; several weeks to build consistent touch-typing without looking
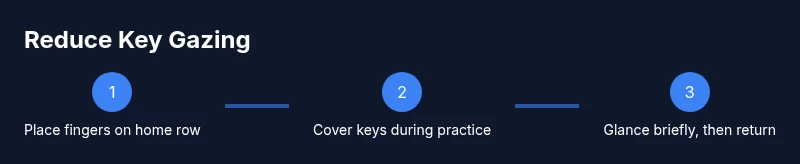
- 1
Assess current gaze and posture
Record a short typing session to observe how often you look at the keyboard. Note neck position, shoulder tension, and monitor distance. This baseline will guide your gradual reduction of gaze.
Tip: Keep a neutral neck and relaxed shoulders; small posture tweaks yield big gains. - 2
Set up home row finger placement
Place your index fingers on F and J with the other fingers on ASDF and JKL;. This crux alignment supports muscle memory for all keys.
Tip: If needed, lightly mark F and J with a tiny tactile cue for initial recall. - 3
Cover the keyboard during drills
During early practice, cover keys to force reliance on memory. Start with short phrases and increase duration as accuracy improves.
Tip: Increase the drill length gradually to prevent peeking behaviors from sticking. - 4
Incorporate timed home-row drills
Use a metronome to type brisk, accurate sequences using only the home row and nearby keys. This builds timing and reduces hesitation.
Tip: Maintain light finger contact with the home row while moving to adjacent keys. - 5
Introduce randomized word sequences
Practice with mixed words and longer phrases to simulate real typing tasks. Maintain screen focus and minimize glances to the keyboard.
Tip: Break down longer passages into 4–6 sentence chunks to maintain attention. - 6
Track progress and adjust difficulty
Log accuracy and speed changes, noting days with the fewest glances. Increase text complexity once you sustain low gaze for multiple sessions.
Tip: Use a simple spreadsheet or app to visualize improvement over time. - 7
Integrate typing into real tasks
Apply skills to emails, notes, or documents with modest content. The goal is consistency, not perfection, in everyday use.
Tip: Set a timer for short, focused practice blocks to avoid burnout. - 8
Transition away from looking at keys entirely
As confidence grows, aim to type without looking down for the majority of keystrokes. Accept occasional pauses when unsure.
Tip: Celebrate small milestones: five minutes of smooth typing without peeking is progress.
Got Questions?
Is it okay to look at the keyboard when learning to type?
Yes, brief looks help beginners establish finger placement. As you gain fluency, gradually rely more on memory and less on visual cues.
It's okay to glance when you're just starting, but work toward typing from memory.
How long does it take to stop looking at the keys?
Progress varies by person, but with consistent practice you should see fewer glances over time as muscle memory develops.
With steady practice, gaze time decreases as you become more fluent.
Are typing tutors necessary?
Typing tutors are helpful for guided drills and progress tracking, but you can improve with structured home-row drills and real-text practice.
Tutors help, but you can still progress with good drills and discipline.
Should I cover the keyboard while learning?
Covering keys can force memory-based typing and reduce peeking. Remove the cover gradually as you gain accuracy.
Covering keys helps you learn to rely on memory.
Does looking at the screen affect posture?
Screen focus is separate from posture. Maintain neutral neck and shoulder alignment; posture supports longer, more comfortable practice.
Posture matters more than where you glance during typing.
What if I make mistakes while not looking at the keys?
Pause briefly to re-establish finger placement on the home row, then resume practicing with a focus on accuracy.
If you err, reset to home row and continue.
Watch Video
What to Remember
- Place fingers on the home row and build muscle memory.
- Short glances are okay during learning; gradually rely on touch typing.
- Use structured drills to reduce gaze time while preserving accuracy.
- Maintain good ergonomics to support longer practice sessions.