What Causes Keyboard Keys to Stick: A Practical Troubleshooting Guide
Discover what causes keyboard keys to stick and how to diagnose, clean, and prevent sticky keys on laptops and mechanical keyboards. Fast, expert guidance from Keyboard Gurus.

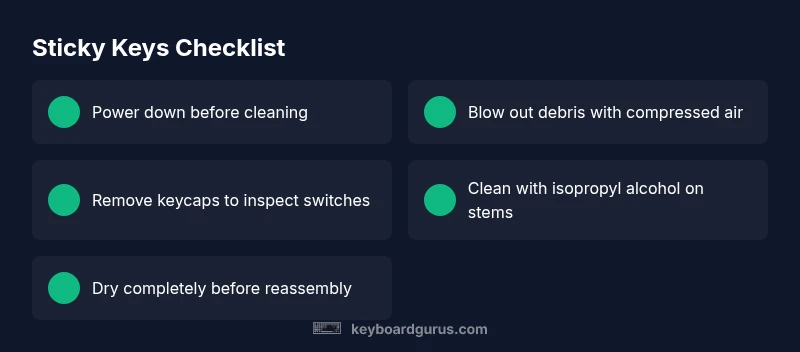
Most keyboard keys stick due to dust, crumbs, or liquid residues that trap under keycaps, plus sticky oils from hands. Quick fix: power down, unplug, and carefully remove obvious loose debris with compressed air or a soft brush; wipe surfaces; for stubborn keys, remove the keycap and clean the switch stem. If sticking continues, inspect for swollen switches or spill damage and consider replacement.
What causes keyboard keys to stick
Keyboards become sticky for several reasons, and identifying the exact cause is the first step to a quick fix. According to Keyboard Gurus, the most common culprits are dust, crumbs, and liquid residues that accumulate under keycaps, plus sticky oils from hands. Environmental factors like humidity can magnify the problem, particularly on laptops where airflow is limited. Distinguish between a simple debris jam and more serious issues such as spilled liquids that wick into the switch or PCB. By understanding the underlying cause, you can choose the safest, most effective remediation path and prevent recurrence. Different keyboard types have different vulnerabilities: mechanical switches can trap tiny particles, while membrane and scissor-switch boards may exhibit binding if debris accumulates on the slider or stabilizers. Regular maintenance reduces risk, and early intervention limits potential damage to the PCB or actuating mechanism. Keyboard Gurus Analysis, 2026 reinforces that routine cleaning is the best preventative measure for most users.
Common patterns and symptoms
Sticking can appear in several ways: a key that registers multiple characters with a single stroke, a key that sticks intermittently after being pressed, or keys that remain pressed down after release. Spills often lead to sticking that worsens over time, while dust causes random, sporadic binding. Laptop keyboards can show rapid changes due to limited air gaps and sealed chassis. If more than one nearby key is affected, you may be facing a broader residue issue or a faulty switch. Recognizing the pattern helps you target the right remedy quickly and prevent unnecessary parts replacement.
Immediate at-home fixes you can try now
Start with the easiest, safest steps first. Power down completely and unplug the device from any power source. Use compressed air or a soft brush to dislodge debris from around the affected keys, blowing from multiple angles. If debris remains, gently remove the keycap to inspect the stem and housing and clean with a lint-free cloth lightly dampened with isopropyl alcohol. Re-seat the key to ensure even alignment. Avoid excessive moisture and never pry keyboard circuitry; if unsure, stop and seek professional guidance. Especially for laptops, treat it as delicate work—incorrect reseating can damage the scissor mechanism.
Deeper cleaning for stubborn keys
For keys that won’t respond after surface cleaning, a deeper clean may be required. Remove the affected keycap using a safe tool or keycap puller, then inspect the switch stem and stabilizers for obstruction. Use a soft brush or cotton swab with 90%+ isopropyl alcohol to clean the area around the switch and the keycap’s underside. Allow any moisture to dry fully before reassembling. If the key remains sticky, suspect residue inside the switch housing or a mechanically bound stabilizer; in mechanical keyboards this can often be addressed by swapping the switch or stabilizer components.
When spill damage changes the equation
Liquids can seep into crevices and wick onto internal components, causing ongoing stickiness and even corrosion. If you spilled a liquid, stop using the keyboard immediately and power down to avoid short circuits. Do not attempt to force dry with heat. Gently remove affected keycaps, clean visible residue, and consider a professional repair if you see corrosion or if the rest of the keyboard starts behaving erratically. For laptops, partial or full keyboard replacement may be the only durable recourse after a liquid intrusion.
Laptop vs desktop keyboards: how stickiness differs
Laptop keyboards are compact, sealed, and often rely on scissor-switch or low-profile mechanisms, making them more sensitive to debris and moisture. Desktop mechanical keyboards provide easier access to switches and keycaps, allowing targeted cleaning or swap-outs for individual switches. If you rely on a laptop, routine external cleaning and a protective keyboard cover can help, but persistent sticking after cleaning usually signals deeper damage that may require professional service or service under warranty.
Prevention: routines to minimize future sticking
Set up a simple cleaning cadence: quick daily wipe-down, weekly dusting with compressed air, and monthly deep-clean sessions for high-traffic keyboards. Keep beverages and food away from the keyboard; wash hands before typing. Store keyboards in a dry, dust-free environment and use protective covers if you work in dusty or humid conditions. Regularly inspect stabilizers and keycaps for wear, and replace any visibly degraded parts promptly. A proactive approach reduces downtime and extends keyboard life.
Tools and supplies you’ll want on hand
A dedicated keyboard cleaning kit makes a big difference. You’ll want compressed air, a soft-bristle brush, microfiber cloths, isopropyl alcohol (90%+), cotton swabs, a keycap puller, spare keycaps, and, for mechanical keyboards, an extra set of stabilizers or switches. For laptops, use non-conductive tools and avoid disassembly unless you’re confident; never use metal picks on delicate plastic housings. Keeping these supplies organized speeds up fixes and minimizes risk.
Quick maintenance ritual you can adopt today
Carve out a 10–15 minute weekly routine to maintain a clean typing surface. Start with a quick wipe, followed by a blast of compressed air and a visual check for any obvious debris. Maintain the habit of washing hands before use and avoiding eating over the keyboard. This routine reduces the chance of sticky keys and keeps your setup ready for long sessions.
Myths vs. realities: safety and best practices
Do not spray liquids directly onto the keyboard. Avoid using harsh chemicals near keys with printed legends. If you’re unsure about the warranty implications of DIY cleaning, check the manufacturer’s guidelines. When in doubt, contact a professional or the device maker’s support line. Safety first protects you and your expensive gear.
Steps
Estimated time: 30-60 minutes
- 1
Power down and disconnect
Turn off the computer or device, unplug from power, and remove the battery if possible. This keeps you safe and prevents accidental keypresses during cleaning.
Tip: Safety first—unplug before you touch the keyboard. - 2
Assess the affected area
Inspect around the stuck key for visible debris. Gently test by pressing neighbors to see if they’re affected. A flashlight can help spot hidden crumbs.
Tip: Take a quick photo to reference how the key is seated. - 3
Blow out debris
Use a can of compressed air in short bursts from multiple angles to dislodge particles. Keep the can upright to avoid propellant spraying back.
Tip: Do not shake the can; inconsistent bursts can scatter debris. - 4
Remove the keycap for a deeper clean
If safe for your keyboard, gently pry the keycap with a plastic tool and clean the stem and housing with a cotton swab lightly dampened with isopropyl alcohol.
Tip: Never use metal tools on delicate keycaps. - 5
Reassemble and test
Re-seat the keycap firmly and test the key by typing a few sentences. If it still sticks, proceed to deeper cleaning or switch inspection.
Tip: Test other nearby keys to ensure no collateral damage. - 6
Deeper clean if needed
If the issue remains, repeat cleaning around the stem and stabilizers. Consider replacing the switch if you have a hot-swappable mechanical board.
Tip: Keep spare parts handy if you regularly service keyboards. - 7
Assess spill or damage
For any spill, power down and seek professional assessment if corrosion or abnormal behavior appears.
Tip: Do not attempt to dry with heat or force electronics. - 8
Plan preventive steps
Set a routine cleaning schedule and implement protective measures (covers, hands washed, no drinks near the keyboard).
Tip: Prevention saves downtime and cost.
Diagnosis: Key sticks intermittently or remains stuck after typing
Possible Causes
- highDust, crumbs, and debris under keycaps/switch
- highLiquid spills or moisture intrusion into the switch or PCB
- mediumSwollen/damaged switches from liquid exposure or wear
- lowWorn stabilizers or keycap interference causing mechanical binding
Fixes
- easyClean around and under affected keys with compressed air and a soft brush
- easyCarefully remove the keycap to clean the stem/switch and reseat the key with gentle pressure
- easyWipe moisture with isopropyl alcohol on the area and allow to dry completely
- mediumIf key remains sticky, inspect or replace the switch or seek professional servicing
- hardFor laptops or non-removable keys, consider professional service if spills occurred
Got Questions?
What are the most common causes of sticky keyboard keys?
Dust, crumbs, and liquid residues under keycaps are the leading culprits. Sticky oils from hands and humidity can exacerbate the problem, especially on laptops.
Dust, crumbs, and liquids under the keys are the main causes. Oils from hands and humidity can make it worse, especially on laptops.
Can spilled drinks permanently damage a keyboard?
Yes, spills can cause persistent sticking and corrosion. If you spill, power down immediately and clean carefully, then consider professional service if symptoms persist.
Spills can permanently damage keyboards. Power down right away and clean; if it still sticks, seek professional help.
Is it safe to remove keycaps on a laptop keyboard?
Removing laptop keycaps isn’t always safe. Laptop keys often use delicate scissor mechanisms; check manufacturer guidance before prying any key.
Careful—laptop keys can be delicate. Check the maker’s instructions before removing any key.
Will cleaning solutions damage the legends on keycaps?
Use isopropyl alcohol or water-diluted cleaners sparingly. Strong solvents can fade or wear legends over time.
Use a mild cleaner like isopropyl alcohol sparingly to avoid fading the legends.
When should I replace a keyboard or seek professional help?
If sticking persists after cleaning or if there is evident liquid damage, worn switches, or PCB issues, professional repair or replacement may be needed.
If it keeps sticking after cleaning or shows liquid damage, get professional help or replacement.
Does humidity cause keys to stick?
Humidity can contribute to stickiness by promoting adhesive residue and corrosion. Keeping the environment dry helps prevent this.
Yes, humidity can make keys stick by promoting residue and corrosion.
Watch Video
What to Remember
- Identify cause before cleaning to avoid damage
- Start with simple fixes, escalate if needed
- Avoid excessive moisture and avoid heat
- Regular maintenance prevents future sticking