When to Change Keyboard Switches: A Practical Guide
Learn when to change keyboard switches and how to replace them safely. This guide covers wear indicators, testing methods, and a clear workflow for hot-swappable and soldered keyboards.

By the end of this guide, you will confidently determine when to change keyboard switches, based on feel, sound, and reliability indicators. You’ll learn how to assess switch wear without disassembling every component, identify repair vs replacement options for hot-swappable versus soldered keyboards, and a practical workflow to choose, test, and install new switches.
Why wear matters for keyboard switches
Switches are designed for tens of thousands of keystrokes, but real-world use wears them down in measurable ways. Over time, friction from repeated Actuation, dust intrusion, and uneven lubrication reduce smoothness and accuracy. When you ask when to change keyboard switches, the answer hinges on both objective wear and your personal expectations for feel and reliability. This means that the same switch on a typing-heavy workstation may need replacement sooner than one on a casual gaming rig. Keyboard Gurus analysis shows that wear signs differ by switch family (linear, tactile, clicky), by keyboard construction (hot-swappable vs soldered), and by environment (dusty desks, humid rooms). In practice, you’ll look for changes in actuation force, wobble, rattle, and bottom-out feel, then weigh those signs against your goals for performance and acoustics. Understanding wear helps you plan replacements before failures occur, keeping your setup productive and enjoyable.
Signs your switches may be reaching end of life
Wear manifests in several reliable indicators. First, inconsistent actuation or double-registers signal contact wear or misalignment. Second, a muffled or gritty sound can indicate deteriorating stems or lubricants; third, sluggish return or sticking keys point to debris, lube breakdown, or spring fatigue. Fourth, longer travel or higher actuation force required to press a key suggests spring fatigue or stem wear. Fifth, frequent key chatter can indicate electronics or switch contact issues. Finally, mismatch between perceived feel and actual input—keys that repeat or skip—often means a specific switch is past its prime. If you notice any of these signs consistently across multiple keys, it’s time to evaluate a replacement strategy rather than assuming you just need more lube. These indicators help you distinguish between minor maintenance and genuine switch replacement needs.
How keyboard design affects replacement decisions
Not all keyboards are created equal when it comes to replacing switches. Hot-swappable keyboards make life easier because you can pull and replace switches without soldering, enabling quick testing and iteration. Soldered boards require desoldering and careful re-soldering, which increases risk and time but is still feasible with patience. The keyboard’s plate structure, stabilizers, and switch footprint influence compatibility and ease of replacement. In addition, switch type matters: linear switches often wear smoothly but may dull over time; tactile and clicky variants can lose feel and audible feedback sooner if lubed inconsistently or exposed to dust. Your decision to replace or upgrade should consider these factors alongside the severity of wear. If you’re chasing a certain sound or actuation feel, you may opt for a different switch family, but ensure compatibility with your keyboard’s layout and PCB design.
Material compatibility and choosing replacement switches
Selecting the right switches requires understanding stem compatibility, housing design, and actuation force. Most consumer keyboards use a standardized MX-style cross stem, but even within that, factory tolerances exist. When changing switches, consider the following: (1) type (linear, tactile, or clicky) and its actuation force to match your typing or gaming profile; (2) stem design and housing compatibility with your keyboard’s plate and PCB; (3) the length of travel and tactile bump position to preserve your preferred typing rhythm; and (4) whether lubing or stabilizer work is desired for the intended feel. It’s worth testing a small batch of switches before a full replacement to confirm stability and sound. Keep a log of the changes to map back to key feel and performance across sessions.
Safety and preparation steps before swapping
Safety and etiquette matter as you prepare to swap switches. Always unplug the keyboard and, if possible, work on an anti-static mat with an grounding strap to prevent ESD damage. Remove keycaps carefully with a puller to avoid stabilizers and plate damage. Clean the key area to minimize debris that could contaminate new switches. If you’re working with soldered boards, understand that desoldering introduces risk of lifted traces or cold joints; proceed only if you’re confident in technique or plan to consult a technician. Keep an organized workspace, label switch positions, and verify key layout before reassembly. These precautions preserve the keyboard’s long-term reliability and reduce the chance of errors.
Step-by-step testing approach for a suspect switch
Before committing to a full replacement, test the suspect switch in isolation. Use a switch tester or a spare PCB to verify actuation force, travel, and tactile feedback. Install a known-good switch in the same position to compare feel and audio against the suspect unit. If the suspect switch consistently underperforms across multiple tests, assign it to replacement; if performance is identical, you may be dealing with broader wear elsewhere (plate, stabilizers, PCB traces). Document each test result to guide the broader replacement strategy and avoid overhauling unaffected switches. A measured, methodical approach saves time and materials while preserving system performance.
How lubing and stabilizers affect the feel after swapping
Lubrication can dramatically alter the smoothness and sound of a switch. If you prefer a quieter, glide-like feel, consider applying a light, appropriate lubricant to new switches and lubricating stabilizers where needed. Avoid over-lubing which can attract dust and cause gunk buildup, and always use lubricant compatible with your switch type. Stabilizers contribute to the overall travel sound and key feel, especially on larger keys like spacebar and enter. Re-tuning these components can transform the perceived quality of a switch replacement, so factor stabilization into your plan when replacing a batch of switches.
Cost considerations and time estimates
Switch replacement costs vary with switch type, quantity, and where you purchase from. As a rough guide, expect only a few dollars per switch for basic variants and higher prices for premium or specialty switches. Time estimates depend on keyboard design: hot-swappable boards allow faster turnover, while soldered boards demand careful desoldering and re-soldering. A complete replacement session on a typical compact board may take roughly 60–120 minutes for a careful swap, while a larger or more complex board could extend to 2–3 hours. Budget additional time for testing and retesting to ensure consistent keystroke performance across all keys.
Maintenance plan for future reliability
Set a routine to audit your keyboard switches every 6–12 months, depending on usage. Incorporate a quick test for sticky or inconsistent keys, dust cleaning, and re-lubing only if you’re comfortable with the materials involved. Maintain spare switches and keep a written log of changes and results to track performance trends. This proactive approach minimizes the risk of sudden switch failure during critical work or gaming sessions. A simple maintenance cadence helps you stay ahead of wear, ensuring a stable, satisfying typing experience.
Tools & Materials
- Keycap puller(Used to lift keycaps without damaging stabilizers)
- Switch puller (for hot-swappable boards)(Essential for quick removal on many hot-swappable boards; optional if you already own a compatible tool)
- Small Phillips screwdriver (No. 0 or No. 1)(For screws holding the PCB or stabilizers, if applicable)
- Desoldering pump or wick(Needed only for soldered boards)
- Soldering iron(Use with caution; only if dealing with soldered switches)
- Isopropyl alcohol (70–99%)(Cleaning residue before sticking in new switches)
- New switches (compatible with keyboard)(Order a small batch first to test fit and feel)
- Anti-static wrist strap(Ground yourself to prevent ESD damage)
- Lubricant compatible with switches(Optional for smoother feel on lubed builds)
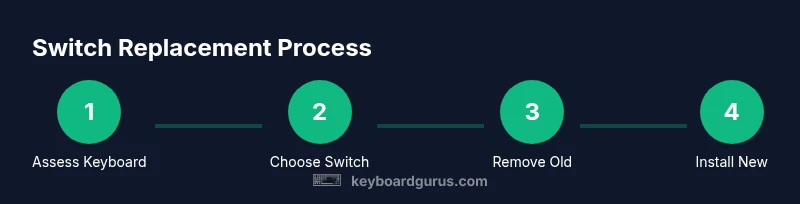
Steps
Estimated time: 90-150 minutes
- 1
Power down and prepare workspace
Unplug the keyboard, place it on an anti-static mat, and gather all tools. Remove acrylic or plastic keycaps to expose the switches. This initial step prevents accidental damage and ensures you can access each switch safely.
Tip: Label key positions before removal to avoid mapping errors later. - 2
Identify board type: hot-swappable or soldered
Check whether switches snap in or are soldered to the PCB. Hot-swappable boards let you replace switches without soldering, while soldered boards require desoldering and re-soldering. Knowing this determines the replacement method and risk level.
Tip: If unsure, consult the board manual or take a high-resolution photo of the PCB before any removal. - 3
Remove faulty switches with the appropriate tool
For hot-swappable boards, firmly seat the switch puller and lift straight up to remove the switch. For soldered boards, do not attempt removal without desoldering; otherwise you risk traces or pads. Record which switches are removed for future reference.
Tip: Work slowly; forceful removal can bend pins or damage the PCB. - 4
Inspect and prepare new switches
Check new switches for any manufacturing defects and ensure compatibility with your keyboard. Test a few units on a spare PCB if possible. If you plan to luble, apply a light coat and allow it to settle before installation.
Tip: Match the switch type (linear, tactile, or clicky) to your typing goals and noise tolerance. - 5
Install new switches and reconnect stabilizers
Place each new switch, ensuring pins align with the PCB. If you have stabilizers on larger keys, reattach them and check alignment for smooth travel. On hot-swappable boards, press firmly until the switch latch clicks into place.
Tip: Do not bend pins; align with even pressure to avoid skewing the switch housing. - 6
Reassemble and test
Reinstall keycaps, plug in the keyboard, and run a quick test using a typing test or a switch tester. Listen for consistent sound and feel, and confirm no key misregistration. If issues appear, re-check the affected switches and board connections.
Tip: Test all layers—regular typing, gaming, and any macro keys—to ensure reliability. - 7
Document changes and monitor performance
Log which switches were replaced, the type, and any anomalies observed during testing. Monitor behavior over the next few days; if new signs emerge, consider repeating the process on other keys or seeking professional help for soldered boards.
Tip: Maintain a maintenance log to track wear trends and inform future replacements.
Got Questions?
What does it mean if a keyboard is hot-swappable?
A hot-swappable keyboard lets you replace switches without soldering. This makes testing and iteration faster and less risky for beginners. If the board is not hot-swappable, you’ll need desoldering tools and soldering skills.
Hot-swappable keyboards let you swap switches without soldering. If yours isn’t hot-swappable, you’ll be desoldering and resoldering switches, which is more complex.
How do I know when to replace rather than lubricate a switch?
If there’s persistent binding, wobbly feel, misregistrations, or audible crackling that lubing won’t fix, replacement is usually the best option. Lubrication can improve smoothness but won’t restore a switch with structural wear.
If a switch feels sticky or unreliable even after cleaning, replacement is usually the best option; lubrication helps but isn’t a cure for wear.
Can switch replacement affect stabilizers and key feel?
Yes. Replacing switches can alter the overall feel, and stabilizers under large keys may creak or rattle if not re-tightened or lubricated. Plan to re-tune stabilizers after any major switch work.
Switch swaps can change how stabilizers feel; you may need to adjust or lubricate them for best results.
Are there risks with soldered keyboards?
Soldered keyboards risk lifted traces or cold joints during desoldering. Only attempt if you’re comfortable with soldering or hire a technician. Work carefully to avoid damaging the PCB.
Desoldering a board risks damage. Consider professional help if you’re unsure.
What’s a realistic replacement cost per switch?
Costs vary by type and brand, but expect a few dollars per switch, with higher prices for premium options. Plan for at least a small batch for testing and replacements.
Switch costs are usually a few dollars per unit, varying by type and quality.
How long should I expect a replaced switch to last?
Lifespan depends on usage and switch type; with proper care, expect typical wear to occur over tens of thousands of keystrokes. Regular maintenance can extend life.
With good care, replaced switches should last many thousands of keystrokes.
Watch Video
What to Remember
- Assess wear before replacing switches
- Choose compatibility and switch type carefully
- Test suspects with a known-good switch
- Document changes for long-term maintenance