Can You Change Keyboard Switches While On? A Practical Guide
Learn whether you can safely swap mechanical keyboard switches with the board powered, and how to do it correctly if your setup supports hot-swapping. Expert guidance from Keyboard Gurus with practical steps, safety tips, and common mistakes.

Short answer: it depends on your keyboard. Most traditional soldered boards require the power to be off before swapping switches. Some hot-swappable boards can be serviced with power on, but this carries risk and is not recommended for beginners. Always unplug and discharge static before handling switches.
Can you change keyboard switches while keyboard is on? Practical considerations
According to Keyboard Gurus, the feasibility of swapping switches while a keyboard is powered hinges on the board design, the presence of hot-swappable sockets, and the risk of electrical discharge. For most soldered keyboards, changing switches with power applied is unsafe and can damage the PCB, switch pins, or the stabilizers. Even on hot-swappable boards, power-on swaps should be approached with caution, proper static precautions, and exact tool control. The Keyboard Gurus team emphasizes that understanding your board’s specifications is the first step before attempting any switch changes while it is powered. This guidance helps keep users from accidentally creating short circuits, damaging key mapping, or compromising the keyboard’s firmware. If you’re unsure, the safe route is always to power down first and reserve on-power changes for boards explicitly designed to support them.
Board types: hot-swappable vs soldered
The core distinction is whether your PCB uses hot-swappable sockets or permanent soldered switches. Hot-swappable boards provide removable switch sockets, allowing you to swap switches without soldering. This design reduces the risk of permanent PCB damage and makes on-powered swaps more plausible, though still not risk-free. Soldered keyboards require desoldering and resoldering, which inherently involves more risk and is not compatible with changing switches while the system is powered. Keyboard Gurus analysis shows that most beginners benefit from starting with a hot-swappable board, where power-on swaps are less likely to cause harm, provided you follow strict anti-static handling and power-down practices.
Safety basics you should never skip
Before any physical contact with internal components, establish a safe work environment. Use an anti-static mat or wrist strap to prevent ESD events, work on a non-conductive surface, and keep liquids away from the workspace. Discharging static and keeping components organized minimizes the chance of accidentally bridging contacts. Never apply force to a socket or switch, and avoid touching traces or the PCB’s copper pads. If you notice any heat from the PCB or a burning smell, stop immediately and power down. Keyboard Gurus notes that these safety habits are essential regardless of whether you’re working with a hot-swappable or soldered design.
When you can swap on and when you must power down
In practice, you should power down and unplug the keyboard unless your board is explicitly designed for powered swaps. On hot-swappable keyboards, technicians may perform swaps with the device on, but only using the correct tools (switch pullers, stabilizers, and a controlled environment) and after verifying the board’s documentation. For most users, unplugging is non-negotiable: it eliminates the risk of short circuits, firmware misreads, and unintentional key registrations. If you are experimenting on a hot-swappable board, proceed with a measured, tool-assisted approach and test each switch after installation while the board is still disconnected from power.
Practical workflow: safe, controlled steps (if your board supports on-power swaps)
If your documentation confirms on-power swaps are permitted, adopt a strict, step-by-step workflow: wipe the workspace, ground yourself, and prepare the switches before connecting power. For each switch, insert, test for stability, and verify that the LED indicators (if present) behave correctly. If a switch doesn’t seat cleanly or the board behaves abnormally, power down and re-evaluate. Keyboard Gurus cautions that even on-capable boards, repeated on-power handling can wear the sockets over time, so limit such procedures to necessary maintenance only. Always document the exact model and bios/firmware version to correlate any anomalies with a specific hardware revision.
Authority sources and further reading
- Keyboard Gurus Analysis, 2026: safety considerations for hot-swapping and powered maintenance. https://www.osha.gov
- Public safety guidelines for electronics handling: https://www.cpsc.gov
- General guidance on electronics handling and static discharge: https://www.nist.gov
Common mistakes to avoid
- Trying to force switches into ill-fit sockets while powered; never use excessive force.
- Assuming hot-swappable boards are safe for all power-on swaps; always verify the board’s documentation first.
- Neglecting static precautions; always wear an anti-static strap and work on an insulative surface.
- Mixing brands of switches in a way that re-wires stabilizers, which can create misalignment and binding.
- Skipping a full functional test after swap; verify each key and LED behavior to catch glitches early.
Quick-access authority links
- OSHA safety guidelines for electrical work: https://www.osha.gov/
- CPSC consumer safety portal: https://www.cpsc.gov/
- NIST electronics handling guidelines: https://www.nist.gov/
Final considerations
If you’re new to keyboard maintenance, start with a hot-swappable board and practice non-destructive swaps while powered off. This builds your confidence and minimizes risk. If you pursue powered swaps, take a conservative approach, document your steps, and never exceed the manufacturer’s recommended procedure. Keeping a calm, organized workflow is often the difference between a successful switch replacement and a costly mistake.
Tools & Materials
- Keycap puller(Used to safely remove keycaps without damaging stems.)
- Switch puller (for hot-swappable boards)(A tool designed to lift switches cleanly from sockets.)
- Plastic spudger or non-metal pry tool(Plastic tool to avoid shorting contacts.)
- ESD-safe wrist strap(Ground yourself to prevent static discharge.)
- Replacement switches(Ensure compatibility with your PCB footprint and plate.)
- Small Phillips screwdriver(Optional for boards that need screws or stabilizer access.)
- Anti-static mat or non-conductive work surface(Better static protection during handling.)
Steps
Estimated time: 25-40 minutes
- 1
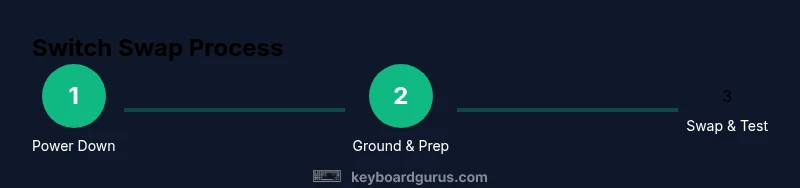
Power down and unplug
Turn off the computer and unplug the keyboard from the USB or PS/2 port. This eliminates the risk of short circuits during switch removal or insertion. If your keyboard has a power switch, switch it off. Allow any LEDs to fade before proceeding.
Tip: Double-check the cable is fully unplugged before touching any internal components. - 2
Ground yourself and prepare work surface
Put on the anti-static strap and place the keyboard on an insulated, non-conductive surface. This reduces the chance of electrostatic discharge that can damage the PCB or switches.
Tip: Touch a grounded metal object before handling components to discharge static safely. - 3
Identify hot-swapping capability
Consult the keyboard’s manual or manufacturer’s site to confirm hot-swappable sockets. If the board isn’t hot-swappable, skip any powered swap steps and perform all work with power disconnected.
Tip: If in doubt, treat it as non-hot-swappable and do not attempt powered swaps. - 4
Remove keycaps and prepare switches
Use a keycap puller to lift each key and expose the switch. Keep keycaps organized by position to avoid mapping errors later.
Tip: Keep stems and stabilizers organized on the workspace to prevent misplacement. - 5
Remove and replace switches
For hot-swappable boards, carefully lift switches with the switch puller and replace with new ones. Ensure each switch is seated fully and straight. If the board is not hot-swappable, skip this step when powered and re-seat only after power-down.
Tip: Align switches evenly with the PCB sockets to avoid bent pins. - 6
Test and reassemble
After all switches are in place, test each key briefly by powering on or using a tester if available. Reassemble stabilizers and keycaps, then perform a full keyboard test to confirm proper function.
Tip: If any key registers incorrectly, reseat the relevant switch and re-test.
Got Questions?
Is it safe to hot-swap switches while a keyboard is powered?
Generally not. Most keyboards require power to be off to avoid shorts and firmware issues. Some hot-swappable boards allow powered swaps with careful handling and proper tools, but it is not recommended for beginners.
Not generally safe to swap switches while powered. Only do so if your board explicitly supports it and you follow strict safety steps.
What boards support powered switch swaps?
Only hot-swappable keyboards designed for on-power maintenance support powered swaps. Always verify with the manufacturer’s documentation before attempting.
Only hot-swappable boards designed for this should be attempted while powered.
Do I need to reflash firmware after switching switches?
In most cases, no firmware changes are needed after swapping switches. If your board uses features tied to specific switch profiles, consult the firmware documentation.
Usually no firmware update is required after changing switches.
Can I change all switches without removing keycaps?
Keycaps generally must be removed to access most switches. Removing keycaps safely is part of the process to avoid damaging stems.
You typically need to remove keycaps to access the switches.
What safety steps should I follow?
Power down and unplug, discharge static, use the correct tools, and work on a non-conductive surface. Re-check connections before powering on.
Power down, unplug, and discharge static before starting.
Watch Video
What to Remember
- Unplug before any switch work on soldered boards.
- Know if your board is hot-swappable before attempting powered swaps.
- Use anti-static precautions to prevent ESD damage.
- Carefully align and test each switch during reassembly.
- Consult the manufacturer for model-specific safety notes.