Can You Change Switches in Keyboard? A Practical Guide
Learn how to swap keyboard switches, including hot-swappable vs soldered boards, with safety tips, step-by-step instructions, and troubleshooting to customize feel and sound.

Yes, you can change switches in a keyboard. Whether you want a lighter feel, louder click, or different actuation, swapping switches is a common upgrade. The process ranges from simple hot-swapping to desoldering on non-hot-swappable boards. This guide covers when it's possible, what you need, and how to do it safely with practical steps.
can you change switches in keyboard
Switching switches is a customization path that many keyboard enthusiasts pursue to tailor feel, sound, and latency. The basic question remains: can you change switches in keyboard? The answer depends on your board’s hardware. Some keyboards expose removable switches, while others are fixed to the PCB. The decision hinges on the socket design, stem compatibility, and whether the key switches are soldered. If your keyboard supports hot-swapping, swapping switches is as simple as pulling and seating new switches. If not, you’ll need desoldering skills and replacement switches that match the PCB footprint. The rest of this guide covers how to identify compatibility, select switches, and perform the swap safely. According to Keyboard Gurus, most hobbyists start with a small batch of switches to test feel and sound before committing to a full keyboard swap.
Why switch customization matters
For many users, switch customization is about feel and sound, not merely aesthetics. According to Keyboard Gurus, the most impactful differences come from the switch stem and spring combination, which affect actuation force and travel. When you change switches you’re not just changing a tactile sensation; you’re altering the key’s return path and sound profile. This is why beginners should begin with a small set of switches and test in a single row before doing a full keyboard swap. Also, check your keycaps compatibility and stabilizers; misalignment can cause rattle or binding. Keyboard Gurus analysis shows that enthusiasts frequently upgrade for improved typing comfort and a more satisfying sound profile, not just for branding.
Types of switches and how they feel
Mechanical switches come in several families, each with a distinct feel. The most common categories are linear (smooth travel, quiet), tactile (a bump with feedback), and clicky (audible snap). The choice affects typing comfort, latency, and acoustics in your space. Compatibility depends on stem design and footprint, so you’ll want to compare the switch’s stem style to your PCB sockets. Some brands offer lubed or pre-lubed variants to reduce friction and dampen noise. The feel is influenced by the housing, stem geometry, and lubrication level; if you’re unsure, start with a familiar type and gradually try others.
Compatibility and limitations
Before you buy, verify whether your keyboard supports switch swapping at all. Hot-swappable boards use sockets that allow easy removal and seating of switches; soldered boards require desoldering and re-soldering with the correct footprint. Even among hot-swappable boards, different switch types may need different stabilizers or keycap shapes. Some boards disallow certain switch brands due to stabilizer interference or layout constraints. Always check the keyboard’s documentation or community resources to confirm compatibility, and avoid forcing switches into misaligned sockets.
Tools and preparation
Having the right tools on hand makes the swap safer and faster. Start by organizing a static-free workspace, with a soft mat. Gather a keycap puller, a switch puller, precision screwdrivers, and a soldering station if you’ll desolder. You’ll also want replacement switches that match your stem type and footprint, anti-static measures, isopropyl alcohol for cleaning, and a multimeter for quick continuity checks. Read the keyboard’s warranty terms, as opening the case may affect coverage. Planning ahead reduces the risk of losing small parts and misplacing switches.
Hot-swapping vs desoldering: what changes and what to expect
Hot-swapping lets you swap switches without any soldering, by pulling out old switches and seating new ones in the sockets. Desoldering requires removing solder from each switch pin before lifting it from the PCB, then soldering new switches in place. Hot-swappable boards are usually more beginner-friendly and less risky to board health, while soldered keyboards can offer a broader range of switch options but demand careful technique. When upgrading, expect differences in actuation feel, stabilizer interaction, and sound. Always test each switch individually after installation to catch seating or polarity issues early.
Testing, tuning, and maintenance
After you’ve replaced the switches, re-seat the keycaps, reassemble the board, and connect it to a host device. Test every key for consistent actuation and ensure stabilizers are functioning smoothly. If a key feels scratchy or binds, remove and re-seat that switch or lubricate the stem and housing. Regular maintenance, including occasional lubrication and dust removal, will help preserve the feel you chose and extend the keyboard’s life. Keyboard Gurus Team emphasizes documenting your switch choices so you can refine your setup over time.
Tools & Materials
- Anti-static wrist strap(Ground yourself before touching PCB to reduce ESD risk)
- Keycap puller(Remove caps safely without bending stems)
- Switch puller(For hot-swappable boards, pull switches straight out)
- Precision screwdriver set(Small Phillips and Torx tools for screws on cases)
- Soldering iron (60-80W) and solder(Essential only for soldered/desolder steps)
- Desoldering pump or wick(Needed if board isn’t hot-swappable)
- Replacement switches (MX-style or compatible)(Match stem type and footprint to your PCB and keycaps)
- Multimeter(Helpful for quick continuity checks)
- Isopropyl alcohol and lint-free wipes(Clean contact surfaces and switches)
Steps
Estimated time: 90-180 minutes
- 1
Power down and prep workspace
Unplug the keyboard from the computer and any power source. Ground yourself with an anti-static strap and work on a non-conductive mat. This step reduces the risk of damaging delicate switches or the PCB during the swap.
Tip: Double-check that you’re working on the correct keyboard to avoid cross-swap mistakes. - 2
Remove keycaps safely
Use a keycap puller to lift each cap at a slight angle. Place caps in a labeled tray so you don’t mix up layout positions. If your board uses stabilizers, consider removing spacebar and large keys first to reduce tension on the rest.
Tip: Taking a quick photo of the layout helps during reassembly. - 3
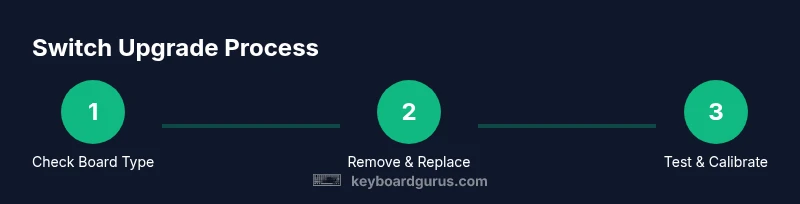
Identify board type: hot-swappable or soldered
Inspect the switches area to see if sockets are present. If you can pull a switch straight up without any heat or extra force, your board is likely hot-swappable. If you see visible solder joints, plan for desoldering.
Tip: If uncertain, consult the board’s manual or community tutorials for your specific model. - 4
Remove old switches (hot-swappable)
Grip a switch with a switch puller and lift it straight out of the socket. Don’t twist, as it can bend pins. Remove all target switches in the same row for consistent feel.
Tip: Do one switch at a time to observe any seating differences and avoid mixing types. - 5
Desolder and remove switches (soldered boards)
Heat each pin with a soldering iron and apply a desoldering pump or braid to remove molten solder. Lift the switch from the PCB once the joints are clear. Inspect for any lingering solder or bent pins before inserting new switches.
Tip: Work in a well-ventilated area and keep the iron at moderate temperature to avoid damage. - 6
Install new switches
Insert each new switch into sockets (hot-swappable) or align pins with PCB holes (soldered). If soldering, apply a small amount of solder to each pin and ensure a clean, solid joint. Verify that the switches sit flush and the stems line up with keycaps.
Tip: Test the travel of each switch before final soldering (if applicable). - 7
Reassemble, test, and fine-tune
Reattach keycaps, close the case, and connect the keyboard to a host device. Run a quick test of every key, listening for clacks or stutters. If any switch binds, re-seat or lubricate the switch housing and stem.
Tip: If you hear new sounds, consider lubricating the stem or stabilizers for smoother operation. - 8
Document and maintain
Record which switches you used and their feel, so you can replicate or revise later. Regular cleaning and occasional lubrication can maintain the new feel and prevent dust buildup.
Tip: Keep spare switches and工具 in labeled containers for future tweaks.
Got Questions?
Can I change switches on any keyboard?
No. Only keyboards with removable switches or hot-swap sockets allow easy replacement. Some boards are permanently fixed to the PCB and require desoldering or soldering.
Not every keyboard supports switch changes. Look for hot-swappable sockets or consult the manual.
What switch types are compatible?
Compatibility depends on the stem design and PCB footprint. MX-style switches are common, but you must match stem size and switch pins to the board.
Match your stem type to the board and check the footprint before buying.
Do I need special tools?
Yes. You’ll need keycap and switch pullers, a precision screwdriver, and either a soldering iron with solder or a desoldering tool for non-hot-swappable boards.
Tools include pullers, a screwdriver, and soldering or desoldering equipment.
Will changing switches affect warranty?
Opening a keyboard or altering its internals can void the warranty. Check the manufacturer’s terms and any retailer policy before starting.
Warranty terms vary; verify before you begin.
How loud are different switches?
Switch sound depends on the type and lubrication. Linear switches tend to be quieter, tactile and clicky variants are louder. Stabilizers also influence sound.
Sound varies with switch type and lubrication; consider the space you’ll use it in.
What if a switch doesn’t fit properly?
Remove and re-seat the switch or try a different switch with the same footprint. For soldered boards, ensure pins aren’t bent before resoldering.
If a switch doesn’t fit, re-seat or swap to another compatible option.
Watch Video
What to Remember
- can you change switches in keyboard? Yes, if the board supports it.
- Identify hot-swappable vs soldered early to choose the right method.
- Choose switches that match stem type and PCB footprint.
- Test and document changes for reproducibility.