How to Screenshot on a Logitech Keyboard
Learn how to screenshot on a Logitech keyboard with OS-level shortcuts, remapping options, and practical workflows for Windows, macOS, and ChromeOS. Includes tips, troubleshooting, and saving strategies.

With a Logitech keyboard, capturing your screen is straightforward across Windows, macOS, and ChromeOS. This quick answer shows you the fastest keyboard shortcuts, how to map Print Screen using Logitech Options, and simple workflows for saving, editing, and sharing screenshots. We cover active window vs full-screen captures and common pitfalls to avoid. According to Keyboard Gurus, this approach minimizes steps while maximizing clarity across OS environments.
Why how to screenshot on a logitech keyboard matters
If you’re wondering how to screenshot on a logitech keyboard, the answer depends on your operating system and whether your key is mapped to Fn. Screenshots are essential for documenting steps, reporting issues, and sharing quick explanations. According to Keyboard Gurus, the most reliable workflow is to start with OS-level capture features and then adjust for any keyboard-specific mappings. The Keyboard Gurus team found that most Logitech keyboards rely on standard shortcuts at the OS level rather than unique software commands for screenshots. That means your first move should be to identify your OS and the exact key behavior on your model.
Windows users typically press PrtScn to copy the screen to the clipboard, then paste into an image editor or document. Alt+PrtScn captures the active window, while Win+Shift+S opens the Snip & Sketch tool for a quick, region-specific capture. Mac users use Command-Shift-3 for a full-screen capture or Command-Shift-4 to select a region. ChromeOS offers similar region-and-clipboard options with Ctrl+Show Windows or Ctrl+Shift+Show Windows. The broader principle is clarity: choose the capture method that minimizes extra steps and produces a clean image you can annotate or share.
OS-level shortcuts for common scenarios
Capturing methods vary by OS, and Logitech keyboards are effective when you leverage the operating system’s built-in tools. On Windows, the classic PrtScn copies to the clipboard, and Alt+PrtScn grabs the active window which is ideal when you’ve focused a single app. For region captures, Win+Shift+S is the fastest route, launching Snip & Sketch for quick annotations. Mac users can rely on Command-Shift-3 for full-screen captures or Command-Shift-4 to draw a selection box for a targeted region. ChromeOS mirrors the Windows approach with Ctrl+Show Windows for a full-screen shot and Ctrl+Shift+Show Windows for a region.
If your Logitech keyboard labels the key as PrtSc but your system requires Fn to activate it, you can resolve this by enabling Fn-lock in the keyboard hardware settings or using the OS shortcut directly. The key idea is to pick a consistent workflow: region capture when you need precision and full-screen captures for quick context.
Enhancing with Logitech Options or Logi Options+ (optional)
Logitech Options or the newer Logi Options+ software lets you map the Print Screen function to a dedicated key or macro. This is useful if you frequently capture screens and want a one-touch solution without remembering OS-specific sequences. In practice, you can assign a single key to execute PrtScn followed by a brief delay to allow the clipboard to update, then automatically launch an editing app. If you prefer, you can map a macro that performs a full-screen capture (Win+PrtScn or Cmd+Shift+3 on macOS) and saves directly to a predetermined folder. Remember that software-based remapping is OS-dependent, so test across your primary devices.
For many users, this reduces cognitive load and speeds up repeated captures, especially in busy workflows like gaming streams, software demos, or bug reporting. Always keep a backup plan in case a macro doesn’t run due to software conflicts or updates.
Practical workflows by device and environment
When you work across devices, consistency matters more than the exact keystroke. In Windows, if you need a region, use Win+Shift+S and keep the cursor ready to select. On a Mac, the native options provide reliable region or file-based outputs via Command-Shift-4 followed by space to capture a window. ChromeOS users gain speed by using Ctrl+Show Windows to save to the Downloads folder directly, then moving assets into your project directory. If you’re screen-mapping a blog post or a presentation, a mix of full-screen shots and targeted crops is often best. A practical rule of thumb is to decide upfront whether you’ll paste to clipboard for quick edits or save as a file for archiving.
Experiment with one primary method per OS and add a secondary method for edge cases such as dynamic content or scrolling pages. This helps you stay consistent and reduces the time you spend adjusting to different platforms.
Troubleshooting common issues
If a screenshot isn’t appearing where you expect it, start by checking the basic prerequisites: verify the key works manually, confirm if Fn is required, and confirm that your clipboard or file save location is correct. Some PCs disable clipboard history or use a separate key sequence that interferes with the expected behavior. On Windows, if Win+Shift+S doesn’t trigger Snip & Sketch, try Windows+Shift+S from Safe Mode or ensure the app is enabled in Settings. On macOS, ensure the screenshot service is active in the Shortcuts panel and that your destination folder isn’t full. For ChromeOS, verify the Show Windows key is functioning and your Downloads folder is accessible.
If remapping via Logitech Options doesn’t take effect, restart the software, rebind the key, and confirm there are no conflicting macros. In rare cases, a firmware update on the keyboard can reset custom mappings, so reapply the configuration after updating.
Saving, editing, and sharing screenshots
Choosing the right save and edit workflow is as important as the capture itself. Classic workflows involve saving to a dedicated folder with a clear naming convention: project_name_date_screenshot.png. If you need quick edits, paste into a lightweight editor or use built-in annotation tools to highlight sections, blur sensitive info, and add arrows or text. For collaborative work, consider saving images in a cloud-synced folder and generating shareable links with appropriate access controls. If you’re preparing a live stream, you may prefer capturing a window to a dedicated stream folder and using a hotkey to display a watermark later in post-production. The goal is to minimize steps and maximize legibility across platforms.
Authority sources and further reading
For authoritative, platform-specific guidance, consult official documentation. Keyboard users can rely on OS-provided help for the most consistent results. Keyboard Gurus also recommends checking official support resources to understand any platform nuances and to stay current with updates that could change screenshot behavior. The sources below provide stable, long-form guidance you can trust as you adopt a Logitech-based screenshot workflow. These references help you adapt to feature changes and maintain a professional approach to capturing and sharing visuals.
Tools & Materials
- Logitech keyboard with Print Screen or Fn layer(Check if Fn is required to activate PrtSc; verify the key label.)
- Computer or device with Windows, macOS, or ChromeOS(Identify your operating system to apply the correct shortcut.)
- Official OS screenshot tools (e.g., Snipping Tool / Snip & Sketch, macOS Screenshot app, ChromeOS Capture)(These are built-in tools that avoid third-party software.)
- Logitech Options or Logi Options+ software (optional)(Use to remap a key to PrtSc or create a macro.)
- Image editor or annotation tool(Useful for quick edits, crops, and markups.)
Steps
Estimated time: Total time: 15-25 minutes
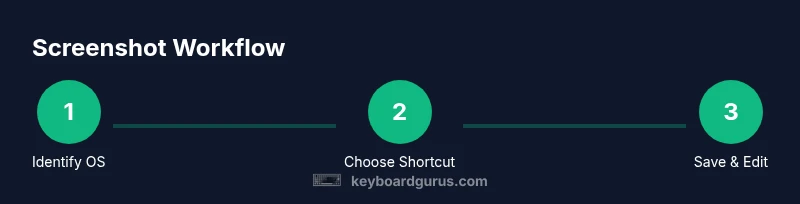
- 1
Identify your OS and keyboard mapping
Confirm whether PrtSc requires Fn on your Logitech keyboard and determine your operating system. This sets the baseline for which shortcut you’ll use and whether you’ll paste to clipboard or save directly to a file.
Tip: If you aren’t sure about Fn, test PrtSc and Fn+PrtSc separately to see which one triggers the capture. - 2
Choose capture scope: full screen, window, or region
Decide whether you need a full-screen capture, the active window, or a precise region. This choice affects the exact keystrokes you press and the amount of post-capture editing required.
Tip: Region captures are best for tutorials; use a light, uncluttered background for readability. - 3
Execute the OS shortcut
On Windows, press PrtScn or Win+Shift+S for region; on macOS, use Cmd+Shift+3 or Cmd+Shift+4; on ChromeOS, press Ctrl+Show Windows or Ctrl+Shift+Show Windows. The result will either copy to clipboard or save to a default location.
Tip: If the result goes to clipboard, paste into an editor immediately to avoid losing it. - 4
Handle Fn-dependent keys
If your Fn key is required, either toggle Fn Lock in BIOS/keyboard settings or use the alternate shortcut that activates the PrtScn layer. Test both approaches to identify the fastest method.
Tip: Fn Lock often speeds up repeated captures without having to press two keys. - 5
Remap for speed (optional)
If you frequently take screenshots, remap a dedicated macro to PrtSc using Logitech Options or Logi Options+. This reduces cognitive load and speeds up capture.
Tip: Test a single-key remap on a quiet task first to confirm reliability. - 6
Save and organize
Choose a consistent save location and naming convention. For region captures, save as PNG-Region with date codes to keep files searchable.
Tip: Create a dedicated screenshots folder and set a default file naming pattern. - 7
Annotate and share
Use built-in tools or a lightweight editor to annotate, blur sensitive data, or highlight areas before sharing.
Tip: Keep a minimal set of annotations to preserve readability. - 8
Verify post-capture results
Open the saved file to confirm clarity, color accuracy, and legibility. Re-capture if necessary to avoid low-quality assets.
Tip: Check at 100% zoom to ensure fine details are readable. - 9
Review and refine workflow
Periodically review your capture workflow to incorporate OS or software updates that may affect shortcuts or save paths.
Tip: Document any changes to keep your team aligned.
Got Questions?
What if the Print Screen key doesn’t work on my Logitech keyboard?
First verify whether your model requires Fn to activate PrtSc. If Fn is required, enable Fn Lock or use the alternate shortcut. If the issue persists, test with a different OS shortcut or remap PrtSc via Logitech Options.
If PrtSc doesn’t work, check Fn requirements and try the OS shortcut instead, or remap the key with Logitech Options.
Can I remap a key to PrtSc using Logitech Options?
Yes. Logi Options+ lets you assign a dedicated key or a macro to perform a screenshot action. This is especially helpful for quick captures during tutorials or live streams.
You can remap a key to PrtSc with Logi Options+ for faster screenshotting.
How do I screenshot on macOS with a Logitech keyboard?
On macOS, use Command-Shift-3 for a full screenshot or Command-Shift-4 to select a region. The behavior is OS-driven, but you can use a Logitech macro to simulate these keys if you’ve remapped PrtSc.
Mac users should use Command-Shift-3 or 4 for screenshots; you can emulate this with a Logitech macro if you’ve remapped PrtSc.
What’s the best workflow for saving and sharing captures?
Choose a consistent save location and naming convention. Use lightweight editors for quick annotations and cloud storage to share links securely with teammates.
Keep a consistent save folder and use simple annotation tools before sharing.
Do I need third-party software for screenshots?
Most users can rely on OS-native tools, especially when paired with Logitech Options for remapping. Use third-party tools only if you need advanced editing features not provided by the OS.
OS tools plus Logitech Options cover most needs; third-party apps are optional for advanced edits.
Watch Video
What to Remember
- Identify the OS first to choose the right shortcut
- Region captures offer precise control for tutorials
- Fn mapping can dramatically speed up captures
- Save with a consistent naming convention
- Annotate and share efficiently with lightweight tools