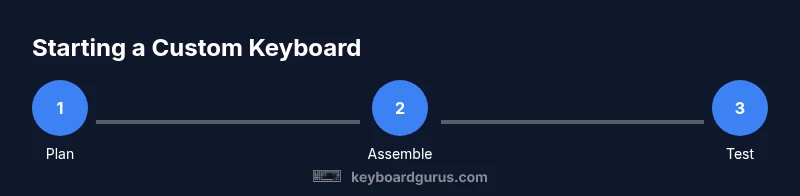
Getting Started with Custom Keyboards
Learn how to start a custom keyboard journey—from parts selection to firmware and testing. A practical, beginner-friendly guide by Keyboard Gurus.

Getting started with custom keyboards means building a baseline kit, selecting a layout, and learning basic firmware to map keys. You’ll combine a case, PCB, switches, and keycaps, then experiment with simple layer changes and macros. Start with a beginner-friendly kit, confirm your preferred layout (e.g., 60%, 75%, or TKL), and gradually expand components as your typing preferences solidify.
What are custom keyboards and why they matter
Custom keyboards are modular devices assembled from individual parts—case, PCB, switches, and keycaps—that you tailor to your typing style, aesthetics, and ergonomics. According to Keyboard Gurus, beginners often start with a simple starter kit and learn by iterating on layout and firmware. This approach helps you feel the difference between a flat, stock board and a setup tuned to your preferences, reducing strain and improving typing speed and accuracy. You gain control over switch feel, keycap profiles, and the overall form factor, which can dramatically affect comfort during long sessions of studying, coding, or gaming. By choosing components you like, you create a personal tool that stays comfortable through education, work, and play. As you gain confidence, you’ll naturally pursue deeper customization, from lighting to advanced macros.
Step 1: Define your goals and budget
Before buying anything, write down what you want from your keyboard. Do you prefer compact layouts for portability, or a larger board for full-size functionality? Consider how much you’re willing to invest in parts, tools, and learning resources. Keyboard Gurus analysis shows that beginners who set clear goals—ergonomics, typing speed, or specific tasks—navigate component choices more easily and avoid buyer’s remorse. Set a rough budget range and plan to upgrade in stages as you master the basics. This upfront clarity keeps your build focused and less overwhelming.
Step 2: Choose your starting kit: hot-swap vs soldered
Your first decision is often whether to buy a hot-swap PCB or a traditional soldered PCB. Hot-swap boards let you swap switches without soldering, which reduces frustration and accelerates learning for beginners. If you’re curious about lubricating or experimenting with different switches, a hot-swap kit is typically the safest entry point. If you want to learn soldering as a long-term skill, you can start with a soldered kit, but be prepared for an additional learning curve. Either way, pick a kit that includes a case, PCB, and plate to ensure mechanical compatibility and a smooth build.
Step 3: Layouts, ergonomics, and intent
Layout choice drives your typing experience. Common starting points include 60%, 65%, 75%, and TKL sizes. The compact form factors save desk space, while larger boards provide easier navigation for complex key bindings. Ergonomics matter: consider a slight tent angle, wrist rest options, and keycap profiles that reduce finger fatigue. Take measurements of your desk height and chair, and map out a layout that minimizes finger stretch and travel time. A well-planned layout reduces fatigue during long coding sessions or extended gaming marathons.
Step 4: Firmware and key remapping basics
Firmware is the brain of your keyboard. Most beginners start with user-friendly toolchains like VIA for remapping and QMK for deeper customization. Start by mapping essential keys, and gradually add layers or macros for gaming or productivity. Read the PCB’s documentation carefully to understand which firmware features are supported and how to flash your board safely. Practice on a spare keyboard or a virtual keyboard editor if you’re unsure, so you don’t risk your primary build.
Step 5: Assembly options and initial build
Assemble the core components first: mount the PCB into the case with the plate, then fit the stabilizers, and finally install the switches if you’re not using hot-swap. For beginners, hot-swap boards simplify the process and allow quick iterations. If you do solder, practice on a practice board first and double-check polarity and grounding. Take your time, keep your workspace organized, and label components to avoid mix-ups during reassembly.
Step 6: Testing, tweaking, and maintaining your board
Begin with a basic keyboard test: confirm all keys register correctly, test for ghosting, and identify any stabilizer rattle. Use a typing test to assess comfort and accuracy. If a switch feels scratchy, try lubricating gently or swapping it out for a test run. Maintain your build by keeping dust out of keys and periodically re-lubing if needed. Document changes so you can reproduce successful configurations later.
Step 7: Community, learning, and ongoing improvements
Join keyboard communities, inspect other builders’ layouts, and share your progress. Following creators and guides can spark new ideas, from alternative switch types to lighting effects and software quirks. Remember that mastery comes from hands-on practice, not just theory. Keyboard Gurus suggests documenting your builds, experimenting with one change at a time, and enjoying the process as you grow your skills.
Step 8: Roadmap for expansion and personal style
As you gain experience, you may expand into custom keycaps, unique switches, or specialty cases. Consider integrating ergonomic improvements, such as a split design or tenting accessories, to optimize comfort. Build logs help you track what works and what doesn’t, and serve as a reference for future projects. This iterative approach keeps your setup fresh and aligned with your evolving needs.
Tools & Materials
- Keyboard starter kit (case, PCB, plate)(Choose a beginner-friendly, hot-swap compatible kit if possible)
- Switches(Try a small mixed batch of tactile and linear switches to compare feel)
- Keycaps(PBT or ABS; consider profile (SA/DSA/XDA) based on comfort)
- Keycap puller(Essential for swaps and maintenance)
- Switch puller(Not needed for hot-swap boards but handy for non-hot-swap kits)
- Screwdriver set (precision)(Phillips and flat-head; include mini Torx if needed by your kit)
- Anti-static wrist strap or mat(Prevents component damage from static electricity)
- Soldering iron and solder(Only if building a soldered PCB; practice on a spare board first)
- Lubricant for switches (optional)(For smoother key feel; test on a single switch first)
Steps
Estimated time: 4-7 hours
- 1
Define goals and budget
Identify your primary use (coding, gaming, writing) and set a flexible budget. Decide on a preferred layout and size, and acknowledge the learning curve involved with firmware and assembly.
Tip: Document your goals in a quick list to revisit before each purchase. - 2
Choose a starter kit
Select a beginner-friendly case/PCB/plate combination, preferably hot-swap to avoid soldering initially. Ensure compatibility with your layout size and keycap set.
Tip: Opt for a kit that includes stabilizers and feet for a complete initial build. - 3
Plan layout and ergonomics
Decide on a layout size and position keys for comfortable reach. Consider chair height, desk space, and wrist posture to minimize strain.
Tip: Sketch a rough diagram of your intended layout before buying parts. - 4
Assemble core components
Mount the PCB into the case, install the plate, and fit stabilizers. If hot-swap, snap in switches; if soldering, prepare joints carefully.
Tip: Keep a magnetic tray to organize tiny screws and switches. - 5
Program firmware and remapping
Flash the firmware and begin with basic key mappings. Explore layers and macros via VIA or QMK, testing changes as you go.
Tip: Back up your initial layout before making heavy changes. - 6
Test, adjust, and refine
Run typing tests, check for misfires, and adjust switch stabilization. Revisit LED effects or lighting intensity if desired.
Tip: Take notes on what feels satisfying to type and what doesn’t. - 7
Document and maintain
Record component choices and firmware versions. Create a build log to reuse settings on future projects.
Tip: Label cables and save a screenshot of your keymap for future reference. - 8
Expand knowledge through community
Engage with keyboard communities, share your build, and learn from others’ configurations. Iteration is the path to mastery.
Tip: Regularly check for firmware updates and new switch/case ideas.
Got Questions?
What is a hot-swappable keyboard and do I need one?
A hot-swappable keyboard lets you swap switches without soldering. It’s ideal for beginners who want to experiment with different feels and reduce setup friction. You’re not required to use one, but it greatly speeds up learning.
A hot-swappable keyboard lets you swap switches without soldering, which is great for beginners who want to try different feels easily.
Do I need to solder the switches to build a keyboard?
Not if you choose a hot-swap board. Soldering is only necessary for traditional fixed PCBs. Beginners often start hot-swapping to avoid soldering while learning.
Soldering isn’t required if you use a hot-swap board; soldering is for fixed PCBs when you’re ready.
What is QMK and VIA in simple terms?
QMK and VIA are firmware options that let you remap keys, create layers, and customize macros. VIA is more beginner-friendly, while QMK offers deeper customization for advanced users.
QMK and VIA let you customize your keyboard’s keys and behaviors; VIA is easier for beginners, QMK for advanced users.
How long does it take to complete a beginner build?
Time varies by complexity and your experience. Plan for several hours up front, with additional time for firmware setup and testing as you iterate.
Expect several hours for a first build, plus extra time for firmware and testing as you learn.
Can I upgrade parts later without starting over?
Yes. Many components are modular, so you can swap switches, keycaps, or even cases and PCBs as your needs evolve.
Absolutely. You can upgrade switches, keycaps, or cases later without rebuilding from scratch.
What layout should a beginner start with?
A small-to-mid sized layout (60% to 75%) is common for beginners, balancing portability with enough keys for productive work and gaming.
Most beginners start with a 60% to 75% layout for a good mix of portability and functionality.
Where can I learn more and get help?
Join online communities, read guides, and watch tutorials. Practice builds a strong foundation and helps you avoid common beginner mistakes.
Join keyboard communities and follow tutorials to build your skills and confidence.
Is cost a barrier for starting a custom keyboard?
Costs vary with components and goals. Start with a basic kit and expand gradually as you identify what matters most to you.
Costs vary, but you can start affordable and upgrade over time as you learn.
Watch Video
What to Remember
- Define goals before buying parts.
- Start with a beginner-friendly kit.
- Experiment with layouts gradually.
- Learn firmware basics early.
- Document builds for future projects.