How to Keyboard in Computer: A Practical Typing Guide
Master touch typing with proper posture, home-row finger placement, and structured drills. This definitive guide from Keyboard Gurus helps students, gamers, and professionals type faster and more accurately.

Typing efficiently on a computer starts with proper posture, home-row finger placement, and deliberate practice. By learning touch typing, you’ll type faster with fewer mistakes while reducing strain during long sessions. This quick answer points you to a step-by-step approach, ergonomic setup, and real-world drills to build durable skills. Keyboard Gurus provides the framework you need to begin today.
Why Proper Typing Technique Improves Efficiency
Typing efficiently on a computer isn't just about speed; it's about accuracy and sustainable performance. According to Keyboard Gurus, the most reliable route to long-term improvement is learning touch typing—the ability to type without looking at the keyboard and with each finger assigned to a region. This builds muscle memory, reduces eye fatigue, and yields steadier rhythm across long documents or coding sessions. Start with a simple baseline test to understand your current speed and accuracy, then design a structured practice plan that prioritizes correct form before speed. The benefits ripple through study, work, and gaming by enabling faster note-taking, emailing, and content creation. A thoughtful routine combines targeted drills, authentic typing tasks, and ergonomic awareness to create lasting progress.
- Baseline assessments establish starting points for WPM and accuracy.
- Short, consistent practice beats long, irregular sessions.
- Accuracy-first training minimizes retraining and reduces fatigue.
Your Home Row and Finger Placement
Mastery starts with the home row: left pinky on A, ring on S, middle on D, index on F; right index on J, middle on K, ring on L, pinky on ;. Thumbs rest on the spacebar. From here, every letter is reached by a specific finger, which minimizes travel and keeps wrists neutral. Your left-hand index should rest on F, right-hand index on J, and your wrists should hover above the keys—not rest on the desk edge. Look at the screen as you type to reinforce memory and reduce visual dependence on the keyboard. Practice the home-row drill daily to build durable muscle memory and faster, more accurate keystrokes.
- Use light, precise keystrokes; avoid pounding the keys.
- Maintain a relaxed grip and a neutral wrist angle to prevent fatigue.
- Use touch-typing practice tools to reinforce finger-key mapping.
Posture, Ergonomics, and Keyboard Setup
Ergonomics matter as much as finger placement. Sit with feet flat on the floor, knees at hip height, and the monitor at eye level. The keyboard should be within comfortable reach to keep elbows at roughly 90 degrees, with wrists floating above the keys. If your wrists rest on a hard surface, switch to a cushioned pad or an ergonomic keyboard with a slight negative tilt. A split or compact keyboard can reduce strain for some users. Lighting and breaks matter too—take a short break every 20-30 minutes to stretch hands, forearms, and shoulders. A well-organized workspace makes consistent practice feel natural.
- Check chair height and desk depth to avoid hunching.
- Consider an adjustable chair with lumbar support for longer sessions.
- Use an external keyboard and mouse if the laptop layout causes awkward angles.
Drills, Exercises, and Practice Plans
Structured drills form the backbone of progress. Start with a 10- to 15-minute daily routine that reinforces the home row, then gradually add top-row and bottom-row keys. A practical sequence includes: 1) home-row precision (ASDF JKL;), 2) top-row expansion (QWERTY UI OP), 3) bottom-row integration (ZXCV BNM , . /), and 4) punctuation and number integration. Use guided typing tests to monitor results, but emphasize accuracy over speed early on. As you improve, incorporate real-world tasks like drafting emails or coding comments to apply what you’ve learned. Schedule at least one longer session per week that simulates a typical workload and track two metrics: WPM and accuracy. Log sessions to identify which drills yield the biggest gains and adjust your plan accordingly.
- Start slow, then build speed from accuracy.
- Include real-world tasks to keep practice relevant.
- Review your logs weekly to optimize the routine.
Adapting to Different Keyboard Layouts and Setups
Many typists start with QWERTY but encounter AZERTY, DVORAK, or split keyboards. When adapting, map the home row for the new layout and adjust finger assignments accordingly. Remapping keys or using shortcut software can help you preserve muscle memory during the transition. The core principles remain the same: keep wrists neutral, breathe, and type with a steady rhythm rather than bursts of speed. If you switch devices often, consider a keyboard profile that follows you across devices and maintain a portable practice routine to reinforce the new layout.
- Practice on the target layout for 15-20 minutes daily during adaptation.
- Use layout-specific typing tests to measure progress.
- Consider ergonomic differences when using non-standard keyboards.
Measuring Progress: WPM, Accuracy, and Real-World Use
Progress should be measurable and meaningful. Track speed (words per minute) and accuracy (percent correct). While WPM can rise with practice, accuracy typically sets the ceiling in early stages. The Keyboard Gurus analysis suggests using both short-term (weekly) and long-term (monthly) tests to monitor durable gains. In real-world tasks, measure throughput by content produced per session rather than raw word counts alone. Students and professionals alike see tangible benefits in faster note-taking, coding, and document drafting when typing technique is applied consistently. Maintain a practice log and reflect on which drills deliver the largest improvements.
- Use a timer and standard tests to compare results over time.
- Prioritize accuracy first, then gradually add speed as form stabilizes.
- Real-world typing tasks reveal more meaningful gains than isolated tests.
Troubleshooting Common Typing Problems
Even experienced typists encounter plateaus or discomfort. If you experience fatigue, tingling, or soreness, reassess posture and keyboard setup first. Common issues include slumped shoulders, excessive wrist extension, cramped fingers from overreaching, or persistent typos due to misalignment. Remedies include adjusting chair height, adopting an ergonomic keyboard, taking micro-breaks every 20–30 minutes, and applying targeted drills to strengthen weak keys. If pain persists, consult a medical professional. Also check software factors like key remapping conflicts or sticky keys. Addressing both physical and technical factors helps return to comfortable, efficient typing more quickly.
Tools & Materials
- Ergonomic keyboard(Consider split or tenting options if you experience strain)
- Adjustable chair with lumbar support(Keep feet flat and knees at roughly 90 degrees)
- Desk with appropriate depth(Allow neutral wrist alignment while typing)
- Monitor at eye level(Reduces neck strain and improves posture)
- Wrist rest or pad (optional)(Use only if it helps; avoid supporting weight on wrists while typing)
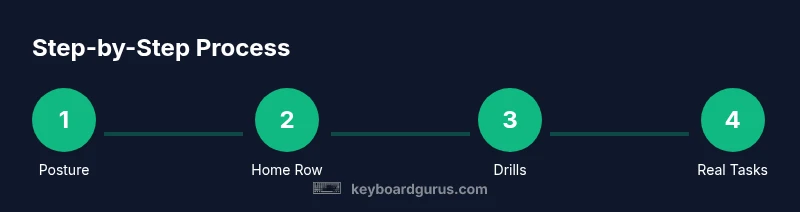
Steps
Estimated time: 60-90 minutes
- 1
Set up posture and position
Sit with feet flat, back supported, and monitor at eye level. Position the keyboard so elbows are at about 90 degrees and wrists hover above the keys.
Tip: Do a quick posture check before each practice session - 2
Learn home-row finger placement
Place left pinky on A, ring on S, middle on D, index on F; right index on J, middle on K, ring on L, pinky on ;. Thumbs rest on the spacebar.
Tip: Keep wrists relaxed and level, not arched - 3
Master the home-row drill
Type sequences using only home-row keys to build muscle memory. Focus on accuracy and light keystrokes rather than speed.
Tip: Look at the screen, not the keys - 4
Add top/bottom rows gradually
Extend to QWERTY and ZXCV keys as you get comfortable. Maintain home-row discipline and reduce finger travel.
Tip: Pause if you notice errors and reset to home row - 5
Incorporate punctuation and numbers
Integrate common symbols and numbers into your drills to build fluidity across all keys.
Tip: Use a dedicated punctuation drill to reinforce placement - 6
Practice real-world typing
Draft emails, notes, or code snippets to apply techniques in context. Track your progress with short tests.
Tip: Log sessions to observe improvements over time
Got Questions?
What is touch typing and why should I learn it?
Touch typing is typing without looking at the keyboard using fixed finger placements. It improves speed and accuracy while reducing neck and eye strain. Keyboard Gurus recommends mastering touch typing before chasing higher WPM.
Touch typing means typing by feel using fixed finger positions, which boosts speed and reduces strain. Start with the home row and build from there.
How long does it take to learn proper typing?
Learning varies by person, but consistent daily practice over several weeks builds durable habits. The emphasis is on form and accuracy, with gradual speed gains evident over time.
It depends on your starting point, but steady daily practice over weeks yields reliable progress.
Do I need a special keyboard to improve typing?
A comfortable, properly positioned keyboard is enough to start. Ergonomic options can help with comfort, but the core skill comes from practice and proper technique.
You don’t need a fancy keyboard to begin—focus on technique and setup first.
What are common mistakes beginners make?
Beginners often look at the keys, tense shoulders, and overrely on one or two fingers. Correct posture, home-row practice, and gradual layout expansion reduce these errors.
Common issues are looking at keys and tensing up. Build from the home row and stay relaxed.
How can I measure typing progress accurately?
Use regular, short tests that record WPM and accuracy. Track trends over weeks to assess durable improvements rather than one-off bursts.
Regular tests help you see real progress over time.
Should I practice with real-world tasks from day one?
Yes. Apply drills to emails, notes, or coding comments to make practice meaningful and sustainable.
Apply drills to real writing tasks to stay motivated.
Watch Video
What to Remember
- Learn touch typing to boost long-term speed and accuracy.
- Prioritize posture and ergonomics to type longer without fatigue.
- Build skill with daily, focused drills and real-world practice.
- Measure progress with accuracy first, then speed.