How to Type with Nails: A Practical Guide
Learn nail-friendly typing techniques, ergonomic setup, and practice routines to type accurately with nails. This guide from Keyboard Gurus helps you adapt without trimming.

Learning to type with nails involves adjusting posture, finger placement, and timing. Use the fingertip pads or the nail edges while keeping wrists neutral, avoiding strikes with the full fingertip. Tap with a light, deliberate press and a slightly slower cadence, then gradually speed up as accuracy improves. If needed, consider a wider keyboard or a split layout and tweak key-repeat settings.
Why typing with nails presents unique challenges and opportunities
For many people, nails alter the way keystrokes land, requiring adjustments to finger placement, touch, and posture. The nail tip has a larger contact area than a fingertip, which can slow down speed but improve control if used intentionally. Keyboard Gurus recommends starting with a clear posture: sit upright with elbows at about 90 degrees, wrists floating or resting lightly on a padded surface, and eyes focused on the screen rather than the keyboard. Nail length varies widely; very long nails can cause accidental keystrokes and mis presses, while very short nails may feel similar to natural typing.
A practical approach is to experiment with two common tactics: using the nail edges for certain keys (such as the outer columns of the home row) and using the fingertip pads for others. This hybrid method minimizes fatigue and reduces missed keystrokes during longer sessions. Early weeks typically involve slower speed, but accuracy tends to rise as you learn which keys respond best to nail-based contact and which benefit from finger pads. According to Keyboard Gurus Analysis, 2026, mindful practice and progressive adaptation yield consistent results over time.
Ergonomic setup for nail-friendly typing
Creating a nail-friendly work environment starts with your desk height, chair, and keyboard orientation. Use an adjustable chair so your elbows rest at about 90 degrees and your wrists stay in a neutral position. A keyboard with a gentle tilt or a split layout can reduce the arch in your wrists, which is especially helpful when you’re using the nail edges for keystrokes. A padded wrist rest that aligns with the keyboard helps maintain a straight line from elbow to fingertip. Position the monitor to eye level to prevent neck strain, and ensure you have adequate lighting to avoid straining your eyes while you type.
Keep your shoulders relaxed and avoid hunching forward. If you notice fatigue in the first 15–20 minutes, pause and reset your posture. Small adjustments—like raising the keyboard by 1–2 centimeters or adjusting the tilt by a few degrees—can significantly impact comfort and accuracy. Accessibility considerations are important, so choose equipment that matches your body dimensions and bell-tone cues of your own typing rhythm. A well-considered setup reduces fatigue and improves long-term performance.
Hand positioning and finger strategy
Nibbling around the home row with nails requires a strategic approach to finger placement. Use the nail edges for keys on the outer columns and rely on fingertip pads for the middle keys where precision is critical. Maintain a light touch on all keys and avoid slamming keystrokes; nails do not rebound as quickly as bare fingertips, so a slower cadence often yields better accuracy. Keep your wrists level with the keyboard and avoid bending them upward or downward. The goal is to establish a repeatable contact point that minimizes finger travel while maximizing control. Train both hands to share the workload evenly, and avoid over-extending any single finger. This balanced approach helps distribute force across the hand, reducing fatigue during long sessions.
Modifications and tools that help
Several practical tools can support nails-based typing. An ergonomic keyboard, especially one with a split layout or low-key travel, can dramatically reduce strain. Wrist rests and a chair with proper lumbar support play crucial roles in maintaining neutral positioning. For nails, consider a light hand-care routine: keep nails trimmed to a practical length, moisturize cuticles, and use a nail file to smooth edges that could catch on keys. If you’re practicing, soft silicone finger pads can provide a tactile buffer between the nail edge and the keycap, reducing wear. While not essential, these tools can accelerate comfort and accuracy as you build muscle memory. Remember: the aim is a sustainable, repeatable workflow that you can maintain daily.
Keyboard Gurus emphasizes gradual adaptation: start with comfortable equipment, then progressively introduce more challenging layouts or longer typing sessions as your technique improves.
Practice routines and drills
Structured practice is essential when learning to type with nails. Begin with a 10-minute warm-up focusing on light, deliberate taps rather than speed. Move to a nail-friendly drill that alternates between home-row keys and edge keys to build muscle memory. Next, introduce short sentences or phrases that you commonly type, watching for frequent mistakes and adjusting touch accordingly. Include a 2-minute cooldown where you relax your hands and shake out tension. Over days and weeks, increase session length by 5–10 minutes and gradually incorporate punctuation and numbers. Keeping a simple log helps track which keys trigger more errors and where to focus next. Consistency beats intensity; repeat short, careful sessions rather than occasional long ones. A paced, mindful approach yields better results than rushing a single practice sprint.
Common mistakes and fixes
Common mistakes include pressing too hard with the nail edge, leading to higher error rates and quicker nail wear. Another frequent issue is inconsistent cadence, which reduces rhythm and accuracy. To fix these, focus on a light, controlled touch and maintain a steady, deliberate pace. If you notice wrist fatigue, reassess your elbow and chair height and ensure your wrists stay neutral. Avoid cranking the keyboard’s tilt too far; a minor tilt can dramatically improve stability. If nail edges snag on keycaps, trim slightly or smooth edges with a-file to reduce resistance. Finally, ensure your nails are well cared for; brittle nails crack more easily under repetitive motion. A calm, measured approach minimizes errors and supports long-term improvement.
Progress tracking and expectations
Progress with nail typing varies by individual, but most users notice improvements in accuracy within a few weeks of consistent practice. Expect an initial drop in speed as you adjust to new contact points, followed by a gradual increase in both accuracy and speed. Set small, measurable goals—for example, reduce the error rate on a 10-minute typing test by 20% within two weeks. Use a simple journal or typing software to log speed (WPM) and accuracy. Periodically reassess your setup: a slightly higher chair, different keyboard tilt, or a new keycap profile can all contribute to better performance. Remember that nails typing is a skill that benefits from purposeful repetition and patience.
Tools & Materials
- Ergonomic keyboard (split or curved layout)(Choose a model with gentle key travel and larger keys if possible)
- Wrist rest or wrist pad(Align with the keyboard to keep wrists neutral)
- Adjustable chair and desk height(Set to elbow height when typing)
- Monitor stand or desk riser(Keeps neck aligned and reduces strain)
- Typing gloves or finger pads (optional)(Can help reduce nail wear during practice)
- Nail care kit (emery board, cuticle oil)(Healthy nails improve comfort and control)
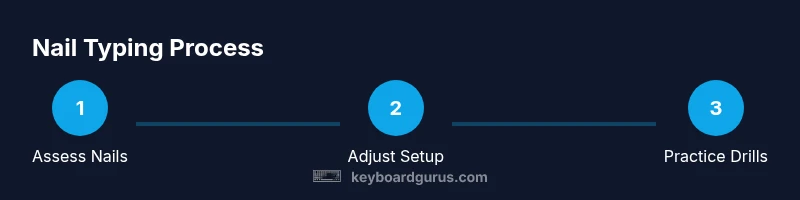
Steps
Estimated time: 60-90 minutes (initial session); recommended 3-4 weekly 20-30 minute sessions for mastery
- 1
Assess nails and workspace
Audit nail length and shape, review keyboard height and tilt, and verify wrists stay in a neutral line when typing. Identify the keys that feel most comfortable with nail contact and which feel better with the fingertip pads. Establish a baseline by typing at a comfortable pace for 2–3 minutes.
Tip: Take initial notes on key areas that cause hesitation to guide future adjustments. - 2
Choose an ergonomic keyboard layout
If you don’t already have one, select a split or curved keyboard with a low key travel and clear keycaps. A layout that reduces lateral wrist movement makes nail-based typing more predictable. Try a gentle tenting angle and adjust until your hands feel balanced.
Tip: Test at least two layouts for 5–10 minutes each to compare comfort. - 3
Position hands and wrists
Place wrists in a neutral position above the keyboard, avoiding bending up or down. Align thumbs near the spacebar area and use the gentle edge of the nails for keys on the outer columns. Keep shoulders relaxed and elbows close to the body.
Tip: Use a light touch initially; nails are less forgiving of heavy presses. - 4
Practice nail-friendly keystrokes
Begin with a controlled cadence—think of it as a slow drumbeat. Press keys with the nail edge or pad depending on the key. Focus on accuracy and gradually increase speed as your muscle memory improves.
Tip: Record your tempo and error rate to guide future sessions. - 5
Incorporate targeted drills
Do focused drills on home-row keys, then expand to left and right outer keys. Use simple sentences that you type often, emphasizing accuracy over speed. Take short breaks to avoid nail fatigue.
Tip: Pause briefly if you notice tension building in your hands. - 6
Track progress and adjust
After each session, log WPM and accuracy and compare against your baseline. If progress stalls, revisit posture, keyboard tilt, or nail care. Iterate settings gradually rather than making abrupt changes.
Tip: Celebrate small improvements to stay motivated.
Got Questions?
Can I type normally with long nails?
Long nails can complicate typing, but with the right technique and keyboard setup, you can type accurately. Start with nail-edge contacts on outer keys and gradually refine your touch.
Long nails can complicate typing, but with technique and practice you can type accurately.
What keyboard works best for nails?
Keyboards with split layouts or shallow key travel often help nails-based typing by reducing wrist strain and improving control. Try a few layouts to see which feels most natural.
Keyboards with split layouts or shallow key travel can help nails-based typing.
How long does it take to learn typing with nails?
Most learners notice gradual improvements over several weeks with consistent practice. Progress depends on nail length, keyboard setup, and daily practice time.
Improvements usually occur over weeks with consistent practice.
Are there tools to help type with nails?
Optional tools like silicone finger pads and nail care products can reduce wear and improve comfort. They are most helpful during early practice.
Silicone pads and nail care tools can help during practice.
Should I trim nails before typing?
Trimming can ease initial adaptation, but it isn’t required. Start with a moderate length and adjust as your comfort and accuracy improve.
A moderate nail length is fine to start; adjust as you go.
Watch Video
What to Remember
- Upgrade to an ergonomic keyboard to reduce strain.
- Adopt nail-friendly finger placement and a balanced touch.
- Keep wrists neutral to prevent repetitive strain injuries.
- Use deliberate, light taps to improve accuracy.
- Track progress and adjust your setup as needed.