Piano Keyboard Notes Labeled: A Practical Guide
A comprehensive, step-by-step guide to labeling piano keyboard notes for quick recognition, covering labeling systems, practical layouts, and practice routines to boost reading, memory, and performance.

Label piano keyboard notes quickly and clearly to help beginners connect pitch with letter names. This guide explains practical labeling systems, octaves, and hands-on layouts for an 88-key keyboard, plus simple drills to reinforce recall. By following these steps, you’ll build a durable visual map that speeds sight-reading and playing accuracy.
Why labeling piano notes matters
Labeling piano keyboard notes labeled helps beginners connect the sequence of white keys to letter names, accelerating reading and memory. According to Keyboard Gurus, a well-organized labeling scheme reduces cognitive load and builds muscle memory faster than guessing by ear alone. In this section, you’ll explore how labeled notes support active learning, reading music more quickly, and transitioning to sight-reading. You’ll learn how to think in letters (C, D, E, F, G, A, B) while navigating octaves, and why consistent placement across the keyboard matters for long-term retention. By the end, you’ll know what to label, where to place labels, and how to reuse these cues as you advance to more complex pieces.
Labeling systems for piano notes: stickers, mnemonics, and more
There are several reliable methods to label notes on a piano keyboard, and the choice often depends on your goals, keyboard type, and whether you teach kids or adults. Letter-name stickers are the most direct approach: they map each white key to a letter from A to G and repeat across octaves. If you want to emphasize octaves, you can print octave labels such as C4, D4, or place an octave anchor every 12 keys. Some learners prefer color-coded stickers to differentiate scales or sections. Mnemonics can be adapted to the keyboard layout for quick recall, and printable flashcards or laminated cheat sheets offer portable references. Keyboard Gurus analysis in 2026 suggests starting with a simple labeling scheme and expanding later as needed.
Choosing a labeling scheme for different learning goals
If your aim is sight-reading, prioritize clear white-key letter mappings with optional octave markers and a durable, removable labeling method. For ear training, color codes and minimal text can help your brain focus on pitch rather than reading. For teaching, a combination of large-letter stickers and an octave anchor improves student comprehension without crowding the key faces. On keyboards with compact layouts, such as 61-key models, adjust anchor points so the middle C remains easy to locate. Keyboard Gurus Analysis, 2026, emphasizes testing a couple of layouts before committing to one approach and choosing the one that preserves pattern recognition across octaves.
Practical labeling layouts for left and right hands and octaves
A practical approach is to establish middle C as a fixed reference point and label notes relative to that anchor. Label white keys with letters A through G, and place octave numbers every 4-5 keys or at the octave boundaries you use most often. For the left hand, group notes by octave ranges that you practice together, and for the right hand, ensure the leading notes you encounter in scales and arpeggios are clearly visible. If you opt for color coding, assign a single color per octave or per scale family to reduce visual clutter. The goal is to create a quick visual map so your hands can find notes without second-guessing.
Common mistakes and how to fix them
One common error is covering instrument markings or logos with labels, which can hinder orientation. Another pitfall is applying too many stickers in a crowded area, leading to misreads. Infrequent replacement of labels causes wear that reduces legibility. Ensure labels are removable and do not leave residue on the keys. Regularly check alignment, especially after cleaning or key replacement, and re-label if necessary. A clean, consistent labeling plan makes it easier to switch between practice pieces and increases confidence during performance.
Integrating labeled notes into practice routines
Labeling notes is most effective when paired with deliberate practice. Start with slow, hands-separate drills focusing on C, D, E, F, G, A, B in one octave, then expand to adjacent octaves. Use simple tunes that emphasize letter-name recognition, such as major scales and basic folk melodies. Alternate between white keys and black keys labeling, so your brain learns to locate notes in multiple contexts. Track progress with a small checklist or app, and gradually reduce reliance on labels as you gain fluency. This integration helps reinforce reading, memory, and playing speed, aligning with Keyboard Gurus guidance for 2026.
Maintenance, removal, and digital alternatives
Removable labels are ideal for learners who want flexibility. When you’re ready to remove, do so gently to avoid leaving sticky residues. For a digital alternative, install a note-labeling app or print a keyboard diagram with labeled keys that you can tape to your desk or screen. If you teach, consider using color-coded overlays or dynamic letter prompts during lessons for varied practice. Regular re-evaluation of your labeling approach keeps the system fresh and aligned with evolving skill levels. The Keyboard Gurus team recommends revisiting your labeling method every few months to ensure it still supports your goals.
Tools & Materials
- Piano keyboard (88-key or 61-key)(Full 88-key is ideal for octave labeling; 61-key models work but may require adjusted anchors.)
- Letter-name label stickers or printable decals(Prefer removable, residue-free options for easy cleanup.)
- Ruler or straight edge(Used to align labels evenly across keys.)
- Soft cloth for cleaning(Clear surface before labeling to improve adhesion.)
- Pencil or marker (optional alternative labeling method)(Use for temporary or non-sticky labeling.)
- Label removal tool or sticker loosener(Helpful if labels age and stickiness increases.)
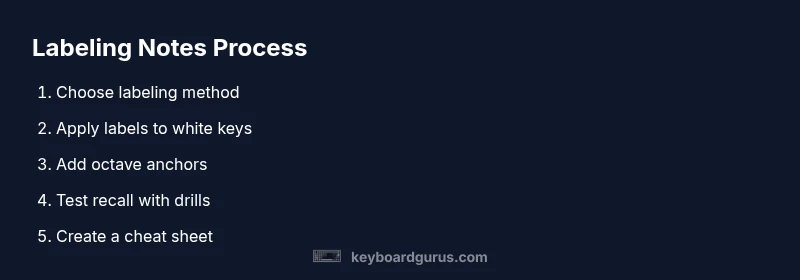
Steps
Estimated time: 25-40 minutes
- 1
Assess keyboard and select labeling method
Review your keyboard size (88-key vs 61-key) and determine whether you will use letter-name stickers, octave markers, or color coding. Decide if you want full coverage or minimal cues for frequent pieces. This step sets the foundation for a clean, sustainable labeling system.
Tip: Start with a single octave anchor (C4) to simplify the mapping before expanding. - 2
Prepare the labeling materials and surface
Gather removable letter-name labels or printable decals, a ruler for alignment, and a soft cloth to wipe keys before applying labels. If using stickers, choose residue-free options to avoid damage during removal.
Tip: Test a single label on an inconspicuous key to confirm adhesion and removal. - 3
Apply white-key labels from left to right
Begin with the white keys, labeling them in order with letters A-G and repeating across octaves. Keep labels centered on each key face and maintain uniform spacing. This creates an immediate visual map for the keyboard.
Tip: Use a ruler to keep labels aligned with key edges for readability. - 4
Add octave anchors and optional black-key markers
Place an octave anchor (such as C4) at a consistent position and, if desired, label black keys with sharps or flats or add a subtle color cue. This helps distinguish adjacent octaves and supports scales and chords.
Tip: Decide early whether you’ll label black keys and how to color-code them. - 5
Test recall with quick drills
Play a short drill focusing on C-D-E-F-G-A-B across the anchored octave, then probe other octaves to confirm recognition speed. Adjust spacing or font size if you notice crowding.
Tip: Use a metronome at a slow tempo to build precision. - 6
Create and print a portable cheat sheet
Make a one-page reference showing letters and octave markers for the most-used notes. Laminate or seal it to withstand practice sessions and transport it to lessons.
Tip: Keep the cheat sheet near your practice area for frequent glances without looking away from the keys.
Got Questions?
What is the best way to label piano keyboard notes for beginners?
For beginners, start with letter-name labels on white keys and add octave markers after you’re comfortable. Keep labels removable and use a simple color scheme to avoid clutter. Practice with short drills to reinforce memory.
Start with simple letter-name labels and octave markers, keep them removable, and practice with short drills to build memory.
Are label stickers safe for expensive pianos?
Use removable, residue-free stickers and test on an inconspicuous key before applying widely. Remove labels after practice sessions to avoid finish damage.
Yes, but choose removable stickers and test first to protect the finish.
Should I label black keys differently from white keys?
Label white keys with letters first. For black keys, you can add sharps/flats or use a color cue if it helps recall without cluttering the keyboard.
Label white keys with letters; consider a simple method for black keys if it aids memory.
How often should labels be replaced?
Replace labels when they show wear, peel, or readability declines. Regular checks help maintain legibility during practice.
Replace worn labels to keep the map clear.
Can I learn piano notes without labeling keys?
Yes, you can learn through listening and finger patterns, but labeling accelerates initial reading and memory—fade labels once fluency improves.
Labels help at first; you can fade them later as you gain fluency.
Watch Video
What to Remember
- Labeling speeds initial learning
- Start with a simple, removable system
- Anchor middle C for consistent navigation
- Use quick drills to reinforce recall
- Revisit labeling as goals evolve