Where Is Keyboard in Android Settings: A Practical Guide
Learn where to locate and manage the Android keyboard, switch keyboards, and customize input options with a clear, step-by-step guide from Keyboard Gurus.

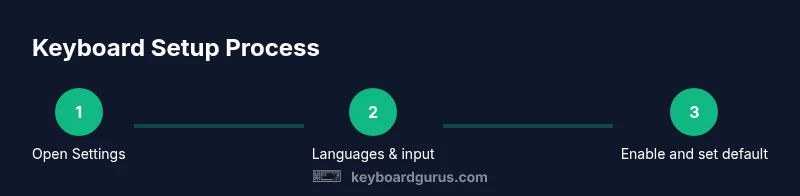
According to Keyboard Gurus, locating the Android keyboard is usually Settings > System > Languages & input > On-screen keyboard, though paths vary by OEM and Android version. This quick answer helps you reach the right menu fast and set a default keyboard, languages, and layouts. If your device uses a different UI, look for a similar item named Keyboard, Keyboards, or Input Method. After finding it, you can proceed to choose the default keyboard and adjust language settings.
How Android Keyboard Paths Vary by OEM and Version
On Android, the keyboard settings live behind a few layers, and the exact path can shift between devices. In Google's stock Android, you typically find the keyboard under Settings > System > Languages & input > On-screen keyboard. Some OEM skins push the same options into Settings > General management > Keyboard or Language & input. Others label the main entry as Keyboard, Keyboards, Typing, or Input Method. The takeaway: the concept is the same, you’re enabling or switching an input method rather than editing the keyboard itself. Keyboard Gurus emphasizes that a small search inside Settings (type “keyboard”) can surface the correct menu even when names differ. If you own a device with a heavy customization layer, anticipate extra taps, such as opening a sub-menu called “Advanced” or “Additional settings.” For students and professionals who type a lot, recognizing this pattern improves efficiency because you’ll reach the right screen in fewer taps, then customize your language, layout, and input style. Also consider whether you’re using a built-in keyboard, a third-party keyboard app, or a hardware-connecting keyboard; each type has distinct steps and permissions. Plan to test your keyboard after changes by opening a text field and typing to verify the active input method and language.
Step-by-step Finder: Where to Look in Settings
The following sequence is designed to work across most Android versions and OEMs. Step 1: Open Settings from your home screen or app drawer. Step 2: Scroll to System (or General management) and tap it to reveal language options. Step 3: Tap Languages & input (or Language & input). Step 4: Tap On-screen keyboard (or Virtual keyboard) to see installed keyboards. Step 5: Choose Manage keyboards to view which input methods are enabled and available for switching. Step 6: Turn on the keyboard you want as default by selecting it from the list and confirming any prompts about device access or permissions. Step 7: If the keyboard you want isn’t listed, open the Google Play Store and install a popular option like Gboard or SwiftKey, then repeat Steps 4–6. Step 8: Open a text field and test typing. Step 9: If needed, adjust language packs, layouts, and input methods for your preferred typing experience. Why this method works: keyboard settings are usually tied to language controls and app permissions; following the steps ensures you enable the right option and can switch as needed. Optional: keep the keyboard settings easily accessible by placing a Settings shortcut on your home screen for quick access. Pro tip: use the in-Settings search to surface “keyboard” instantly if the menu titles are ambiguous.
Choosing a Keyboard: Gboard, SwiftKey, and Alternatives
There are several popular keyboard apps, each with its own strengths. Gboard, developed by Google, emphasizes seamless language switching, emoji and voice input, and robust privacy controls. SwiftKey focuses on prediction and multilingual typing, with strong adapting to your tone. Other options include Fleksy, Grammarly Keyboard, and Samsung's own keyboard on Galaxy devices. When selecting a keyboard, consider: speed and accuracy of typing, themes and layouts, language support, voice input quality, and privacy permissions requested. Keyboard Gurus recommends starting with a widely supported option like Gboard for compatibility and then trying alternatives if you need better multilingual support or a certain keyboard layout. After installing a new keyboard, you’ll usually need to enable it in Settings > Languages & input > On-screen keyboard and set it as default. Some keyboards request extra permissions to function, such as full-disk access or personal dictionary syncing; be mindful of what you grant. If you’re on a company device or school-owned phone, your administrator may restrict installation of third-party keyboards, in which case you’ll be limited to the pre-installed option. Finally, explore advanced features: one-handed mode, glide typing, and personal dictionary to improve speed and accuracy.
Language Support, Layouts, and Input Methods
Android supports multiple languages and keyboard layouts, enabling you to switch between languages without leaving your typing area. In this section, we cover adding languages, choosing input methods, and customizing layouts. Steps: add a language under Languages & input; then select a keyboard and configure languages for that keyboard. You can toggle between QWERTY, AZERTY, and other layouts within the keyboard settings or per-language options. Some keyboards offer gesture typing, voice input, and emoji suggestions; enable or disable as desired. Pro users often use two or more languages daily; enabling language switching hotkeys or ring toggles reduces friction. When languages are added, you can set auto-correct dictionaries and phrase shortcuts to speed up your workflow. For designers, researchers, and gamers, experimenting with layouts like split or compact can improve ergonomics. Be aware that adding languages may increase resource usage, and some devices limit the number of active languages for performance.
Troubleshooting Common Issues
Problems locating the keyboard setting are common during OS updates or after applying a new OEM skin. If the path you expect isn’t present, try these steps: use the Settings search for 'keyboard' to surface related options; reset app preferences via Settings > Apps > Reset defaults; ensure the keyboard app is enabled (toggle on) in Languages & input; update the keyboard app to the latest version; check for restricted profiles or enterprise management that may hide keyboard settings. If you still can't enable a keyboard, reboot the device and re-enter the settings. In some cases, the keyboard may appear under a different label like 'Typing' or 'Input Method' depending on the device. Finally, if privacy prompts block permission requests, review the app permissions and grant only what the app requires to function. After performing changes, test typing in a text field to confirm the active keyboard.
Privacy, Security, and Keyboard Shortcuts
Beware that keyboards could collect keystrokes and personal data; use trusted apps from reputable developers and limit permission requests to only what is necessary. Review privacy settings in the keyboard app to understand data usage. If you’re concerned about privacy, consider using a keyboard that supports offline language processing and local dictionaries. Keyboard Gurus recommends avoiding unnecessary permissions such as full network access unless the keyboard explicitly requires it. Keyboard shortcuts in the OS can streamline switching between keyboards; learn the quick-tap method on your device to switch inputs without leaving the app.
Quick Reference by Android Version: A Practical Map
Android versions converge on a similar structure, but there are edge cases. For Android 9 (Pie) through 12 (S), the path often remains Settings > System > Languages & input > On-screen keyboard, with minor variations. Android 13 and 14 sometimes place these options under General management or Accessibility, depending on OEM. If you’re using stock Android on Pixel devices, you’ll likely see a direct 'On-screen keyboard' option within Languages & input; OEM skins can require two extra taps. A good habit is to search for keyboard in Settings on any device to surface the exact menu. The practical map helps you locate the keyboard quickly and adapt to future Android updates.
Tools & Materials
- Android smartphone(Any device running Android 9+; paths vary by OEM.)
- Keyboard app (e.g., Gboard, SwiftKey)(Install or ensure enabled for testing and switching.)
- Settings access(Access to Settings app; device unlock may be required.)
- Optional: Settings search(Helps surface the keyboard option quickly.)
Steps
Estimated time: 15-25 minutes
- 1
Open Settings
Open the Settings app from your home screen or app drawer to begin locating the keyboard options.
Tip: If you can’t find Settings, use your device’s search bar to surface it quickly. - 2
Open System/General management
Navigate to System or General management to access language and input controls where keyboards are usually managed.
Tip: Some OEMs place this under a sub-menu like 'Advanced' or 'Additional settings'. - 3
Open Languages & input
Tap Languages & input (or Language & input) to reach keyboard-related options.
Tip: If you see a different label, look for keywords like 'Typing' or 'Keyboard'. - 4
Select On-screen keyboard
Choose On-screen keyboard (or Virtual keyboard) to list installed keyboards.
Tip: This confirms which keyboards are available on your device. - 5
Manage keyboards
Tap Manage keyboards to enable or disable keyboards and view other input methods.
Tip: Enable the keyboard you want to use and set defaults if needed. - 6
Set default keyboard
Select your preferred keyboard from the list and confirm any prompts about permissions.
Tip: Setting a default ensures your selections apply automatically. - 7
Install a new keyboard (if needed)
If the desired keyboard isn’t listed, install it from the Play Store and enable it in the same menu.
Tip: Always choose trusted keyboards and review permissions. - 8
Test in a text field
Open any text field to verify the active keyboard and language; adjust as needed.
Tip: Switch keyboards using the OS shortcut or keyboard icon if available. - 9
Add languages and layouts
If multilingual typing is needed, add languages and switch layouts for faster typing.
Tip: Keep frequently used languages near the top for quick access. - 10
Review permissions
Check keyboard permissions to ensure privacy and security; disable any unnecessary access.
Tip: Limit access to only what the app requires. - 11
Troubleshoot if needed
If the keyboard doesn’t appear, consult OEM support or reset defaults for keyboard apps.
Tip: A device restart can resolve many tangential issues. - 12
Document your steps
Keep a short note of your path for future reference on devices or OS updates.
Tip: A quick cheat sheet saves time later.
Got Questions?
Where is the keyboard setting located on most Android devices?
Most devices place keyboard settings under Settings > System/General management > Languages & input > On-screen keyboard. OEMs may vary slightly.
Keyboard settings are usually under Languages & input in Settings; the exact path can vary by device.
How do I set a default keyboard on Android?
Open Languages & input, select On-screen keyboard, choose Manage keyboards, then pick your preferred keyboard and set it as default.
Go to Languages & input, then On-screen keyboard, pick your keyboard, and set it as default.
Can I install third-party keyboards on Android?
Yes, you can install keyboards like Gboard or SwiftKey from the Play Store and enable them in the keyboard settings.
Absolutely; install from the Play Store and enable in Settings.
Why can’t I find the keyboard option on my device?
Some devices hide the option under vendor-specific menus or require a software update. Try Settings search and check for alternatives like Typing or Input Method.
It can be hidden by OEM menus; try searching in Settings for 'keyboard' or 'typing'.
Is it safe to use third-party keyboards?
Use trusted developers and review permissions carefully; prefer keyboards that work offline or limit data collection.
Choose reputable keyboards and review permissions before enabling.
Watch Video
What to Remember
- Find the keyboard path quickly in Settings
- Enable and set a default keyboard
- Add languages and layouts for multilingual typing
- Test in a text field to confirm the active keyboard
- Be mindful of privacy and permissions when trying new keyboards