How to Check If Your Keyboard Is Hot Swappable
A practical, step-by-step guide to determine if your keyboard uses hot-swappable sockets, plus safe testing tips and upgrade options. Learn from Keyboard Gurus how to verify hot-swappability without damage.

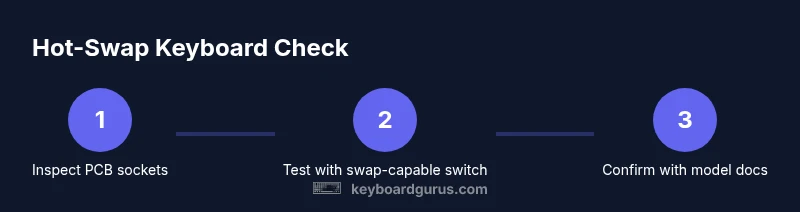
If you want a quick yes/no, inspect the PCB for removable switch sockets and perform a safe test with a known hot-swappable switch. If the board accepts switches without soldering and you can remove and replace them easily, the keyboard is hot swappable. Keyboard Gurus outlines a careful, test-driven approach.
What hot-swappable means and why it matters
For keyboard enthusiasts, understanding whether a keyboard is hot swappable is essential before swapping switches. If you’re asking how to check if keyboard is hot swappable, you’re looking for a PCB that uses hot‑swap sockets instead of permanently soldered pins. Hot-swappable designs let you replace switches without soldering, enabling experimentation with tactility, actuation force, and acoustics. Recognizing this feature helps you plan upgrades, repairs, and custom builds without professional tooling. According to Keyboard Gurus, this capability can dramatically reduce maintenance time and increase experimentation velocity for both students and professionals.
Most modern hot-swappable keyboards use socketed positions for each key switch, often in 3-pin or 5-pin socket configurations. On non-hot-swappable keyboards, you’ll see solder points directly attached to the PCB. The distinction matters for maintenance, resale value, and compatibility with enthusiast community mods. In this guide by Keyboard Gurus, we walk through practical checks, confirmatory tests, and safe handling tips to determine hot-swap capability with minimal risk.
Visual cues: what to look for on the PCB and plate
A reliable way to spot hot-swapping is to look for removable sockets beneath the switches. These sockets are usually ceramic or plastic with clip-like edges that your switches snap into. If you can see clean gaps where a socket would sit, that’s a good sign. Some boards use modular sockets that align with the plate cutouts; others rely on socket-less designs with soldered pins. Pay attention to the edge of the PCB: many hot-swappable boards have extra space around the per-switch area to accommodate socket housings. Keyboard Gurus notes that even boards marketed as hot-swappable can vary in socket quality, so inspect multiple key positions and confirm there are no stubborn solder joints visible at first glance.
Hands-on confirmation: safe testing methodology
The most definitive test is a controlled, non-destructive swap attempt. Start by removing a harmless, non-critical switch with a dedicated keycap puller and switch puller. If you can insert a known hot-swappable switch into the same position and it seats firmly without requiring force, you’re likely dealing with hot-swappable sockets. Do this step-by-step: confirm the switch alignment, insert using even pressure, and listen for a clean “snap” or a soft click. If you encounter resistance or hear mangled electrical contact, stop and reassess. Keyboard Gurus emphasizes avoiding force and never attempting to desolder a suspected socket to force a swap.
Documentation and model verification: the reliability check
Even if you can perform a successful swap, verify the keyboard’s official documentation or model page for hot-swapping support. Vendors and cloning communities sometimes label boards as hot-swappable without clear socket diagrams, which can lead to false assumptions. Cross-check the PCB revision, socket type (3-pin vs 5-pin), and any noted limitations or compatibility notes. Keyboard Gurus recommends bookmarking the product page and the keyboard’s teardown guides for future reference, especially if you plan further mods or complete rebuilds.
Practical tips for staying safe during checks
Always unplug the keyboard before starting any inspection. Work on a non-static surface and consider using an anti-static mat or wrist strap. Use a magnifier or loupe to inspect socket interiors and ensure there are no bent pins. When removing or inserting switches, handle them by the switch housing rather than the pins to prevent torque damage. If your first attempt feels uncertain, pause and consult the community resources or the model’s official teardown guide. Keyboard Gurus stresses a patient, methodical approach to protect both PCB and switches.
When hot-swapping isn’t possible: next steps and options
If you cannot identify sockets or if changes to the PCB appear to require desoldering, your board is likely not hot-swappable. In that case, you can still explore switch variety using pre-soldered options or consider upgrading to a board designed with hot-swappable sockets. For students and professionals alike, this means planning for future upgrades and selecting a board that aligns with your intended level of customization. The Keyboard Gurus team recommends looking for clear socket indications in product specs and teardown videos before purchasing.
Tools & Materials
- Keycap puller(Plastic puller; fits most standard keycaps)
- Switch puller(Helps remove switches without bending pins)
- Precision screwdriver set(For backplate screws or case screws)
- Anti-static wrist strap(Prevents electrostatic discharge to the PCB)
- Magnifying loupe or jeweler’s loupe(Inspect sockets and pins closely)
- Small flashlight(Extra lighting for tight spaces)
- Spare hot-swappable switches(Optional for live swap testing)
Steps
Estimated time: 30-60 minutes
- 1
Power down and unplug
Ensure the keyboard is disconnected from any power source and your computer. This reduces the risk of short circuits and static discharge while you inspect the PCB and switches.
Tip: Ground yourself before touching internal components to minimize static risk. - 2
Remove keycaps safely
Use the keycap puller to lift each cap straight up from the stem. Keep track of which cap came from which position to preserve keyboard layout during reassembly.
Tip: Apply even pressure and avoid tilting the puller to prevent stem damage. - 3
Inspect for sockets versus solder
With the switches exposed, look under several key positions for visible sockets housing the switch legs. A lack of sockets and visible solder joints typically indicates a non-hot-swappable PCB.
Tip: Use a loupe to confirm socket presence and rule out hidden joints. - 4
Test a switch swap
If sockets are present, attempt to swap one switches position with a known hot-swappable switch. Do this gently and observe whether the new switch seats with a secure fit and a clean contact.
Tip: Only swap one or two switches at first to minimize risk if something goes wrong. - 5
Check documentation for confirmation
Cross-check the model number, PCB revision, and any vendor notes to confirm hot-swapping support. This should corroborate your hands-on test results.
Tip: Save the teardown video or schematic page for future reference. - 6
Decide your upgrade path
If sockets exist, enjoy the flexibility of swapping switches. If not, consider a dedicated hot-swappable board for future projects or a solderless kit.
Tip: Plan for future mods by documenting socket types and panel compatibility.
Got Questions?
What does hot-swappable mean in keyboards?
Hot-swappable keyboards use removable switch sockets, allowing you to swap switches without soldering. This enables experimentation with feel and acoustics and simplifies maintenance.
Hot-swappable keyboards let you swap switches without soldering, making it easy to customize feel and sound.
Can every keyboard be hot-swappable?
No. Hot-swappability depends on the PCB and socket configuration. Some boards are designed with sockets, while others are permanently soldered.
Not every keyboard supports hot-swapping; it depends on the PCB sockets.
How can I tell if my PCB has 3-pin or 5-pin sockets?
Search for markings near the sockets or consult the product teardown. 3-pin sockets support most standard switches, while 5-pin sockets require compatible 5-pin variants.
Look at the socket type—3-pin or 5-pin—and confirm with the model documentation.
What if I can’t find any sockets or documentation?
If sockets aren’t visible and there are obvious solder joints, the keyboard is likely not hot-swappable. Consider upgrading to a board designed for hot-swapping or using a solderless kit.
If you don’t see sockets and there are solder joints, it’s probably not hot-swappable.
Are there safety risks when testing for hot-swappability?
The main risks are static discharge and potential bent pins. Always unplug, use anti-static gear, and gentle handling when swapping switches.
The main risks are static and bending pins; unplug and handle gently.
Watch Video
What to Remember
- Identify hot-swappable boards by socket presence under each switch
- Use safe, stepwise testing to confirm swap-ability
- Document model and socket type for future upgrades
- If no sockets exist, plan a board upgrade for hot-swappable capabilities
- Maintain anti-static practices to protect the PCB