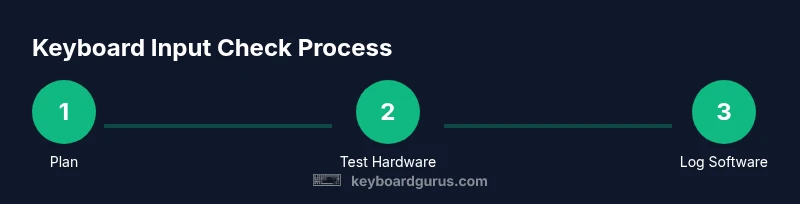
How to Check Keyboard Inputs: A Practical How-To
Learn practical, step-by-step methods to verify keyboard inputs across hardware and software. This educational guide covers hardware checks, OS tools, developer testing, and real-world debugging with clear steps and safety notes from Keyboard Gurus.

By the end of this guide, you will confidently verify keyboard inputs across apps, OS utilities, and hardware. You’ll learn quick checks, essential tools, and safe testing methods to troubleshoot unresponsive keys, sticky modifiers, and input lag. Before you begin, ensure you have a simple keyboard, a computer, and a test app ready. The Keyboard Gurus team emphasizes systematic checks to speed debugging.
Why Checking Keyboard Inputs Matters
In daily computing, reliable keyboard inputs are foundational. From writing documents to gaming and coding, accurate keystroke detection reduces debugging time and prevents user frustration. According to Keyboard Gurus, a structured input-check routine helps isolate whether issues live in the keyboard, the device drivers, or the software layer. Consistent checks also support accessibility goals, ensuring that users relying on keyboard navigation experience predictable results. Whether you’re a student, a gamer, or a professional, establishing a repeatable method to verify inputs keeps your setup efficient and dependable. This section explains why tests succeed only when you test the right signals: physical actuation, electrical signals, and software event handling. It also sets expectations for results that are reproducible across devices and environments, including different operating systems and keyboard layouts. The goal is not to replace professional diagnostics but to provide a fast, repeatable baseline you can trust.
Key takeaways:
- Validate both hardware and software paths for inputs
- Use consistent test scenarios to compare results across devices
- Document findings to guide repairs or replacements
How Keyboard Input Events Work
Keyboard input is more than pressing a key. When you press, the hardware generates a scancode that the operating system translates into a key event. Depending on the platform, you’ll encounter events like keydown, keyup, and sometimes keypress or input events tied to text composition. The timing between events (latency) and whether repeat events fire when you hold a key down are critical indicators of performance or faults. Understanding this flow helps you design tests that differentiate between a sticky key (physical issue), a debounce problem (signal noise), and a software handling fault (driver or application bug). Cross-platform differences exist (Windows, macOS, Linux, and mobile), so your tests should cover at least two environments when possible. Keyboard Gurus recommends watching both the raw electrical signal and the resulting events in software to form a complete picture.
Hardware vs Software Validation Methods
Hardware validation focuses on the physical keyboard and its connections. Use LED indicators, key actuation feedback, and external testers to verify that a pressed key actually completes its circuit. Software validation uses built-in tools (OS on-screen keyboards, keyboard viewers) plus third-party utilities to log keystrokes and event timings. A hybrid approach yields the most reliable results: confirm physical actuation first, then verify that the system and applications register the inputs as expected. When hardware faults are suspected, swapping to a known-good keyboard is a fast way to isolate the problem. Keyboard Gurus highlights that maintaining a clean, consistent test environment—same USB ports, same wireless channel, and minimal background tasks—reduces confounding factors.
Common Pitfalls and Debugging Tips
Many input issues arise from soft factors rather than a broken keyboard. Debounce problems can create sporadic misses, while driver updates may temporarily disrupt key mappings. Locale and keyboard layout mismatches can misinterpret inputs, especially for non-Latin scripts or specialized layouts. Avoid assuming that a single test covers all cases; repeat checks with different keys, modifiers, and combos. Always test in multiple apps, since some software may capture or filter key events differently. If you rely on polling rather than event-driven input, you may miss quick key sequences. Keyboard Gurus stresses keeping a changelog of driver updates, OS updates, and app versions to correlate with input anomalies.
A Developer-Friendly Test Framework (Optional)
For developers or power users, a lightweight test framework can accelerate validation. Create a small sandbox page or script that attaches listeners for keydown, keyup, and input events, logging key values, codes, and timestamps. This approach helps you quantify latency and detect missed events. Example: attach listeners to document and call a logging function with e.key, e.code, and Date.now() for each event. Use this data to plot response times and identify bottlenecks. Remember to respect privacy and run tests only on devices you own or have permission to test.
Real-World Scenarios: Quick Validation Checklist
When you’re in a hurry, use a streamlined checklist:
- Verify physical actuation with a known-good keyboard
- Confirm the OS-level keyboard viewer reflects the press
- Run a short test script to log events for several keys (letters, numbers, modifiers)
- Compare results across apps to catch app-specific filtering
- Document any anomalies and proceed with targeted fixes or hardware replacement as needed
Tools & Materials
- A computer or laptop(Ensure the OS is up to date and you have admin access if testing drivers)
- Test keyboard (wired or wireless)(Have a backup keyboard available to isolate hardware faults)
- On-screen keyboard / OS keyboard viewer(Use for visual feedback of inputs)
- Keyboard testing app or diagnostic tool(Basic keystroke loggers or built-in utilities)
- Simple event-logging script (optional)(A small snippet to capture key events for timing analysis)
- USB keyboard tester (optional)(Helps isolate USB/hub or port issues)
Steps
Estimated time: 1-2 hours
- 1
Define test objectives
Identify which keys and scenarios you will test (letters, numbers, modifiers, and combos). Decide whether you’re validating hardware, software, or both. Clear objectives help prevent scope creep and ensure you capture relevant data.
Tip: Write down the exact keys you will test and the expected behavior for each. - 2
Set up your testing environment
Connect the test keyboard, launch the OS keyboard viewer, and open your test app or logging script. Close unnecessary background processes to minimize interference and enable consistent timing measurements.
Tip: Use a clean desktop and a single USB port to avoid port-related variability. - 3
Run hardware-level checks
Tap each key and observe physical actuation feedback. If available, verify LED indicators on the keyboard or the key switch requires a measurable force. Note any keys that feel stuck or require extra pressure.
Tip: Test in both keyboard orientations (flat and angled) to rule out mechanical binding. - 4
Capture software events
Record keydown and keyup events from your test app or logging script. Compare the captured events against what the OS reports in the on-screen viewer. Look for missing events, incorrect codes, or inconsistent timing.
Tip: Capture multiple samples for each key to account for variability. - 5
Validate timing and repeat behavior
Press and hold keys to observe repeat events and timing consistency. Check for latency spikes and whether repeats stop after release. This helps distinguish debounce or driver issues from hardware faults.
Tip: Use a stopwatch or timestamp logs to quantify delay. - 6
Document results and plan next steps
Summarize which keys passed or failed, note environmental factors, and propose remediation (hardware replacement, driver update, or software patch). Re-test after any fixes to confirm resolution.
Tip: Keep a simple report with dates, versions, and observed behavior.
Got Questions?
What constitutes a keyboard input?
A keystroke, key release, or modifier combination that the system recognizes as an event. This can be observed in hardware signals and software event logs.
A keystroke or key action that the system recognizes as input.
How should I test keys individually?
Use the OS on-screen keyboard or a simple logging script to capture each key's event. Compare results across multiple keys to ensure consistency.
Test individual keys with a visual and log-based approach.
Can software tests reveal hardware faults?
Software tests can indicate where events fail to register, but hardware faults are revealed when a different keyboard behaves normally in the same setup.
Software tests help locate issues; hardware tests confirm the fault.
Is testing keyboard inputs OS-specific?
Yes. Some behaviors vary between Windows, macOS, and Linux. Replicate checks across at least two operating systems when possible.
Expect OS-specific differences; test on multiple systems.
How long should a typical test take?
A focused, structured session usually takes about an hour, depending on the number of keys and scenarios involved.
Plan for a focused hour of checks.
What should I do after completing the tests?
Review findings, decide on hardware repair or replacement, and re-test after fixes to confirm resolution.
Summarize results and re-test after fixes.
Watch Video
What to Remember
- Define clear objectives before testing
- Separate hardware from software validation
- Log data consistently for reliable analysis
- Document results and iterate on fixes