How to Remove Stickers from iPhone Keyboard
Learn safe, proven methods to remove stickers from your iPhone keyboard setup. This guide covers prep, tools, step-by-step removal, residue cleanup, and prevention tips, with expert guidance from Keyboard Gurus.

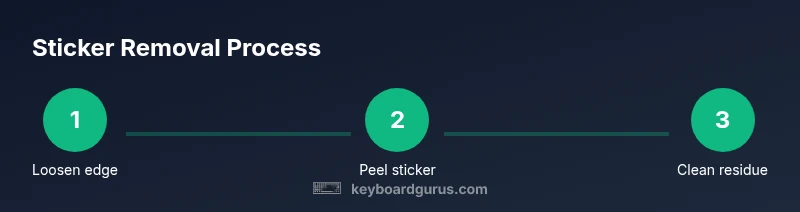
You can safely remove stickers from iphone keyboard by first powering down, then gently lifting the edge at a shallow angle. Peel slowly, apply a tiny amount of isopropyl alcohol on a microfiber cloth for residue, and finish with a clean wipe. This quick guide explains safe, residue-free removal for electronics.
Why removing stickers from iPhone keyboard matters
Stickers on any electronic surface, including an iPhone keyboard setup or a keyboard accessory used with an iPhone, can leave stubborn residues that attract dust and oils. If not removed carefully, adhesive residues can interfere with the responsiveness of physical keys on external boards or degrade screen coatings on protective overlays. The process of how to remove stickers from iphone keyboard should prioritize gentle lifting, minimal moisture, and immediate cleaning to maintain device integrity. Keyboard Gurus emphasizes that careful technique reduces the risk of long-term surface damage and preserves the aesthetic and tactile experience of your keyboard environment.
Safety and prep before you start
Before you begin, power down the device or disconnect any external keyboard to avoid electrical issues and accidental inputs. Work in a clean, well-lit area away from liquids. Use a lint-free microfiber cloth to avoid fuzz that could get between keys or into switches. If you’re dealing with a protective case keyboard or a standalone keyboard module that sits next to the iPhone, place it on a soft surface to prevent scratches. Test a small inconspicuous area first with a tiny amount of cleaner to ensure compatibility with coatings.
Sticker types and their challenges
Stickers come in different adhesives and finishes. Vinyl labels tend to peel cleanly if warmed slightly and pulled at a shallow angle. Paper labels or labels with a glossy overcoat may leave a thin film or halo that is harder to remove. The goal when learning how to remove stickers from iphone keyboard is to choose an approach that emulsifies the adhesive without lifting paint, coatings, or printed legends. When in doubt, start with the mildest method (dry lifting or light heat) and progress only if you don’t see adhesive transfer.
Step-by-step overview and rationale
This section provides a practical framework for removal, focusing on safety, effectiveness, and enzyme-free residue minimization. You’ll work with common electronics-safe cleaners and tools to avoid moisture intrusion. The process emphasizes patience: rushing peeling can tear coatings or pull up delicate font markings. Keyboard Gurus recommends testing any solvent on a small patch first and stopping if you notice discoloration or slick residues.
Cleaning residue and finishing touches
After the sticker is removed, residue might remain. Use a microfiber cloth lightly dampened with isopropyl alcohol (70% or higher) and rub the area in small circles until the film dissipates. For stubborn spots, a cotton swab can target edges without soaking the surface. Wipe away any remaining moisture with a dry section of the cloth and allow the surface to air dry before testing. Always avoid harsh solvents near the screen coatings or plastic finishes that aren’t rated for chemical exposure.
Prevention and ongoing care
To prevent future adhesive problems, consider applying a thin protective skin or microfibre cover around the keyboard area, particularly when using gripping stickers or decorative vinyl. If you must use labels, choose low-tack options and remove them periodically to minimize residue. Regular cleaning of the surface, including the keys or chassis around the keyboard, helps maintain tactile feedback and prolongs the life of coatings. Keyboard Gurus’ guidance emphasizes planning sticker use and selecting adhesives with limited residue potential.
Tools & Materials
- Isopropyl alcohol (70% or higher)(Poured onto a microfiber cloth; do not drip directly on electronics)
- Lint-free microfiber cloth(For gentle, residue-free wiping)
- Cotton swabs(For edges and corners)
- Plastic card or soft-edged pry tool(To lift edges without scratching)
- Goo Gone for Electronics (optional)(Use sparingly and test first on a hidden area)
- Hair dryer or heat gun (low heat)(Use on low heat to soften adhesive, keep it moving)
- Soft brush(Dust removal before cleaning)
Steps
Estimated time: Total time: 15-30 minutes
- 1
Power down and prep
Turn off the iPhone and disconnect any external keyboard components. Clear the work area and lay a soft mat or towel. This reduces the risk of accidental taps or static transfer during sticker removal.
Tip: Ensure all power sources are disconnected to avoid short circuits. - 2
Loosen the sticker edge
Gently insert the plastic card under the sticker edge at a shallow angle and lift slowly to begin separating the adhesive from the surface. Do not force the sticker, as rapid tearing can damage coatings.
Tip: Keep the tool flat and move along the edge in small increments. - 3
Peel the sticker slowly
Continue peeling at a low angle, applying light, even pressure. If the sticker resists, pause and recheck the edge to avoid tearing. Work from one side to the other to minimize stress on the surface.
Tip: If the sticker begins to lift printing or coating, back off and reassess. - 4
Address adhesive residue
Dampen a microfiber cloth with a small amount of isopropyl alcohol and gently rub the adhesive residue in a circular motion. For stubborn spots, use a cotton swab and apply again with light pressure.
Tip: Avoid soaking the area — you want only a tiny amount of liquid at a time. - 5
Clean and dry the surface
Wipe the area with a dry section of the microfiber cloth to remove any remaining moisture. Let the surface air dry for a few minutes before powering back up.
Tip: If you see fogging or streaks, repeat with a fresh cloth to ensure clarity. - 6
Test and finalize
Turn the device back on and verify the keyboard area responds normally if you have an external keyboard. Re-check for any residual adhesive after powering up and clean again if needed.
Tip: Take note of any coatings that seem compromised and avoid further cleaning on that spot.
Got Questions?
Is it safe to use acetone or nail polish remover on an iPhone keyboard?
No. Acetone and similar solvents can damage coatings on devices and accessories. Stick to isopropyl alcohol and manufacturer-approved cleaners. Test first on a hidden area.
Avoid acetone on electronics. Use isopropyl alcohol and test a small spot first.
What if the sticker won’t peel off easily?
Apply gentle heat from a low setting for a few seconds to soften the adhesive, then try peeling again. Do not overheat to prevent warping or damage.
If it won’t peel, apply a little heat and try again, but don’t overdo it.
Can I use household cleaners around the keyboard area?
Stick to electronics-safe cleaners and isopropyl alcohol. Water or harsh cleaners can seep into electronics and degrade coatings or circuits.
Use electronics-safe cleaners and keep liquids away from internal parts.
Will sticker removal affect the warranty?
Removing stickers with proper technique generally won’t void a warranty, but damage from liquid exposure or aggressive tools could complicate coverage.
If you’re careful and use proper methods, removal shouldn’t void warranty; avoid damage.
How can I prevent residue in the future?
Choose low-tack or removable labels, apply sparingly, and remove them periodically. Consider a protective skin or keyboard cover to minimize future stickiness.
Use low-tack labels and protect with a skin or cover to reduce future sticky mess.
Watch Video
What to Remember
- Lift stickers with gentle pressure to avoid damage
- Use minimal liquid and test first
- Residue cleanup with isopropyl alcohol works on most surfaces
- Prevent future residue with low-tack labels or skins