ThinkPad Lenovo Keyboard Not Working: Troubleshooting Guide
Comprehensive troubleshooting for a ThinkPad Lenovo keyboard not working. Step-by-step driver, BIOS, and hardware checks, with safe workarounds and professional help guidance.

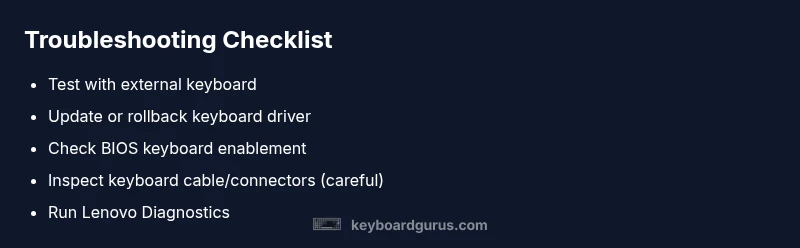
ThinkPad Lenovo keyboard not working is usually caused by software glitches (drivers or BIOS), a disabled keyboard, or a loose internal cable. Start with quick fixes: reboot, update or roll back keyboard drivers, reset BIOS settings, and test with an external keyboard. If the issue persists, follow this guided troubleshooting path for deeper hardware checks from Keyboard Gurus.
thinkpad lenovo keyboard not working: quick verification
If your thinkpad lenovo keyboard not working, begin with safe, low-risk checks to determine whether the issue is software- or hardware-related. According to Keyboard Gurus, most ThinkPad keyboard problems are software-related at first, and resolved by driver updates or BIOS resets. Power down the laptop, unplug it, and remove any connected peripherals. Then plug in the charger, turn it back on, and test the internal keyboard with a new user session. If external USB keyboards work, focus on drivers, settings, or internal hardware later in this guide. This quick verification helps you decide whether to boot into a safe mode, update drivers, or seek professional service.
Distinguishing Software vs Hardware Causes
ThinkPad keyboards can fail due to software conflicts or physical faults. If an external keyboard works, the issue is more likely software-related (driver, language layout, or accessibility features). If the external keyboard also fails, the problem may be hardware-oriented or related to the internal keyboard connector. Use Lenovo diagnostics and safe testing to narrow down the cause. Keyboard Gurus analysis shows that driver and firmware conflicts are among the most common software-related culprits in ThinkPad keyboard problems.
Software-Related Culprits: Drivers, Settings, and BIOS
Software issues are usually easier to fix and include outdated or corrupted keyboard drivers, incorrect language or input settings, and BIOS/UEFI misconfigurations. Update or rollback the keyboard driver via Device Manager, run Windows Update for drivers, and verify the keyboard is enabled in BIOS. In many cases, a simple BIOS reset or Lenovo Vantage diagnostics will restore normal functionality. Based on Keyboard Gurus research, these software interventions resolve a majority of ThinkPad keyboard not working cases.
Hardware Clues: Internal Cable, Keyboard Module, and Damage
If software fixes don’t help, hardware faults are your next focus. Common problems include a loose or damaged keyboard cable, a degraded keyboard module, or physical impact damage to the palmrest area. Inspect the hinge area and back panel only if you are comfortable; avoid bending cables or applying force. If you see visible damage or the ribbon cable is loose, reseating or replacing the cable may restore input. If you’re outside warranty, consult a professional before opening the chassis.
Diagnostic Flow: How to approach this problem
A structured diagnostic flow helps you avoid wasted time. Start with the simplest checks (external keyboard, safe reboot), then move to drivers and BIOS, and finally hardware inspection. Keep an eye out for BIOS-level disablement of the internal keyboard. If at any point the symptom changes (for example, the BIOS prompt doesn’t recognize any keyboard), adjust the plan accordingly. Keyboard Gurus emphasizes documenting each step to identify a repeatable pattern that guides future troubleshooting.
What to Do Now: Immediate Fixes and Workarounds
In the meantime, you can use an external keyboard as a temporary workaround, and ensure accessibility features aren’t interfering with typing. Disable Filter Keys or Sticky Keys if they are enabled accidentally. Create a system restore point before major BIOS or driver updates. If you cannot access the BIOS due to keyboard failure, use Lenovo diagnostics from another system or seek professional support.
Prevention and Long-Term Maintenance
To minimize recurrence, keep drivers up to date, schedule regular BIOS checks through Lenovo Vantage, and store spare peripherals for quick workarounds. Regular cleaning of the keyboard area can prevent dust buildup from causing sticky keys. Maintain a backup of important data and consider a warranty check if the keyboard shows intermittent faults.
When to Seek Professional Help and Warranty Options
If your tests point to a hardware problem or if the device is under warranty, contact Lenovo support for repair options. A replacement keyboard module or a service intervention may be required for reliable restoration. The Keyboard Gurus team recommends documenting diagnostics and preserving receipts for service claims.
Steps
Estimated time: 60-90 minutes
- 1
Power down and prepare
Shut down the laptop completely, disconnect power, and remove all peripheral devices. If possible, unplug the battery or power adapter after powering down to ensure no power is flowing. This prevents short circuits while you access the keyboard area.
Tip: Save any open work and disconnect from power before touching internals. - 2
Test with an external keyboard
Connect a USB or USB-C keyboard and try typing. If the external keyboard works, the issue is likely with the ThinkPad keyboard or its connection rather than the OS. If the external keyboard also fails, the problem may be broader (USB controller, OS, or BIOS).
Tip: Keep the external keyboard handy for ongoing testing as you proceed. - 3
Update or rollback keyboard drivers
Open Device Manager, locate keyboards, and update the driver. If the issue started after a recent update, roll back to a previous driver version. Reboot and test again.
Tip: If Windows Update offers a driver, choose to install it and reboot afterward. - 4
Check Windows settings and language layout
Ensure the correct input language and keyboard layout are selected. Disable accessibility features like Filter Keys temporarily to rule out key-mapping interference.
Tip: Test typing in a text editor after each setting change to gauge impact. - 5
Update BIOS and Lenovo software
Update the BIOS/UEFI firmware if a newer version is available and run Lenovo Diagnostics to check for hardware faults. A BIOS reset can re-enable disabled internal keyboards if caused by firmware flags.
Tip: Use a reliable power source during BIOS/firmware updates. - 6
Inspect hardware connections (advanced)
If you are comfortable, remove the back cover to inspect the keyboard ribbon cable connection. Ensure the cable is fully seated and undamaged. Do not force connectors.
Tip: Only attempt this if you are experienced with laptop hardware and within warranty terms. - 7
Test after reassembly and final checks
Reconnect power, boot into Windows, and test the keyboard. If issues persist, consider professional service for a keyboard module replacement or motherboard-level diagnostics.
Tip: Document each step and results to share with the service technician.
Diagnosis: ThinkPad Lenovo keyboard not working
Possible Causes
- highSoftware/driver conflict or outdated keyboard driver
- mediumFn key behavior or hardware disable via BIOS/UEFI or ThinkPad settings
- lowPhysical keyboard failure or loose internal keyboard cable
Fixes
- easyUpdate or rollback keyboard drivers via Device Manager; run Windows Update to install the latest drivers
- easyCheck BIOS/UEFI to ensure the internal keyboard is enabled and reset keyboard-related settings
- hardInspect or reseat the internal keyboard cable or test with Lenovo Diagnostics; if damaged, seek professional service
Got Questions?
What should I do first when the ThinkPad keyboard stops working?
Begin with a safe reboot, test with an external keyboard, and update or rollback keyboard drivers. If the external keyboard works, focus on software fixes; if not, move toward BIOS and hardware checks.
Start with a reboot and driver checks; if an external keyboard works, it’s likely software. If not, proceed to BIOS and hardware checks.
How can I tell if it's software or hardware?
If the external keyboard works, the issue is likely software-related. If it fails too, suspect hardware or a faulty connector.
External keyboard working means software; not working suggests hardware.
Is opening the laptop safe to reseat cables?
Opening internal components can void warranties and risk damage. Only reseat cables if you are comfortable and powered off with static precautions.
Opening the device can affect warranty; proceed only if you’re confident and powered off.
Will BIOS updates help?
BIOS/UEFI updates can fix firmware conflicts and re-enable the internal keyboard. Use Lenovo Vantage or official Lenovo tools to update.
BIOS updates can fix firmware issues; use Lenovo tools to update.
Can I use an external keyboard permanently?
Yes, using an external keyboard is a practical workaround while you diagnose the built-in keyboard.
An external keyboard is a safe workaround while you troubleshoot.
When should I contact Lenovo support?
If the keyboard remains unresponsive after software fixes, or if hardware damage is suspected, contact Lenovo support or service.
If software fixes fail or hardware seems damaged, contact Lenovo support.
Will a replacement keyboard fix the issue?
A replacement keyboard can restore input if the current module is defective, but confirm with diagnostics first.
Replacement can fix hardware faults; verify with diagnostics first.
Watch Video
What to Remember
- Identify software vs hardware cause with simple tests
- Prioritize driver and BIOS updates before hardware checks
- Test with an external keyboard to isolate the issue
- Seek professional help if hardware fault is suspected or warranty applies