Where is Keyboard Troubleshooter in Windows 11: A Practical Guide
Discover where to find Windows 11's Keyboard Troubleshooter, how to run it, and how to interpret results. A clear, practical guide for gamers, students, and professionals.

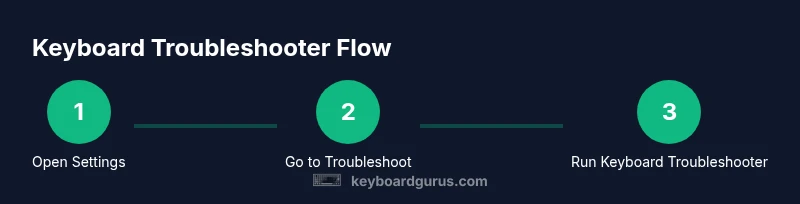
By following these steps, you can locate and run Windows 11's Keyboard Troubleshooter to diagnose common keyboard issues. Start by opening Settings, then go to System > Troubleshoot > Other troubleshooters, and select Keyboard. You can also search in Start for Troubleshoot and run the Keyboard troubleshooter from there. This quick path helps identify driver or layout problems without manual testing.
What is the Keyboard Troubleshooter and why use it
According to Keyboard Gurus, most keyboard issues stem from driver conflicts, incorrect language or keyboard layout, or simple hardware quirks. The Keyboard Troubleshooter is a built-in Windows 11 tool designed to quickly diagnose and fix common input problems without requiring expert technical knowledge. It guides you through a structured flow, checks for known issues, and offers recommended fixes. For students, gamers, and professionals who depend on reliable input, this tool can save time and reduce frustration. The Keyboard Gurus team found that running this troubleshooter early in the troubleshooting process often prevents minor glitches from becoming bigger problems, especially after OS or driver updates. If you ask where is keyboard troubleshooter in windows 11, this guide will show you the exact path and how to use it effectively.
Where to find it in Windows 11
Windows 11 places the keyboard troubleshooting option in the Settings app, under the System category and then Troubleshoot. The standard path is Settings > System > Troubleshoot > Other troubleshooters, where you can select Keyboard to run the specific troubleshooter for input devices. You can also access Troubleshoot by typing troubleshoot in the Start menu search and selecting Keyboard from the results. This dual access helps you start debugging quickly, even if you are not sure where the feature is located. Keyboard Gurus analysis shows that many users find the option by first searching for Troubleshoot, which reduces navigation steps and saves time during busy days.
What issues does it diagnose
The Keyboard Troubleshooter focuses on common, repeatable keyboard problems such as unresponsive keys, incorrect key mappings, stuck keys, and intermittent input. It checks for driver conflicts, hardware recognition failures, and basic settings like language and input method. In some cases, it can identify problematic keyboard layouts or accessibility features that affect typing behavior. While it cannot fix all hardware faults, it often resolves software-level blockers and provides guidance for follow-up steps. As part of our ongoing coverage, Keyboard Gurus notes that most issues stem from drivers, language settings, or simple configuration errors rather than hardware faults alone.
How to run the troubleshooter step by step
Launching the Keyboard Troubleshooter is a quick, guided process. Start in Settings, navigate to System, then Troubleshoot, and choose Other troubleshooters. From the list, click Keyboard to begin. The tool will scan for common problems, ask clarifying questions about symptoms, and propose fixes such as updating drivers, adjusting language settings, or resetting keyboard settings. If a recommended action requires a restart, the tool will prompt you. This flow is designed to be user-friendly for non-tech-savvy users while still providing value to power users who want a clean, methodical approach.
Interpreting the results and next actions
After the scan completes, you will see a summary of detected issues and recommended fixes. Common outcomes include driver updates, keyboard layout corrections, or enabling a specific input method. If the troubleshooter resolves a problem, retest the keyboard to confirm normal operation. If it suggests updating drivers or changing settings but cannot apply changes automatically, follow the on-screen instructions to implement the fixes manually. Keyboard Gurus emphasizes documenting which recommendations you applied and testing after each change to ensure stability.
When the troubleshooter cannot fix the issue
Some keyboard problems originate from hardware faults or deeply complex driver conflicts that the built-in troubleshooter cannot resolve. In such cases, consider checking the keyboard itself on another device to rule out hardware failure, updating BIOS or firmware if applicable, or performing a clean system update. If issues persist, you may need to reinstall keyboard drivers manually, reset the system's keyboard settings, or contact device support. The Keyboard Gurus team recommends documenting symptoms, reproducing steps, and seeking professional help if needed to avoid data loss or misconfiguration.
Keyboard troubleshooting best practices
To maximize success with the Keyboard Troubleshooter, keep your Windows 11 up to date and ensure you have a recent system backup before making changes. Use the troubleshooter after any OS update or driver installation to verify stability. If you rely on a specific language or layout, temporarily switch to a standard layout to isolate issues. Regularly check for firmware updates for external keyboards and stay aware of accessibility settings that might affect typing. Following these practices minimizes recurring issues and keeps your setup reliable.
Tools & Materials
- Windows 11 PC or device(Ensure you can access Settings and the Internet if you plan to download updates.)
- Keyboard (external or built-in)(Have it connected and functional for testing after fixes.)
- Another keyboard (optional)(Helpful for cross-checking whether the issue is hardware-related.)
- Backups or restore point(Create a system restore point before major changes.)
- Documentation note(Jot down symptoms, steps taken, and results for future reference.)
Steps
Estimated time: 15-25 minutes
- 1
Open Settings and locate Troubleshoot
Press the Windows key, select Settings, then choose System. Scroll to Troubleshoot to access the general troubleshooter area. This initial step is needed to reach the Keyboard option without navigating through multiple menus.
Tip: If Settings is slow, use the search box at the top and type Troubleshoot to jump directly to the right page. - 2
Choose Other troubleshooters
On the Troubleshoot page, click Other troubleshooters to reveal a list of devices and inputs that Windows can diagnose. This organizes troubleshooters by category for quick access.
Tip: Use the on-screen search within Troubleshoot to quickly locate Keyboard if you don’t see it immediately. - 3
Launch Keyboard troubleshooter
From the list, click Keyboard to start the diagnostic. Windows will run a scan for common keyboard issues, including settings and driver conflicts.
Tip: If you are using an external keyboard, disconnect and reconnect it after the scan to test changes. - 4
Answer prompts about symptoms
The troubleshooter may ask about unresponsive keys, wrong characters, or unusual typing behavior. Provide accurate responses to tailor the scan.
Tip: Be specific about when the issue occurs (e.g., gaming, typing in documents, or on-screen keyboard use). - 5
Review recommended fixes
If a fix is suggested, read the instructions carefully and apply them. This may include updating drivers, changing input methods, or reconfiguring language settings.
Tip: Take note of all changes you make so you can revert if needed. - 6
Test the keyboard after applying fixes
After completing a fix, test each key to confirm whether the issue is resolved. If not, rerun the troubleshooter or try the next suggested step.
Tip: Test in multiple apps to ensure consistency across programs. - 7
Consider driver updates manually
If the troubleshooter doesn’t auto-update drivers, visit the device manager, locate the keyboard, and update drivers from the manufacturer’s site or Windows Update.
Tip: Always create a restore point before updating drivers in case something goes wrong. - 8
Explore advanced options if needed
If basic fixes fail, explore alternative routes such as resetting keyboard preferences, language options, or performing a system update to ensure compatibility.
Tip: Avoid deep registry edits unless you are experienced; use official restore points instead.
Got Questions?
Where is the Keyboard Troubleshooter located in Windows 11?
Open Settings > System > Troubleshoot > Other troubleshooters, then select Keyboard. You can also search for Troubleshoot in Start and pick Keyboard from the results.
Open Settings, go to System, then Troubleshoot, and choose Keyboard. You can also search Troubleshoot in Start to reach it quickly.
Can the troubleshooter fix hardware keyboard issues?
It can diagnose some hardware-related problems by ruling out software causes, but it cannot repair physical keyboard faults. Use it to confirm if software/configuration is at fault.
It helps identify software causes but can’t repair physical hardware.
What should I do if the troubleshooter shows no issues?
If no issues are detected, test the keyboard on another device to rule out hardware problems. Update or reinstall keyboard drivers and verify language settings.
If nothing’s detected, try a driver update and language check, and test the keyboard elsewhere.
Is it safe to run the Keyboard Troubleshooter?
Yes. It’s a built-in Windows tool designed to diagnose issues without risking data loss. Always back up settings or create a restore point before making changes.
Yes, it’s safe; just back up settings before changes.
Does the troubleshooter cover on-screen keyboards?
The troubleshooter focuses on hardware and input driver configurations but generally does not diagnose on-screen keyboard issues. Use it to verify the physical keyboard before testing the on-screen option.
It mainly checks physical keyboard problems, not the on-screen one.
What should I do after applying a recommended fix?
Retest the keyboard across apps, and consider restarting your device to ensure changes take effect. If issues recur, consult device support.
Test again across apps, restart if needed, and seek support if problems persist.
Watch Video
What to Remember
- Identify where to find the Keyboard Troubleshooter in Windows 11.
- Follow a clear sequence to run the tool and apply fixes.
- Interpret results and continue with recommended actions.
- If issues persist, escalate with hardware checks or driver updates.