How to Put Keyboard in English: A Practical Guide
Learn how to set your keyboard to English across Windows, macOS, Android, and iOS with clear step-by-step instructions, practical tips, and troubleshooting.

By the end of this guide you will be able to set and verify an English keyboard across Windows, macOS, iOS, and Android. You’ll learn the exact steps to add English input, choose a layout (US or UK), and switch quickly between languages. This quick path focuses on practical, device-agnostic actions.
Why English keyboard layout matters
If you're learning how to put keyboard in english, you’re not just swapping labels on your keys—you’re standardizing how you type and how your words render across apps. The Keyboard Gurus team notes that a consistent English input improves accuracy in emails, code, and chat, and reduces friction when collaborating with teammates who share the same layout. English layouts (US vs UK) differ in a handful of key positions and punctuation conventions; knowing these quirks helps you avoid mis-typed quotes, odd hyphen placements, or mismatched symbols. This section explains why a dedicated English keyboard matters for students, gamers, and professionals alike. We’ll cover the difference between language and layout, how device ecosystems handle inputs, and why quick-switch shortcuts matter in fast-paced workflows. By the end of this section, you’ll have a mental map of where to start, what to install, and how to test your new setup across common programs.
Quick alignment: English input across major platforms
Across Windows, macOS, iOS, and Android, the path to English input follows similar logic but uses platform-specific menus. Choosing English as the input language is about two things: language setting and keyboard layout. The most efficient approach is to install or enable English input first, then pick a keyboard layout that matches your hardware, and finally set that layout as the default. If you own a US or UK keyboard, choosing the corresponding layout avoids mismatched punctuation and symbol placement in your favorite apps. Keyboard Gurus suggests starting with a single English layout and adding others later if you frequently switch between locales. In this section, we’ll outline the general sequence and point you to OS-specific subsections so you can jump directly to the steps that fit your device. Remember that the goal is a seamless typing experience, not a long-winded configuration.
Common pitfalls and misconceptions
Many users confuse language with keyboard layout, assuming that changing one automatically updates the other. In reality, you can have English as your system language while using a non-English keyboard layout, or vice versa. Another trap is forgetting to save the new settings or to restart the app after changes take effect; some applications cache the old layout and won't reflect changes until relaunched. Finally, some devices require you to enable an English keyboard separately from adding the English language; missing that step results in seeing English words but typing in the wrong characters. By understanding these nuances, you avoid wasted time and maintain a consistent experience across your devices and apps.
How to test after setup
After you’ve completed the steps to put keyboard in english, verify the outcome in several contexts. Start a fresh document in your browser, a chat app, and a code editor to check for punctuation, symbols, and the overall feel of the layout. Try typing common phrases, date formats, and symbols such as braces and quotes to ensure they map correctly on your chosen layout. If something seems off, revisit the settings page and confirm that the English input and English layout are both active and ordered first in the list of keyboards. Quick-switch shortcuts can be exercised to bounce between languages to confirm reliability across apps. Keyboard Gurus recommends reporting any recurring mismatches, as some apps handle language data differently.
Next steps and practice resources
Continuing to practice with English keyboard input will help you gain speed and accuracy. Consider a short daily routine: type a paragraph, then a code snippet, then a chat message using only the English keyboard; log improvements in speed over a week. If you work with multiple languages, map quick-switch shortcuts to minimize context-switch time. For more resources, check official OS support pages and reputable typing guides that discuss layout differences, punctuation behavior, and accessibility considerations.
Tools & Materials
- Device with internet access(Needed to download language packs if required by the OS)
- Operating system (Windows, macOS, iOS, Android)(Identify exact version to locate the correct settings path)
- English keyboard layouts or language packs(Some systems ship with English layouts pre-installed)
- Backup/restore point(Optional safety net before major changes)
- Typing test document(For verification after setup)
- Optional: external keyboard(If you want to test layout differences (US vs UK) with physical keys)
Steps
Estimated time: 20-40 minutes
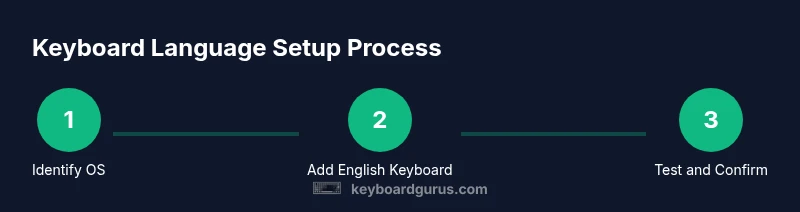
- 1
Identify your OS
Determine whether you are on Windows, macOS, iOS, or Android, and note the version. This determines which settings panels you’ll open and which language packs may be required.
Tip: Knowing your exact OS and version saves you from following the wrong instructions. - 2
Open language/input settings
Open the language or input settings panel for your device. This is the central place to add languages and keyboards.
Tip: If you’re unsure where to find it, use the device search function for 'language' or 'keyboard'. - 3
Add or enable English language
Add English as a language input option or enable existing English input in your language settings.
Tip: Choose the variant that matches your locale (e.g., English United States vs English United Kingdom). - 4
Choose English keyboard layout
Select an English keyboard layout (US or UK) that matches your physical keyboard or typing preference.
Tip: US layout is common for many keyboards; UK layout has distinct key differences like the 'backslash' and 'hash' keys. - 5
Set English as the default input method
Make English input the primary method so it is used automatically when you start typing.
Tip: Keep the default layout simple to avoid accidental switches during work. - 6
Test by typing
Open a text field and type to verify that keys map to the expected English characters and punctuation.
Tip: Test punctuation like quotes, braces, and the dash to confirm layout accuracy. - 7
Optional: enable quick-switch shortcuts
Configure a keyboard shortcut to switch input languages quickly (e.g., a globe or shortcut combo).
Tip: Choose a shortcut you won’t press by accident during typing.
Got Questions?
What is the difference between language and keyboard layout?
Language governs the system UI and fonts, while a keyboard layout determines which keys map to which characters. You can have English as the UI language while using a non-English keyboard layout, or the reverse.
Language refers to the system UI, while the keyboard layout affects what you type.
Can I have multiple English keyboard layouts?
Yes. You can enable both US and UK English layouts and switch between them as needed.
Yes, you can switch between US and UK layouts when you need to.
How do I quickly switch input language on Windows?
Use Windows key + Space to cycle through installed input methods, including English layouts.
Press Windows key plus Space to switch inputs quickly.
Will changing keyboard language affect the system language?
No. Changing the keyboard input language typically does not alter the system UI language.
No, it mostly changes how you type, not what the system displays.
Do I need internet to install English keyboard?
Usually not. Most systems include English keyboard layouts offline; internet is only needed for optional language packs.
Usually not, unless you need an extra language pack.
How can I revert changes if something goes wrong?
Re-add the previous language or reset the keyboard layout order to restore the prior setup.
You can revert by re-adding the earlier language and reordering the layouts.
Watch Video
What to Remember
- Identify your OS and version before starting
- Add English input and select the correct layout (US/UK)
- Set English as default input to streamline typing
- Test across apps and set quick-switch shortcuts