How to Set Keyboard Language: A Step-by-Step Guide
Learn to set keyboard language across Windows, macOS, iOS, and Android. This guide covers language packs, layouts, switching methods, and testing for accurate multilingual input.

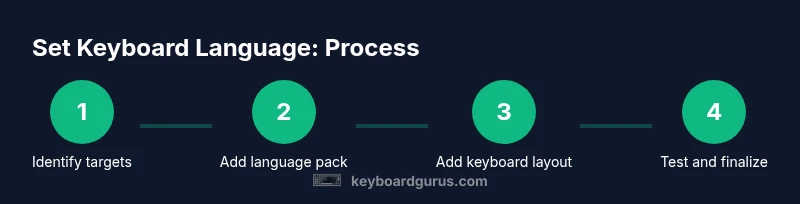
In this guide, you will learn how to set the keyboard language across Windows, macOS, and mobile devices. You’ll learn to add language packs, switch input layouts, and verify typing accuracy. By the end, you’ll confidently type in your preferred language whenever you work, study, or play. This quick answer highlights prerequisites and steps.
Why setting keyboard language matters
Typing in the right language and layout is more than a cosmetic change. It affects autocorrect, character availability, and even punctuation behavior across apps, documents, and forms. When you set the keyboard language correctly, you reduce mis-typed words, language switching friction, and delays in communication. According to Keyboard Gurus, a thoughtful configuration aligns input methods with your daily tasks, whether you’re coding, writing, or collaborating in multilingual teams. In this block, you’ll learn the core concepts: language vs. locale, input method editors (IME), and keyboard layouts. We’ll also clarify why some devices separate language packs from layouts and how this separation can make switching smoother. The result is a reliable setup you can reuse on work machines, personal devices, and school laptops.
Understanding language packs and keyboard layouts
A language pack typically includes the locale information, spell checking rules, and sometimes input methods for a region. A keyboard layout, by contrast, maps keys to characters and symbols for a particular language. You can have multiple layouts for one language (e.g., US QWERTY vs. UK QWERTY) and multiple languages on the same device. On desktops, you’ll often manage both through a single language setting, while mobile devices may require separate steps per platform. When choosing, consider: (a) the target scripts you type (Latin, Cyrillic, etc.), (b) whether you need diacritics, and (c) how you’ll switch among them during work or study. This context helps prevent frustration when you switch between languages in real-time tasks, like writing emails or coding.
Windows: set keyboard language
Windows supports multiple languages and layouts within the same user profile. To set a new language, you typically add a language pack, then enable the corresponding keyboard layout. Some builds let you download language features from Settings or Control Panel. If you primarily type in two languages, you can assign a default layout for each language and use a quick toggle to switch. Windows also offers language preferences for app-specific input that can help avoid unwanted changes when using certain software.
macOS: set keyboard language
macOS uses a similar philosophy: you add language inputs and switch between them with a shortcut. The system lets you customize per-app input sources and can automatically switch to a relevant layout when you switch languages. On Mac, you’ll manage these through Keyboard preferences and the Input Sources tab. A clean setup might include your primary language, a second language for reading, and a dedicated layout for code or data entry. This enables smooth typing without large workflow disruptions.
iOS and Android: set keyboard language
Mobile platforms rely on a centralized language dictionary plus per-app keyboards. On iOS, add keyboards in Settings > General > Keyboard > Keyboards, then reorder and enable a preferred default. On Android, you’ll often add languages in System > Languages & input, then choose the keyboard and input method. Mobile setups benefit from a lightweight approach: install only the languages you actively use and assign a simple switch method (glide or long-press) to move between them quickly while on the go.
Troubleshooting common issues
If switching languages feels laggy or the wrong characters appear, check your language order, keyboard layout, and autocorrect settings. Some apps override system preferences, causing mismatches. Ensure that the language pack installed matches the layout you intend to use, and verify that the active input method is the one you expect. Finally, confirm that your backup configuration is saved so you can restore it if settings reset after an update.
Testing and validating your keyboard language
Test in real-world contexts: compose emails, chat messages, and documents in the target languages. Look for correct spelling, punctuation, and symbol availability. If problems persist, re-check the locale and input source priorities, and test with a fresh document to rule out app-specific issues. Regular testing helps ensure the configuration remains reliable across updates and new software.
Tools & Materials
- Computer or device with admin access(Windows, macOS, iOS, or Android device)
- Internet connection(Needed to download language packs on some devices)
- Keyboard languages and layouts(Identify target languages and preferred layouts)
- Backup method(Create a restore point or note down current settings)
- Optional external keyboard(Helpful if testing multiple layouts physically)
- Documentation checklist(Record chosen languages and steps for future reference)
Steps
Estimated time: 20-30 minutes
- 1
Identify target languages and layouts
Decide which languages you will use and which keyboard layouts support those languages. Write down the primary scripts, like Latin, Cyrillic, or Devanagari, and note any special characters you frequently type. This clarity saves time during setup.
Tip: Document the languages and layouts you’ll use most often. - 2
Check system requirements and backups
Before changing language settings, confirm that your device supports the language packs you need. Create a restore point or note your current input settings in case you need to revert.
Tip: Always have a rollback plan in case a new language causes unexpected behavior. - 3
Open language or input settings
Navigate to the language or input settings on your device. On Windows, go to Time & language; on macOS, Keyboard preferences; on iOS/Android, the keyboard section of system settings. Opening the right panel early avoids wasted clicks later.
Tip: Use search in settings to jump directly to language options. - 4
Add a language pack
Choose the language you want to type and install or enable its language pack. Some devices download features automatically; others require a manual install. Ensure you have adequate storage and a stable internet connection.
Tip: Select only languages you actively use to avoid clutter. - 5
Add the keyboard layout for the language
After adding the language, add one or more keyboard layouts for it. This is the actual key map that determines which key outputs which character. You can often choose multiple layouts for the same language.
Tip: If you switch layouts often, assign a quick toggle between them. - 6
Set a default input method
Set your primary language and layout as the default for new documents or apps. This helps ensure consistency across most tasks unless you switch intentionally.
Tip: Keep the default aligned with your most frequent language. - 7
Learn the switch shortcuts
Identify the keyboard shortcut or gesture used to toggle between languages and layouts. This is essential for rapid switching during emails, coding, or messaging.
Tip: Practice the shortcut until it becomes second nature. - 8
Test typing in representative apps
Open a word processor, a chat app, and a browser form to test that the correct layout responds as expected. Look for diacritics, accented letters, and punctuation.
Tip: Test both typing and autocorrect behavior for each language. - 9
Document and backup configuration
Record the exact languages and layouts you installed and the chosen defaults. Create a quick backup so you can recover quickly after OS updates or device resets.
Tip: Keep a concise one-page guide for future reference.
Got Questions?
How do I add a new keyboard language on Windows 11?
Open Settings > Time & language > Language & region, then Add a language. After installation, add a keyboard layout under that language and set a default if desired.
On Windows, go to Settings, add a language, then add its keyboard layout and set a default to enable quick switching.
Can I use multiple keyboard layouts for the same language?
Yes. You can install more than one layout for a single language and switch between them using a defined shortcut or menu.
You can have several layouts for one language and switch between them as needed.
Do language settings affect system language or regional formats?
Language settings control input methods, while system language and regional formats are separate preferences. You can input in one language while the system language remains unchanged.
Input language and system language are usually separate; you can mix them as needed.
Why is autocorrect changing words after I set the language?
Autocorrect rules may differ by language. Ensure the correct language is active and review the autocorrect dictionary for that language.
Autocorrect can rely on the active language; check both language and dictionary settings.
Is there a quick way to switch languages on mobile keyboards?
Most mobile keyboards offer a long-press or globe icon to switch languages quickly. Customize the shortcut in keyboard settings if available.
Use the globe or long-press to switch languages fast on mobile keyboards.
Watch Video
What to Remember
- Identify target languages and layouts before setup
- Add language packs and layouts per device
- Test across real apps to confirm accuracy
- Document settings for quick future changes