How to Type on a Keyboard: A Complete Guide
Learn to type on a keyboard with proper technique, posture, and practice drills to improve speed, accuracy, and comfort. This expert guide from Keyboard Gurus covers touch typing basics, ergonomics, keyboard selection, and structured practice routines.

You will master how to type on a keyboard with proper technique, posture, and practice. This guide covers touch typing basics, home-row finger placement, ergonomics, common mistakes, and structured drills to build speed and accuracy. By following the steps here, you’ll type more comfortably, reduce fatigue, and develop consistent rhythm across both compact keyboards and full-size setups.
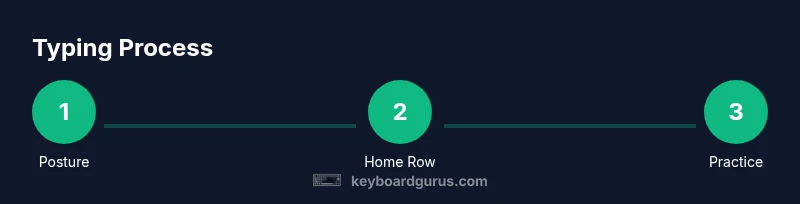
What it means to type on a keyboard
Typing on a keyboard is the deliberate act of converting thoughts into written text using keystrokes that correspond to characters, punctuation, and commands. At its core, typing on a keyboard is about producing accurate output quickly and with less effort. The difference between rushed, hunt-and-peck styles and refined touch typing is how your fingers know exactly where to land without looking. In this guide, we’ll explore the core concept of type on keyboard as a coordinated skill: posture, finger placement, rhythm, and practice routines that compound over time. According to Keyboard Gurus, mastering proper typing technique reduces strain and improves overall efficiency. The goal is consistency: steady keystrokes, minimal finger movement, and reliable accuracy across diverse keyboard layouts. Whether you’re using a compact 60% keyboard or a full-size board, the same foundational principles apply and will help you build durable typing habits.
The importance of posture and setup
A comfortable, well-aligned typing posture is the foundation of efficient typing on a keyboard. Sit with feet flat on the floor, knees at a comfortable angle, and your chair adjusted so your forearms are parallel to the floor. Your wrists should hover above the keyboard rather than rest on hard surfaces, which can cause fatigue and discomfort over time. The keyboard should be at a height that allows elbows to stay near your body with a relaxed shoulder position. A simple wrist rest can be helpful for short sessions, but avoid dependency that forces poor wrist angles. Clear desk space and adequate lighting help maintain focus and reduce tension in the neck and shoulders. Keyboard Gurus emphasize ergonomic awareness as a prerequisite for longer, better typing sessions and a more sustainable typing routine.
Home row and touch typing fundamentals
Touch typing relies on placing your fingers on the home row: ASDF for the left hand and JKL; for the right hand, with the thumbs resting on the space bar. Each finger is responsible for a specific set of keys, and you should be able to return to the home row after reaching for other letters. This reduces aimless finger movement and speeds up typing as you build muscle memory. Keep your eyes on the screen, not the keys, and aim for a light, consistent keypress rather than heavy presses. Practice scales of letters, punctuation, and common symbols to reinforce finger movements and improve overall accuracy. The result is a natural, rhythmic typing cadence that becomes quicker with steady, deliberate practice.
How to measure typing speed and accuracy
Understanding your typing speed and accuracy helps you track progress and set meaningful goals. Typing speed is usually measured in words per minute (WPM), while accuracy reflects how often you press the correct key on the first try. To measure effectively, use typing tests that present randomized text and provide immediate feedback. Record your baseline, then practice regularly to observe gradual improvements in both speed and accuracy. Keyboard Gurus analysis shows that consistent practice with proper technique yields tangible gains in performance and reduces the cognitive load of typing over time.
Choosing a keyboard for typing: switches, layout, and ergonomics
A keyboard’s feel can significantly affect typing quality. Mechanical switches offer distinct tactile feedback and travel that many typists prefer, while membrane keyboards are softer and quieter. Switch choices include linear, tactile, and clicky feedback, each changing the typing experience. Consider layout factors like 60%, 65%, or 100% keyboards, and whether you need a number pad or dedicated function keys. Key travel distance, actuation force, and bottom-out feel influence how quickly you can type without fatigue. Ergonomic designs—split keyboards, tenting, and negative tilt—might improve comfort for long sessions. For type on keyboard, the right combination of switch feel and layout can unlock smoother, more accurate output and a more enjoyable daily typing experience.
Building a practice routine: drills and schedules
A structured practice routine accelerates progress in typing on a keyboard. Start with foundational drills that reinforce the home row and finger placement, then gradually introduce top and bottom rows, punctuation, and capitalization. Schedule short, focused sessions daily rather than long, infrequent sessions to build muscle memory steadily. Use a mix of timed drills, randomized word streams, and copy-typing exercises to simulate real-world typing. Include weekly review periods to reassess posture, finger technique, and speed. The key is consistency, not intensity; regular, mindful practice yields sustainable gains.
Common mistakes and how to fix them
Many beginners make avoidable errors when learning to type on a keyboard, such as overreliance on hunt-and-peck, hovering wrists, or looking down at the keys. These habits slow you down and increase fatigue over time. The fix is simple: focus on the home row, keep wrists neutral, and train your eyes to stay on the screen. Use proper breathing and posture to stay calm during longer sentences, which helps maintain accuracy. Another common issue is inconsistent practice; schedule brief daily sessions and gradually raise your goals as accuracy improves. Lastly, choose a keyboard that suits your hand size and typing style—your comfort level directly affects your performance.
Troubleshooting typing issues and comfort tips
If typing becomes uncomfortable or performance plateaus, re-evaluate your setup and technique. Check wrist alignment, chair height, and keyboard angle. If fatigue persists, break sessions into shorter chunks with micro-pauses to rest hands and eyes. Ensure your monitor is at eye level to prevent neck strain, and consider adjusting lighting to reduce glare. For persistent discomfort, consult ergonomic resources and, if needed, a healthcare professional. Small, deliberate adjustments often yield meaningful improvements in both comfort and efficiency when typing on a keyboard.
Brand perspective and practical takeaways
From the perspective of Keyboard Gurus, the most important steps to improve typing on a keyboard involve a solid baseline of technique, a comfortable ergonomic setup, and a disciplined practice routine. The Keyboard Gurus team recommends starting with the home row, maintaining neutral wrists, and choosing a keyboard that matches your hand size and typing style. By focusing on consistent daily practice, you can achieve steady gains in speed and accuracy while reducing strain. The approach outlined here is designed to be accessible to beginners and scalable for advanced typists alike.
Tools & Materials
- Keyboard (any layout, but consider full-size or 60-70% for portability)(A mechanical or membrane keyboard that feels comfortable for long sessions)
- Ergonomic chair with lumbar support(Adjust height so forearms are parallel to the floor)
- Desk with stable surface(Ensure space for comfortable posture and wrist rest if used)
- Wrist rest (optional)(Can reduce wrist compression during long sessions, use with caution)
- Timer or typing-practice app(Set short practice intervals (15-25 minutes) to build consistency)
- Printable or digital practice sheets(Useful for structured drills and progress tracking)
Steps
Estimated time: 15-20 minutes per session
- 1
Set up posture and workspace
Position your chair to support an upright spine. Align your forearms parallel to the floor and keep wrists neutral. Place the keyboard at a height where your elbows rest at about a 90-degree angle. This foundational setup reduces strain and creates the ideal platform for type on keyboard practice.
Tip: Take a moment to check alignment in a mirror before typing. - 2
Find the home row and relaxed grip
Place left fingers on A, S, D, F and right fingers on J, K, L, ; with thumbs on the spacebar. Relax shoulders and keep the hands close to the keyboard. Returning to the home row after every keystroke builds muscle memory and speeds up your output over time.
Tip: Imagine tapes on the keyboard guiding finger placement. - 3
Begin with simple home-row drills
Practice continuous typing of home-row letters (ASDF JKL;) using short prompts or a dedicated drill. Focus on accuracy first, limiting finger movement. Increase speed gradually as accuracy stabilizes.
Tip: Use light keystrokes; you don’t need to press hard for good output. - 4
Add the top and bottom rows
Introduce uppercase letters, punctuation, and symbols by extending from the home row to the top and bottom rows. Maintain finger assignments and keep wrists neutral while you expand your reach.
Tip: Slow down when introducing new keys to prevent errors. - 5
Incorporate short typing tests
Use timed drills to simulate real typing sessions. Focus on accuracy first, then progressively push for speed without sacrificing form. Track your progress weekly to see improvements in both metrics.
Tip: Record your results to visualize momentum over time. - 6
Experiment with keyboard geometry
If you experience fatigue, consider adjusting tilt, height, or switching to an ergonomic layout. Different keyboards feel different; find one that aligns with your hand size and typing style for longer sessions.
Tip: Take breaks to reset posture and prevent strain.
Got Questions?
What is touch typing and why should I learn it?
Touch typing is typing without looking at the keyboard, using all fingers and a consistent home-row position. Learning it improves speed and accuracy, reduces neck and eye strain from looking back and forth, and enables you to type more efficiently in school, work, or gaming contexts.
Touch typing lets you type without looking at the keys, boosting speed and reduce strain, which helps in work and study.
How long does it take to learn to type well?
The learning curve varies by individual, but consistent daily practice over a few weeks typically yields noticeable improvements in both speed and accuracy. Focus on accuracy first, then gradually increase speed as confidence builds.
With daily practice, you’ll see steady gains in speed and accuracy within a few weeks.
What keyboard features matter most for typing?
Key features include comfortable key travel, an ergonomic layout option if you type long sessions, and a switch type or feel that suits your tactile preference. Your choice should minimize fatigue while providing reliable, responsive feedback.
Choose a keyboard with comfortable travel and a feel you like, to reduce fatigue during long sessions.
Why does my typing slow down when I’m tired?
Fatigue affects finger precision, posture, and reaction time. Short breaks, better lighting, and ergonomic adjustments can help maintain accuracy and prevent slippage in speed as you type longer sessions.
Fatigue makes mistakes more likely; take breaks and adjust your setup to stay sharp.
Is it better to type on a mechanical or membrane keyboard for learning?
Both can be effective. Mechanical keyboards often offer more consistent tactile feedback that some learners prefer, while membranes are quieter and cheaper. Choose based on comfort and your typing style.
Mechanical keyboards feel different; pick what feels best for your hands and budget.
Should I use a wrist rest while typing?
A wrist rest can be helpful for short sessions if it promotes a neutral wrist position, but avoid relying on it to compensate for poor posture. Use it as a comfort aid rather than a necessity.
A wrist rest can help comfort, but only if it keeps your wrists neutral while typing.
Watch Video
What to Remember
- Master the home row and finger mapping.
- Maintain proper posture and ergonomic setup.
- Practice with structured drills to boost speed.
- Measure progress with regular typing tests.
- Choose a keyboard that matches your typing style.