How to Know If Your Mac Keyboard Is Charging
Learn practical, step-by-step methods to confirm your Mac keyboard is charging, using cable checks, macOS indicators, and troubleshooting tips for reliable power.

To know if your Mac keyboard is charging, confirm both the physical charging setup and macOS battery indicators. Connect the included charging cable, then check the battery status in macOS under the Bluetooth or Battery areas. According to Keyboard Gurus, reliable charging depends on a solid cable connection and an accurate onboard or software readout. If you see the battery level rising while connected, charging is in progress.
How to know if mac keyboard is charging: why it matters
Charging status matters for reliability, battery longevity, and seamless work sessions. If the keyboard runs out of power mid‑task, you lose input control until you reconnect power, which can be disruptive during exams, gaming, or coding sprints. For many users, the keyboard is a daily companion, and a sudden power loss interrupts focus. The Keyboard Gurus team found that frequent misreads of charging status are common when people rely on one signal alone, such as a panel icon or a cable plugged in without verifying the readout. The goal here is to equip you with a simple, repeatable method: confirm the physical charging connection, observe software indicators, and cross-check both to validate that the device is actually charging. If you want to know how to know if mac keyboard is charging, you should treat the hardware signal and the software readout as complementary sources of truth. In the sections that follow, you’ll learn practical checks, how to interpret different kinds of signals, and how to avoid common mistakes that lead people to falsely assume charging is underway. This approach reduces downtime and helps preserve battery health over the life of your keyboard.
How macOS reports keyboard charge
macOS provides multiple signals to help you gauge keyboard charge. The Bluetooth devices panel or the Battery widget in Control Center can show current power levels for connected keyboards, and depending on your macOS version, the keyboard may appear under Devices in System Settings with a percentage next to its name. If the keyboard is charging, you might see a rising percentage when the cable is connected. Different macOS versions present data in different places, so it’s wise to check a couple of indicators. The Keyboard Gurus analysis shows that relying on a single signal can lead to confusion, so use multiple signals to confirm charging status rather than trusting one source alone.
Visual cues versus software cues: how to interpret them
Hardware cues and software cues serve different purposes. A solid charging cable at the port is a prerequisite for power transfer, but a successful readout depends on the system’s ability to communicate battery data. For example, you might see the keyboard listed as connected with a percentage while the physical cable is not delivering current due to a loose connection. Conversely, you may observe a rising percentage after plugging in the cable while the device remains unrecognized in certain menus. The most reliable method is to expect that both signals will align: the cable is connected, macOS reports a positive trend in the battery percentage, and the keyboard continues to show power while in use. In practice, test both the hardware and software sides: gently wiggle the cable at the connection, then watch the percentage change over a 5–10 minute window. When these cues agree, you can be confident the keyboard is charging.
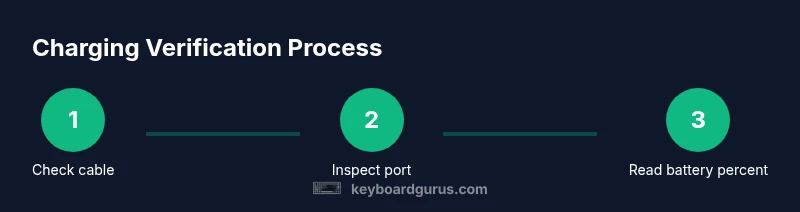
Step-by-step checks you can perform (no guesswork)
- Inspect the charging cable and port for damage or debris, and replace if you see wear. This ensures the device is capable of transferring power. Tip: use a high‑quality, Apple‑certified cable to minimize connection faults.
- Confirm you’re using the correct charging cable and adapter for your keyboard model. Some keyboards ship with a Lightning-based cable; others use USB‑C. If you confuse them, charging may not start. Tip: verify the cable type before connecting.
- Plug into a known-good power source and give the setup 5–10 minutes to update the charge reading. Rushing this step can mislead you if the readout hasn’t refreshed yet. Tip: avoid using USB hubs that can throttle current.
- Check macOS battery indicators: open Settings (System Settings on Ventura+), navigate to Battery, and look for the keyboard’s entry. If you don’t see it, try reconnecting the device and restarting the Bluetooth service. Tip: enable the battery widget for quick visibility.
- Cross‑check with Bluetooth: in Bluetooth preferences, hover over the keyboard to see the current charge estimate. If the percentage climbs while plugged in, charging is underway. Tip: pair again if data becomes stale.
- Test with another device: if another computer shows the same charging behavior, the problem is likely cable or keyboard hardware rather than the Mac itself. Tip: isolate the issue by swapping one component at a time.
- Consider battery aging: if readings are inconsistent after a long period of use, the keyboard’s battery health may be declining and could require service or replacement. Tip: monitor trends over weeks rather than days. EstimatedTime: 15–25 minutes
Troubleshooting: issues that prevent charging
When charging doesn’t start or the indicators disagree, the issue is usually hardware or connection related. Common culprits include a damaged cable, lint in the port, or a degraded battery that no longer accepts a full charge efficiently. Start with the simplest fix—swap in a known-good cable and clean the port—then recheck the charging indicators. If the issue persists, test with a different power source and, if possible, a second keyboard. The Keyboard Gurus analysis shows that systematic testing from the cable to the battery yields the most reliable diagnosis, reducing guesswork and unnecessary replacements.
Battery health and replacement considerations
Battery health matters for long-term reliability. Over time, the capacity of a wireless keyboard’s battery declines, which can manifest as slower charging, shorter runtime, or inconsistent readings. If you notice persistent fluctuations or a much longer charge time than before, plan a battery health check, and consider official service options. Proactive maintenance—using high‑quality cables, keeping ports clean, and avoiding rough handling—helps preserve battery life and charging performance over years of use.
Pro tips to maintain reliable charging on the go
- Use an Apple-certified charging cable and avoid cheap third-party options. This minimizes the risk of intermittent charging or device damage.
- Keep the charging port clean and free of dust or lint; even small debris can impede power transfer.
- When traveling, carry a spare cable and a compact power adapter to ensure you can charge in different environments.
- Regularly verify battery health in macOS and note any long-term declines in charge rate.
- If you rely on the keyboard for critical tasks, keep a quick diagnostic checklist ready for quick reference.
Key takeaways for reliable charging
- How to know if mac keyboard is charging hinges on both hardware and software indicators working in tandem.
- Cross-check charging signals rather than relying on a single readout to avoid misreads.
- Maintain cable quality and port cleanliness to maximize charging reliability.
- The Keyboard Gurus team's verdict is that a structured check routine minimizes downtime and protects battery health over time.
Tools & Materials
- Charging cable compatible with Mac keyboard(Lightning to USB-C or USB-A depending on model)
- Power adapter or USB-C power source(Use a reliable wall outlet or powered port)
- Clean, lint-free cloth or compressed air(For cleaning the keyboard port if needed)
Steps
Estimated time: 15–25 minutes
- 1
Inspect the cable and port
Visually inspect the charging cable for wear, fraying, or bent connectors. Check the keyboard port for lint or debris and clean gently if needed to ensure a solid connection.
Tip: If you see any damage, replace with an Apple-certified cable to avoid charging faults. - 2
Verify cable compatibility
Confirm that the cable type matches your keyboard model (Lightning vs USB-C). Using the wrong cable can prevent charging from starting altogether.
Tip: Double-check the model when buying a replacement cable. - 3
Connect to a known-good power source
Plug the cable into a reliable power outlet or port and leave it for a few minutes to let the readout refresh.
Tip: Avoid low-current USB hubs that can throttle charging. - 4
Check macOS battery indicators
Open System Settings > Battery and look for the keyboard in the list of devices with its current percentage.
Tip: If you don’t see it, disconnect and reconnect the keyboard, then restart Bluetooth if needed. - 5
Cross-check Bluetooth readouts
In Bluetooth preferences, hover over the keyboard to see the current charge estimate and monitor for an upward trend when plugged in.
Tip: If data looks stale, re-pair the device. - 6
Test with another device
If another computer shows similar charging behavior, the issue is likely cable or keyboard hardware rather than the Mac itself.
Tip: Isolate components by swapping one part at a time. - 7
Consider battery aging
If readings are inconsistent over weeks, the keyboard battery health may be declining and could require service.
Tip: Track charging trends over a longer period before deciding on replacement.
Got Questions?
Where can I see the keyboard's charging status in macOS?
Look in the Battery section of System Settings or Control Center, and check the Bluetooth devices list for the keyboard's current percentage. If available, the battery widget provides quick visibility.
In macOS, you can check the keyboard's charge in System Settings under Battery or in Control Center; Bluetooth devices may also show the current percentage.
Why does my keyboard show charging but isn’t charging physically?
A mismatch usually points to a damaged cable, dirty port, or a faulty adapter. Replace the cable and clean the port first, then re-check the indicators.
If it shows charging but doesn’t power, inspect the cable and port for damage and try another cable.
Can I use any USB cable to charge the keyboard?
Prefer Apple-certified or manufacturer-approved cables to ensure consistent current and avoid charging faults. Cheaper, non-certified cables can fail to deliver power reliably.
Use an Apple-certified cable to avoid charging issues.
Does the keyboard need to be paired to show charging status?
Bluetooth keyboards usually display charging status when paired; ensure the keyboard is connected in Bluetooth settings for accurate readings.
Yes—paired keyboards typically show charging status in Bluetooth settings.
How long does charging typically take?
Charging time varies with battery level and cable quality. If readings don’t improve after some time, test with another cable or a different power source.
Charging time depends on battery level and cable quality; test with another cable if unsure.
What should I do if indicators disagree after a full day of charging?
If signs disagree persistently, there may be a battery health issue or hardware fault. Consider service or replacement and monitor trends over weeks.
Persistent disagreement may indicate battery health problems; consider service.
Watch Video
What to Remember
- Check both the cable and the macOS battery indicators to confirm charging.
- Don't rely on a single signal; cross-check hardware and software signals.
- Keep cables clean and in good condition to prevent charging issues.
- Keyboard Gurus's verdict: use a structured check routine to protect battery health and reliability.