How to Put Keyboard on Screen Mac
Learn how to enable and customize the macOS Accessibility Keyboard, with step-by-step setup, practical tips, troubleshooting, and real-world use cases for students, gamers, and professionals.

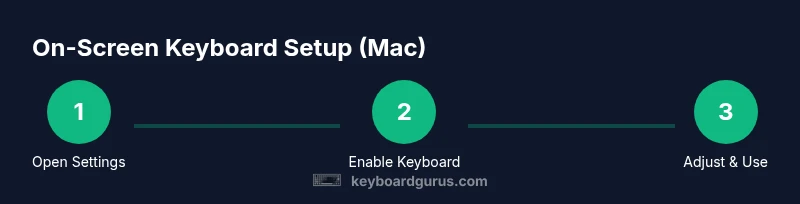
To put the on-screen keyboard on a Mac, enable the Accessibility Keyboard. Open System Settings (or System Preferences on older macOS), go to Accessibility > Keyboard, and toggle on Show Accessibility Keyboard. You can customize the size, color, and layout, and decide where it appears on screen. This built-in feature helps you type when a physical keyboard isn’t available.
Why enabling the on-screen keyboard on mac matters
The on-screen keyboard is a core accessibility feature that helps you type when a physical keyboard isn’t available or convenient. If you’re asking how to put keyboard on screen mac, the answer lies in macOS’s built-in Accessibility Keyboard. According to Keyboard Gurus, adopting this tool early can reduce friction in digital tasks whether you’re using a compact laptop on the go or working with an external monitor in a classroom or office setup. The Accessibility Keyboard is designed to be easy to discover, easy to resize, and easy to customize for legibility and comfort. As with most macOS features, the goal is to keep the typing experience fluid rather than interrupt your workflow. When enabled, the on-screen keyboard can appear with a single toggle, and you can reposition it, adjust its size, or change color contrast to suit ambient lighting. This section sets the stage for practical use, ensuring you understand why this tool is worth configuring, not just learning about in theory.
Keyboard Gurus recommends embracing built-in accessibility tools as part of a modern digital workflow, especially when you need flexibility or work across multiple devices. The on-screen keyboard is not a replacement for a physical keyboard but a complementary input method that can save time in tricky environments, support quick notes, and assist during teaching or demonstrations. By understanding the fundamentals, you’ll be ready to tailor the experience to your needs and keep typing momentum without interruption.
Where to find the on-screen keyboard in macOS
In recent macOS versions, you manage accessibility features from System Settings, not System Preferences. To activate the Accessibility Keyboard, open System Settings > Accessibility > Keyboard and switch on Show Accessibility Keyboard. On older macOS versions you’ll use System Preferences > Accessibility > Keyboard, then enable the equivalent option. If you can’t locate the control, use the search field at the top of Settings or Preferences and type “Accessibility Keyboard” to jump directly to the toggle. Once you enable it, the on-screen keyboard appears on your screen and can be repositioned by dragging its title bar. You can also set it to stay visible while you type or hide automatically when not in use, depending on your workflow and screen space.
This feature is designed to be unobtrusive yet easily accessible during live tasks, whether you’re presenting, coding, or composing long-form text. Keyboard Gurus highlights that finding the right balance between visibility and screen real estate is key to a comfortable experience. If you’re sharing a screen or using multiple monitors, consider pinning the keyboard to a side where it never covers essential content. The settings panel lets you refine behavior so the keyboard feels like a natural extension of your workspace.
Customizing the Accessibility Keyboard
After turning on the Accessibility Keyboard, customize its appearance to match your setup. Use the size slider to enlarge or shrink the keys so you can see them clearly from a distance or while gaming. Adjust color contrast or enable bold key labels to improve readability in bright or dim rooms. Exploring different layouts — standard, compact, or split — helps you find the arrangement that minimizes finger travel. Some macOS builds offer a draggable title bar and an option to anchor the keyboard to a screen edge. Finally, you can enable keyboard highlighting to show pressed keys, which is helpful during teaching sessions or while following a tutorial.
Given diverse lighting environments and display sizes, test changes in real-world apps like a word processor, a web browser, and a chat app to confirm visibility and ergonomics. Keyboard Gurus emphasizes prioritizing legibility and ease of use over flashy visuals, especially when you rely on the on-screen keyboard for long typing bursts or accessibility needs.
Practical use cases and workflows
The on-screen keyboard shines in everyday tasks and specific scenarios. Students can type notes without carrying a separate keyboard, professionals can input quick messages during presentations, and gamers can keep typing in chat windows without losing focus on gameplay. For long typing sessions, position the keyboard where your hands naturally rest, and adjust opacity so it feels like part of your screen rather than an obstacle. In creative workflows, the on-screen keyboard can complement voice dictation, enabling you to switch between input methods with minimal disruption. Keyboard Gurus often emphasizes pairing the on-screen keyboard with other accessibility features such as dictation and VoiceOver for a multimodal approach to typing. You’ll also find it handy when using a touchscreen-enabled device in a mixed-reality setup or while troubleshooting a tech issue away from your desk.
Troubleshooting common issues
If the on-screen keyboard doesn’t appear after enabling, confirm you’re using a supported macOS build and that the toggle is truly on. Try restarting System Settings, or signing out and back in to refresh accessibility services. Some third-party window managers or screen-sharing apps can obscure or hide the keyboard; disable or adjust them temporarily to test. If you still have trouble, check privacy settings to ensure accessibility features have permission to display content on screen. In rare cases, a software update can reset preferences, so reapply the toggle after updating.
When issues persist, review crash reports or console logs for any errors related to accessibility services. Keyboard Gurus notes that a clean boot, recent updates, and avoiding conflicting utilities usually resolves most common problems quickly.
Advanced tips for efficient typing
To maximize efficiency, combine the on-screen keyboard with dictation, trackpad gestures, and customizable shortcuts. Use the on-screen keyboard for tasks where a physical keyboard is impractical, then switch to dictation for longer passages. If you frequently type the same phrases, consider creating templates or using text replacement in macOS. For visibility, pair the keyboard with a high-contrast theme and adjust its size so you can see the cursor comfortably. Finally, maintain your macOS updates to ensure compatibility with accessibility features. With thoughtful configuration, the on-screen keyboard becomes a natural extension of your workflow rather than a workaround.
Tools & Materials
- Mac computer with macOS that supports accessibility features(System Settings vs System Preferences path varies by macOS version)
- Stable internet connection(For accessing official support pages and updates)
- Mouse or trackpad(Helpful to drag and position the on-screen keyboard easily)
Steps
Estimated time: 15-25 minutes
- 1
Open System Settings or System Preferences
Click the Apple menu and choose System Settings (or System Preferences on older macOS). This is the control panel where accessibility features live. Open the Settings app on macOS Ventura and later, or System Preferences on earlier versions to begin.
Tip: Use the search bar at the top of Settings/Preferences to locate Accessibility quickly. - 2
Navigate to Accessibility
In the Accessibility section, look for a sub-menu labeled Keyboard or for items relating to keyboard input. You are seeking the option that enables an on-screen input method. If you don’t see it, try the search function inside Settings/Preferences.
Tip: If you’re using a shared or managed device, verify you have permission to change accessibility settings. - 3
Enable Show Accessibility Keyboard
Toggle the switch to turn on the Accessibility Keyboard. This makes the on-screen keyboard appear on your screen and be ready for immediate use. Some builds label it as 'Accessibility Keyboard' or 'Show Accessibility Keyboard.'
Tip: After enabling, test by clicking a text field in Notes or a browser to confirm it’s visible. - 4
Customize appearance
Access the customization options to adjust size, color, and key labels. Choose a layout that suits your hand size and typing style. Some options let you highlight pressed keys for teaching or demonstration.
Tip: Start with a moderate size and high contrast; refine based on comfort and readability. - 5
Position and pin as needed
Drag the keyboard by its title bar to a convenient screen edge or corner. Consider pinning it so it remains in view while you switch apps or use another window.
Tip: Avoid placing it over critical UI elements like toolbars or menus. - 6
Test across apps
Open a word processor, email client, and a web browser to ensure the on-screen keyboard works consistently. Check typing accuracy, key feedback, and whether it obscures content you’re working on.
Tip: If a particular app hides the keyboard, check for full-screen mode and disable any overlay apps temporarily. - 7
Troubleshoot if it doesn’t appear
If the keyboard doesn’t show, recheck the toggle, restart System Settings, and confirm macOS is up to date. If problems persist, review privacy and accessibility permissions and look for conflicting utilities.
Tip: A quick reboot can clear transient issues affecting accessibility features.
Got Questions?
How do I turn on the macOS Accessibility Keyboard?
Open System Settings (or System Preferences on older macOS), go to Accessibility > Keyboard, and turn on Show Accessibility Keyboard. The on-screen keyboard will appear and can be customized for size and color. This covers most uses and works across apps.
Open System Settings, go to Accessibility, then Keyboard, and enable Show Accessibility Keyboard. The on-screen keyboard will appear and you can adjust its look and position.
Can I customize the size and color of the on-screen keyboard?
Yes. In the Accessibility Keyboard settings, use the size slider to scale the keys and adjust color contrast for readability. You can also choose from different layouts to fit your hand and workflow.
You can adjust the size, color, and layout of the on-screen keyboard in its settings to fit your needs.
Will the Accessibility Keyboard work in all apps?
For most apps, yes, the Accessibility Keyboard works like a standard keyboard input. Some apps that use custom input methods may behave differently, but the majority of common apps will accept input from the on-screen keyboard.
In most apps, the on-screen keyboard will work normally, though a few apps with custom input may behave differently.
How do I disable the on-screen keyboard when I’m done?
Return to System Settings > Accessibility > Keyboard and switch off Show Accessibility Keyboard. You can keep the option ready for quick reactivation, but turning it off hides the keyboard until you need it again.
Go back to Accessibility settings and turn off Show Accessibility Keyboard to hide it.
What if the keyboard doesn’t appear after enabling?
Check that you’re on a supported macOS build and that the toggle is truly on. If needed, restart System Settings, or sign out and back in. Update macOS if there’s a known issue with accessibility features.
Ensure the toggle is on, try a restart of Settings, and check for macOS updates if it still won’t appear.
Watch Video
What to Remember
- Enable the Accessibility Keyboard from Settings/Preferences
- Customize size, color, and layout for comfort
- Position the keyboard to avoid obstructing content
- Test across common apps to ensure reliability
- Update macOS to maintain compatibility with accessibility features