How to Put Keyboard on Laptop Screen: An On-Screen Keyboard Guide
Learn how to enable and use the on-screen keyboard on Windows, macOS, and Linux. Step-by-step setup, customization tips, and best practices for productive typing without a physical keyboard.

By using the on-screen keyboard, you can type on your laptop screen without a physical keyboard. This article shows how to enable and customize the on-screen keyboard across Windows, macOS, and Linux, plus practical tips for working efficiently. You'll learn where to find accessibility tools, how to adjust layout, and how to use shortcuts.
What is an on-screen keyboard and why use it?
An on-screen keyboard is a virtual keyboard displayed on your screen that you can type on using a mouse, touch, or stylus. It is especially valuable when your physical keyboard is unavailable, when you need to demonstrate input on a screen, or when accessibility features are required. According to Keyboard Gurus, on-screen keyboards aren't just for convenience — they improve inclusivity by providing alternate input methods for people who can't use a traditional keyboard consistently. Additionally, many operating systems offer flexible layouts, language options, and features such as drag-to-type, predictive text, and customizable key sizes. In practice, enabling the on-screen keyboard lets you continue productive work on laptops, tablets, or convertibles even when the hardware keyboard is temporarily out of service. The rest of this guide will walk you through enabling, configuring, and using these tools effectively across major platforms.
OS overview: Windows, macOS, and Linux
Across Windows, macOS, and Linux, the on-screen keyboard is a core accessibility feature that makes typing possible without a physical keyboard. The Keyboard Gurus team found that most users start with the OS's built-in utility, then customize layout, language, and touch settings to fit their workflow. Windows On-Screen Keyboard can be pinned to the taskbar for quick access; macOS Keyboard Viewer integrates with the menu bar for easy access; Linux users may choose Onboard or Caribou depending on their distribution and desktop environment. Each option supports common features like drag-to-type, adjustable size, and multiple layouts. If you plan to present or annotate on a screen, the on-screen keyboard can serve as a legitimate input method while you work on precise UI elements. The following sections explain how to enable and optimize these tools on each platform.
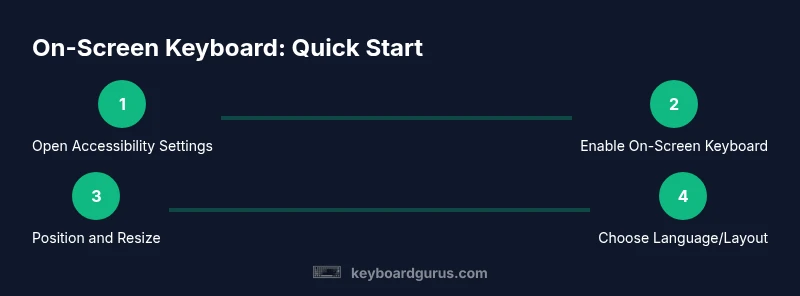
Windows On-Screen Keyboard: quick-start and tips
Windows users typically start by navigating to the built-in on-screen keyboard, which is designed to be touch-friendly and accessible. Start by opening Settings, then Ease of Access or Accessibility, and select Keyboard to turn on the On-Screen Keyboard. You can dock or float the window, adjust its size, and enable a touch-typist mode to improve hit accuracy. For convenience, pin the keyboard to the taskbar so you can summon it with a single click. Remember to explore the Options menu to customize layout, language, and typing preferences for faster input. This tool pairs well with Voice Typing and dictionary corrections for a smoother workflow.
macOS Keyboard Viewer: features and enabling
macOS provides Keyboard Viewer as a built-in utility that lets you type with an on-screen layout mapped to your current input source. To enable it, go to System Settings (or System Preferences) > Keyboard and check Show keyboard and emoji viewers in menu bar. Click the viewer icon in the menu bar to display the keyboard when you need it. Keyboard Viewer supports multiple layouts and languages, making it useful for multilingual work or demonstrations. For quick access, keep the viewer icon visible for rapid toggling during presentations or collaborative sessions.
Linux: Onboard, Caribou, and environment-specific options
Linux users have several on-screen keyboard options depending on the desktop environment. Popular choices include Onboard (universal) and Caribou (GNOME-based) or KDE equivalents. Installation typically involves your distro's package manager, followed by enabling the tool from the accessibility or input settings. Because Linux distributions vary, expect minor path differences, but the core workflow remains the same: install the app, launch it, and configure layout, themes, and shortcuts to fit your workflow. Linux on-screen keyboards can be especially valuable in teaching environments and demonstrations where a physical keyboard may not be accessible.
Best practices for using on-screen keyboard and productivity tips
To maximize efficiency, position the on-screen keyboard where it does not obstruct the main content and use a docking mode when you need to type long passages. Pair with a wireless mouse or trackpad to keep your hands free for typing. Customize the layout for your most-used languages and enable predictive text or autocorrect where available. Practice common shortcuts to reduce reliance on the mouse, such as copy/paste, undo, and selection helpers. Finally, combine the on-screen keyboard with dictation or voice-to-text tools when appropriate to diversify input methods.
Tools & Materials
- Windows 10/11 On-Screen Keyboard(Enable via Settings > Accessibility > Keyboard; consider pinning to the taskbar for quick access.)
- macOS Keyboard Viewer(Enable from System Settings > Keyboard > Show keyboard viewer; add viewer to the menu bar for easy access.)
- Linux on-screen keyboard (Onboard or Caribou)(Install via your distro's package manager and enable from Accessibility or Input settings; steps vary by desktop environment.)
Steps
Estimated time: 15-30 minutes
- 1
Identify your operating system
Determine whether you are on Windows, macOS, or Linux and locate the appropriate accessibility or input settings. Knowing your OS will guide you to the correct enablement steps and layout options.
Tip: If you’re unsure, use a quick search in Settings: 'on-screen keyboard' to locate the feature fast. - 2
Open accessibility/input settings
Navigate to the built-in accessibility or keyboard section for your OS. This is where you’ll find the toggle to enable the on-screen keyboard and related options.
Tip: On Windows, use Win + I to open Settings quickly. - 3
Turn on the on-screen keyboard
Flip the switch to enable the on-screen keyboard. If available, choose a docking mode (dock, floating, or auto-hide) that suits your workspace.
Tip: Try both docked and floating modes to see which minimizes screen obstruction. - 4
Configure layout and language
Adjust the keyboard layout, language, and input options to match your preferences. This is especially important for multilingual work or specific typing tasks.
Tip: Add your most-used languages and switch with a keyboard shortcut when possible. - 5
Position and resize the keyboard
Drag the keyboard by its title bar to a comfortable area and resize as needed. Ensure you can see text clearly while typing.
Tip: Aim for a position that leaves enough screen space for content and reduces arm strain. - 6
Enable touch-friendly features
If your device supports touch input, enable touch-optimized modes like larger keys or a wider key hit area to improve accuracy.
Tip: Test typing short phrases to calibrate key hit zones before longer sessions. - 7
Learn essential shortcuts
Familiarize yourself with basic shortcuts that work with the on-screen keyboard, such as copy, paste, undo, and select-all. These can speed up common tasks.
Tip: Practice a short routine daily to build muscle memory for on-screen typing. - 8
Practice and assess performance
Type a few minutes of text to gauge accuracy and speed. Adjust font size, key spacing, and layout as needed. Consider combining with voice input for efficiency.
Tip: Keep a small sample document on hand to measure improvement over time.
Got Questions?
Can I use the on-screen keyboard for long typing tasks?
Yes, you can, but it may be slower than typing on a physical keyboard. Consider taking breaks and using dictation or a physical keyboard when possible for extended sessions.
You can, but it will be slower than a real keyboard; take breaks and consider other input methods for long typing.
Is there an on-screen keyboard option for Linux?
Yes. Linux users can use Onboard, Caribou, or other DE-specific tools. Installation and setup vary by distribution, but the core steps are to install, launch, and configure layout.
Yes. Linux has Onboard or Caribou among others; installation and setup vary by distribution.
How do I disable the on-screen keyboard?
Open the same accessibility settings you used to enable it and toggle it off. For some setups, you may need to close the keyboard window or unpin it from the taskbar.
Open the accessibility settings and toggle it off, or close the keyboard window.
Does the on-screen keyboard support spell-check or predictions?
Many on-screen keyboards inherit predictive text or spell-check from the OS or installed apps. Availability depends on the platform and selected language pack.
It often supports predictions and spell-check, depending on OS and language packs.
Will using the on-screen keyboard affect battery life?
On-screen keyboards consume more CPU and screen power than a static keyboard, but the impact is usually small. If battery life is critical, use the keyboard sparingly and adjust screen brightness.
There is some impact on battery life, but it's typically small; adjust usage to conserve power.
Can I customize key layout or add new languages?
Most on-screen keyboards support multiple layouts and languages. Check the Options or Preferences in your OS to add or switch layouts conveniently.
Yes, you can add layouts and languages in the keyboard options.
Watch Video
What to Remember
- Enable the on-screen keyboard on your OS and practice with it.
- Customize layout and language to fit your tasks.
- Position the keyboard for comfortable, efficient typing.
- Combine with other input methods to maintain productivity.